Yervana Widget integration
The following document will explain how to integrate Yervana’s widget on different platforms
Widget Integration Overview
Our widget is supported by several web platforms like Static website, WordPress, Wix, Squarespace and more. In general, the integration code should be the same for all of them. In particular cases, developers should consider manually initializing our widget (example: One single page application, React apps, etc).
Widget Types
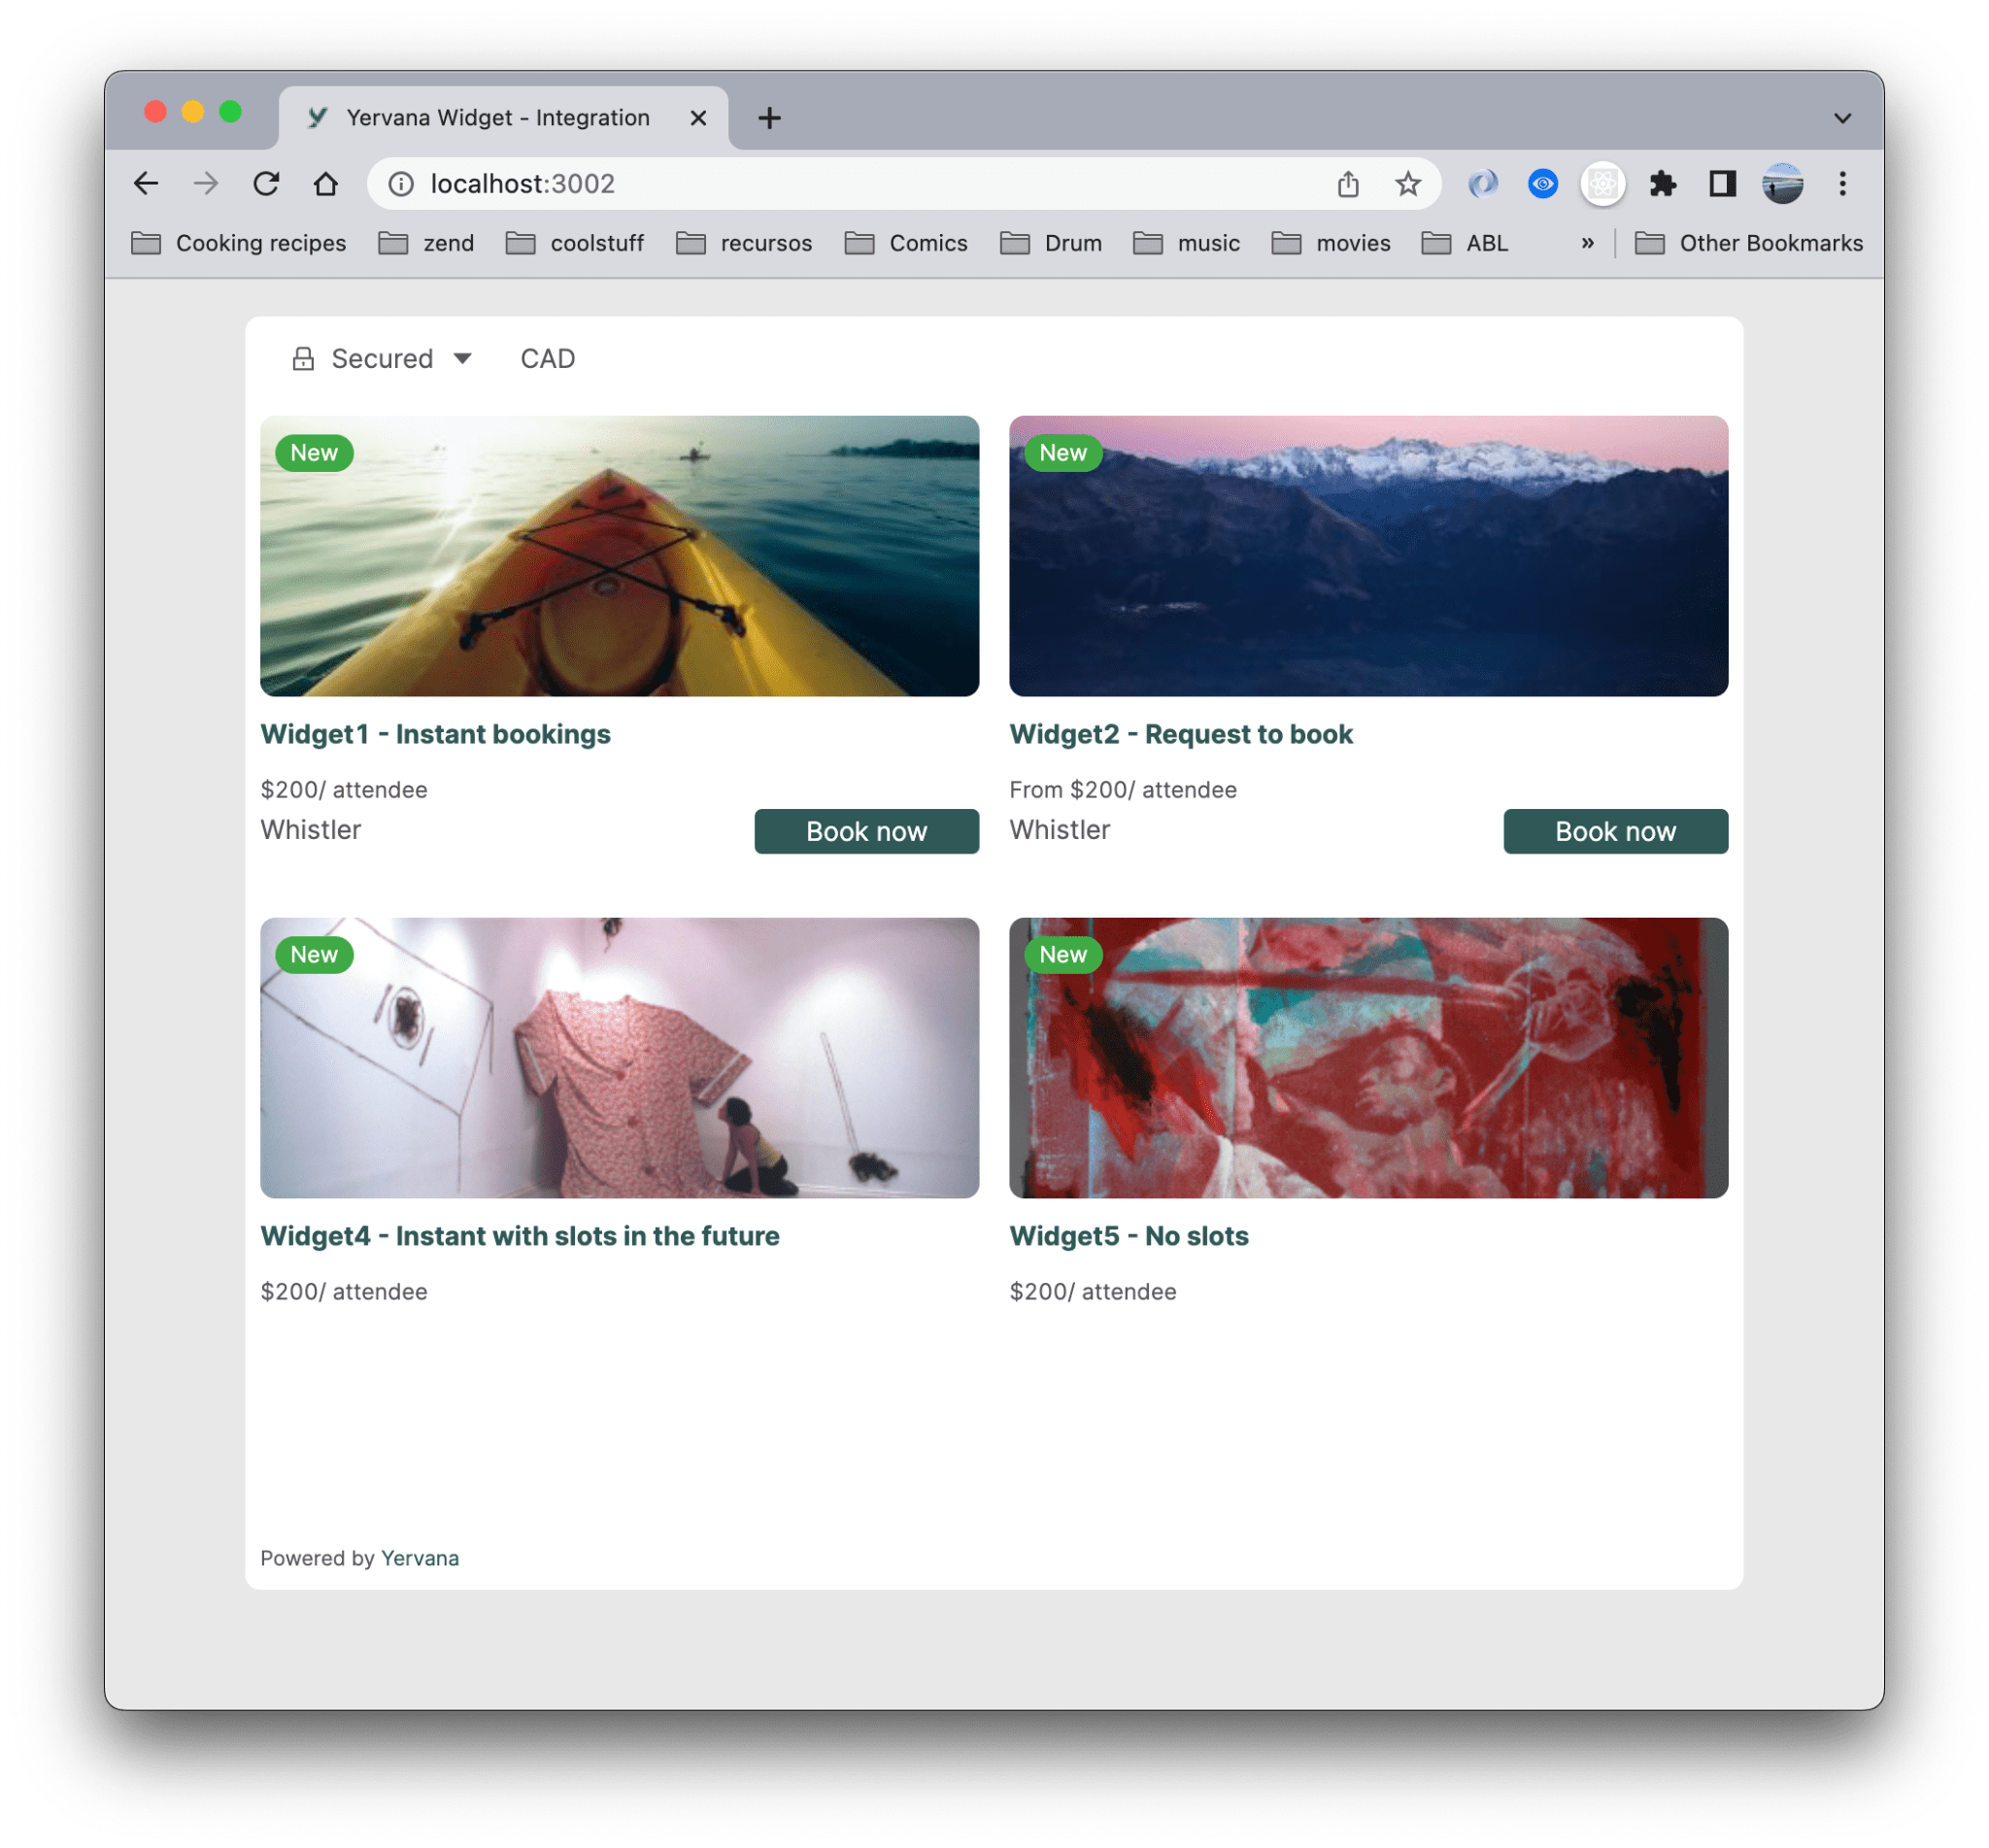
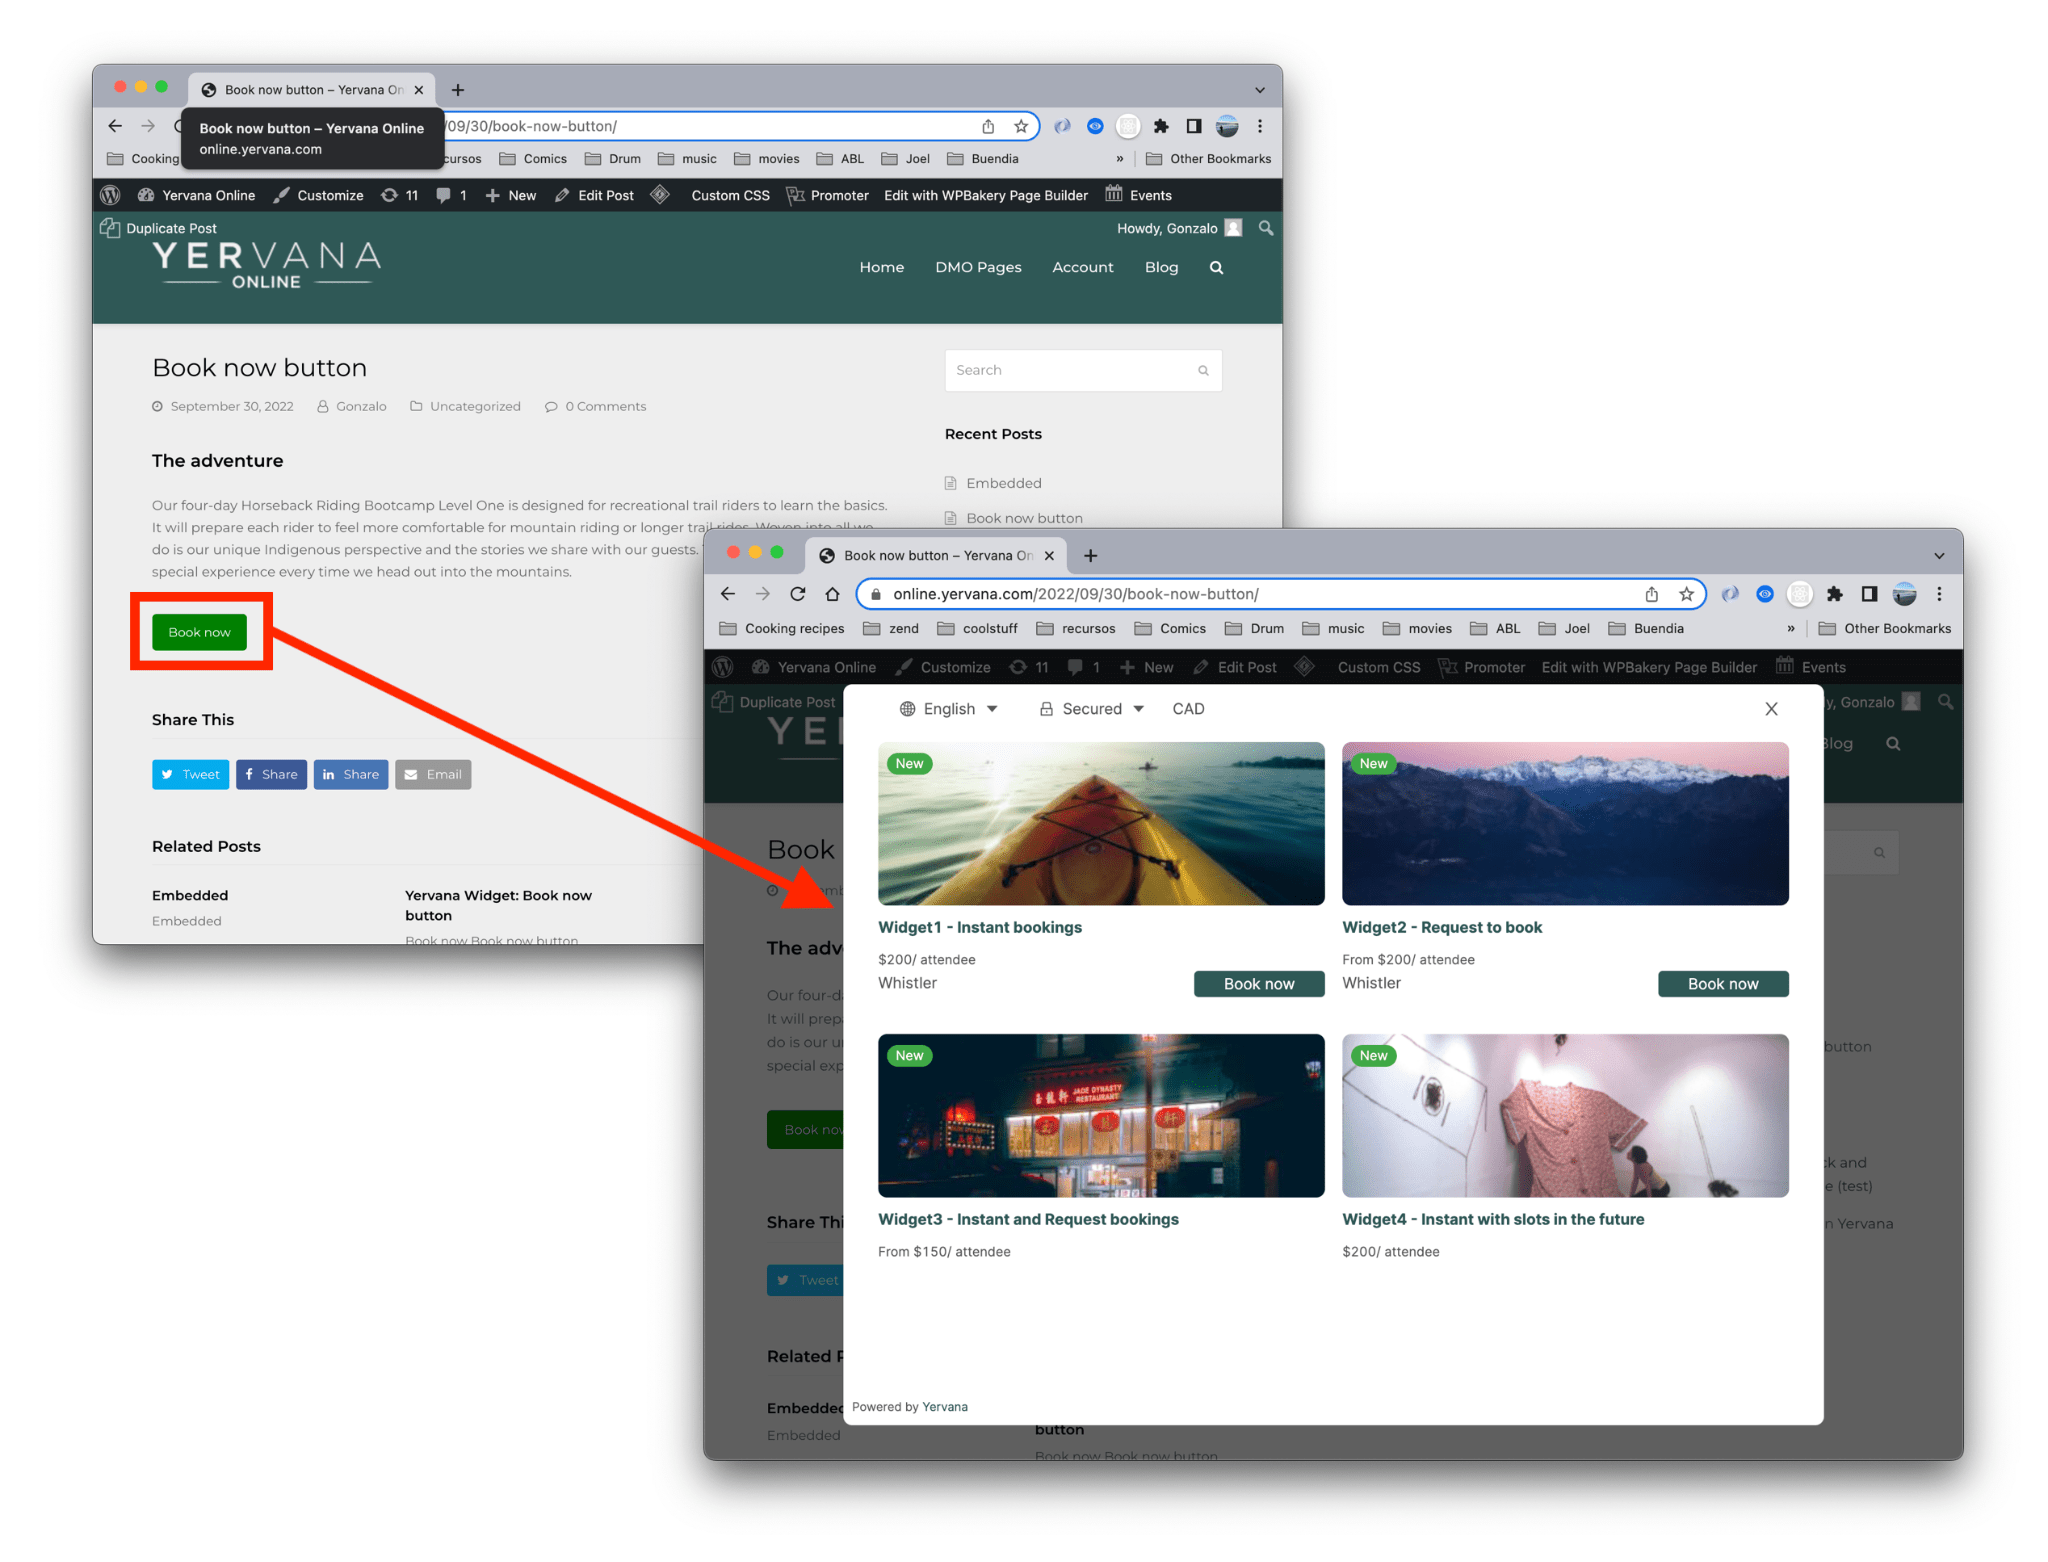
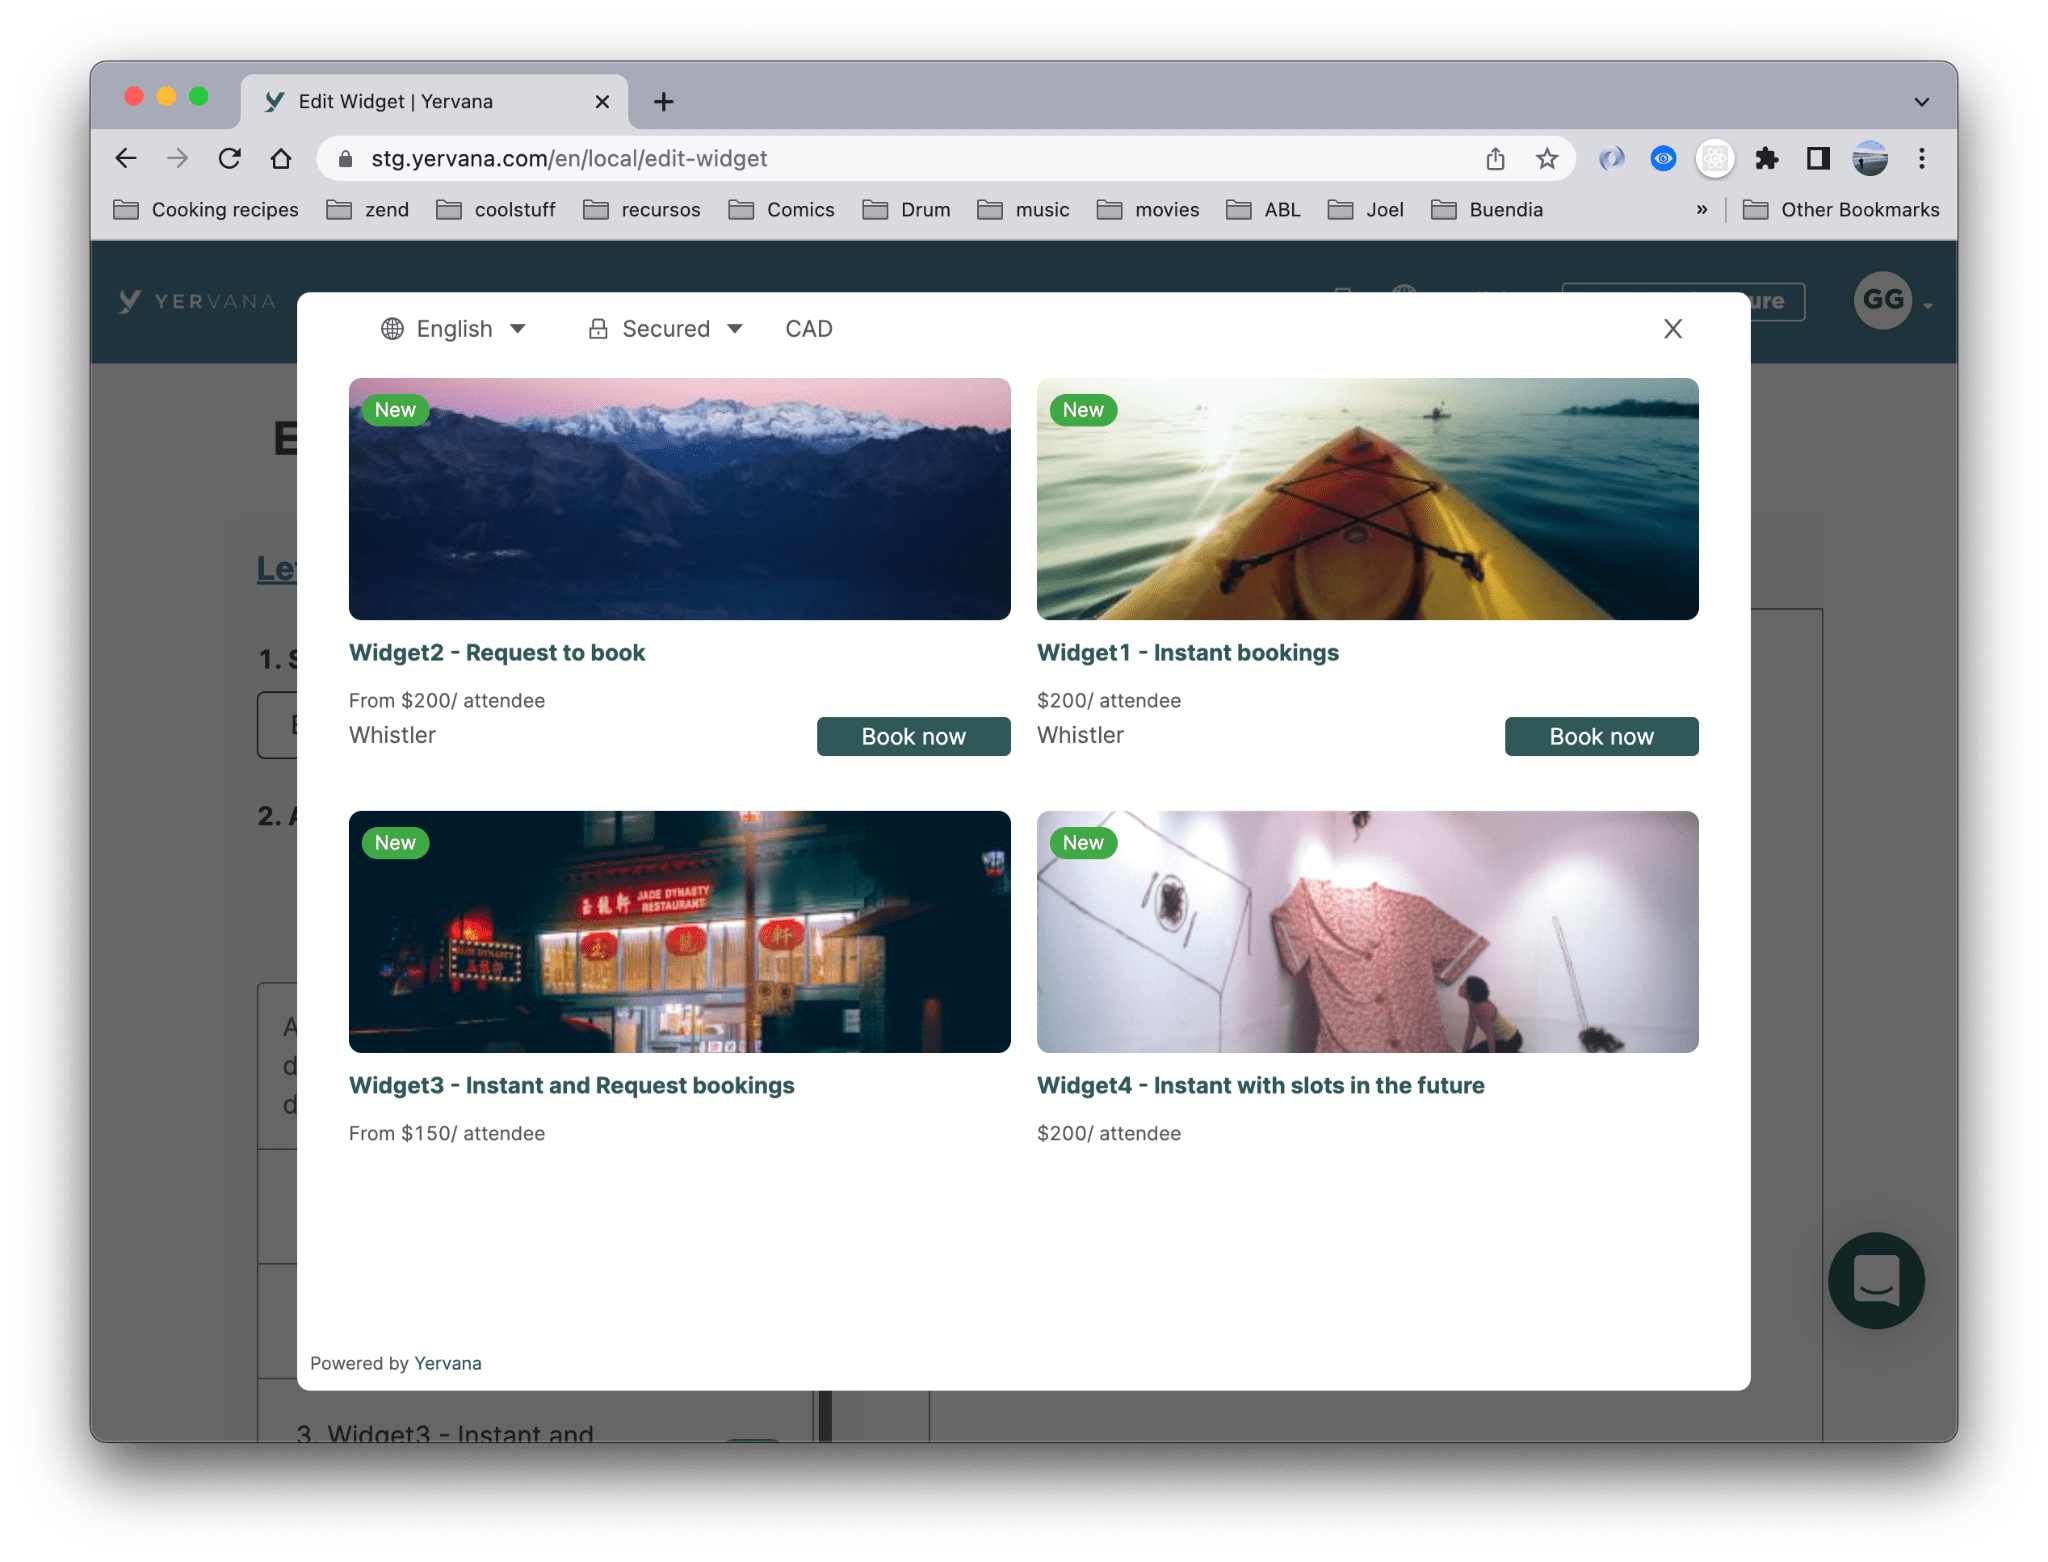
Our Widget has two different displays: Book now button and Embedded. The Book now button will display a button with the text ‘Book now’, when customers click this the Widget will open up in a window on the page. The Embedded option will display the Widget and its content within the main body of your webpage.
Book now button
Embedded

Yervana Widget Generator
Before editing your website, you’ll need to generate the code for the widget that you want to add. Through the Yervana platform, you can select the adventures you want to display within your Widget. Select one or more adventures per widget and generate as many widget versions as you need.
Step 1
Login into your Yervana account, switch to your Local Profile and the click ‘Edit Widget’ (see image 1).
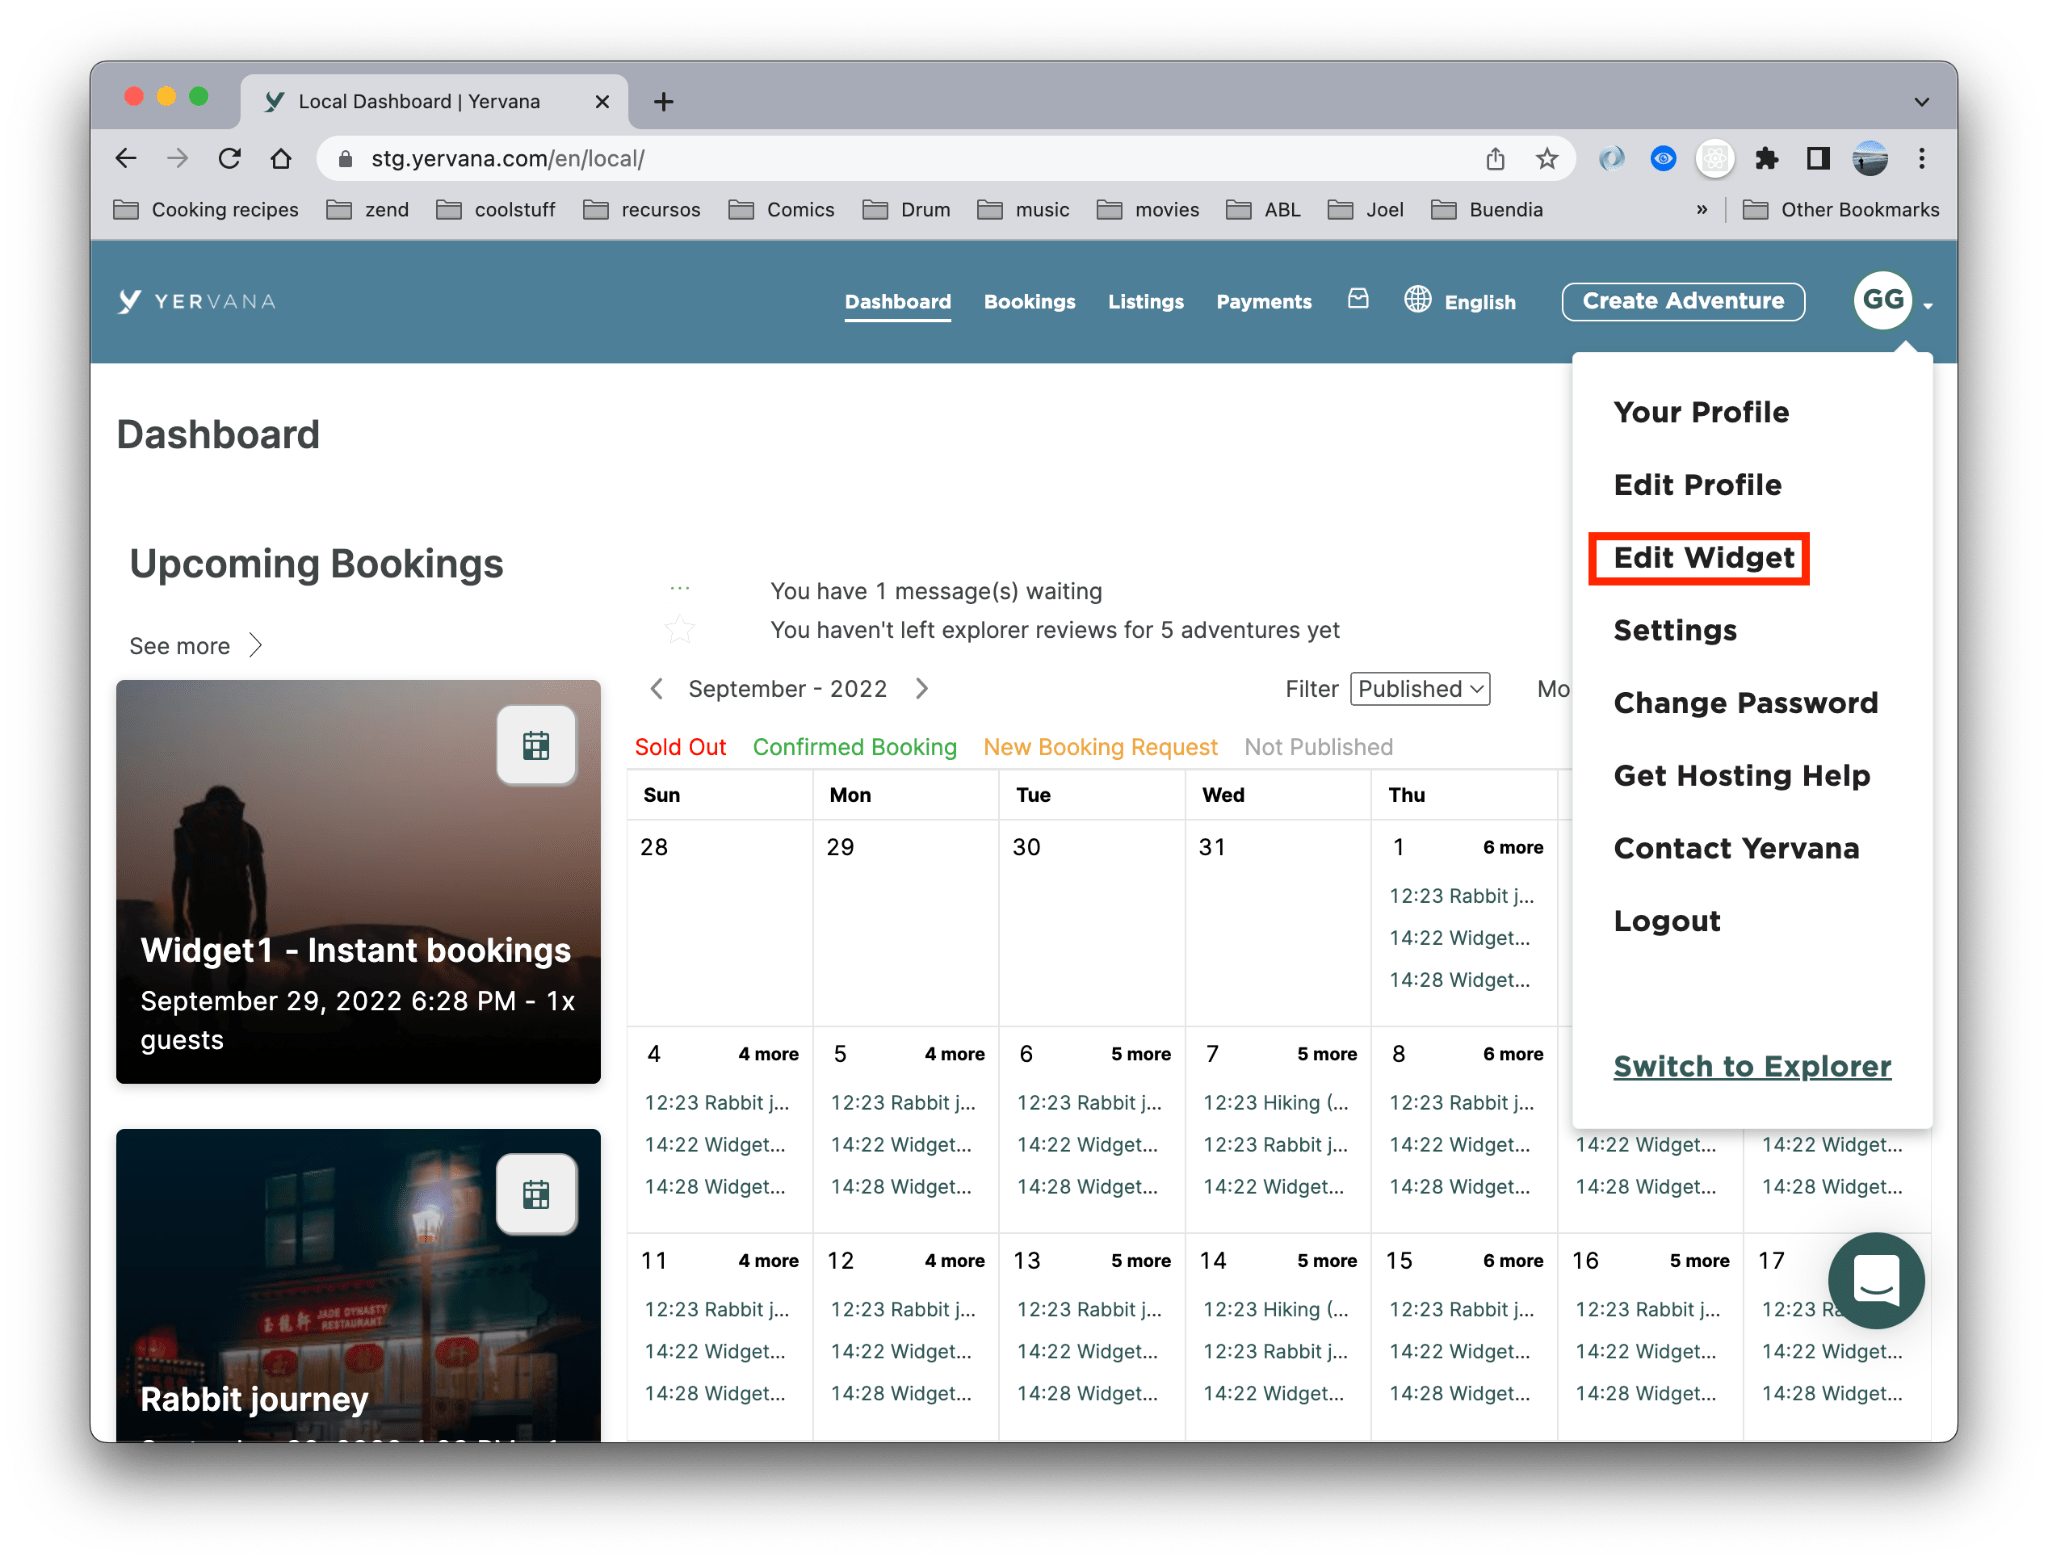 Image 1
Step 2
In the Edit Widget page, you will find the screen below.
1. Select integration type – here you’ll find two options: Book now button and Embedded. Select the one that fits your needs (see Widget Types above). Then select one or more adventures from the list below. If no adventures are selected, the panel to the right will display the message You need to select at least one adventure.
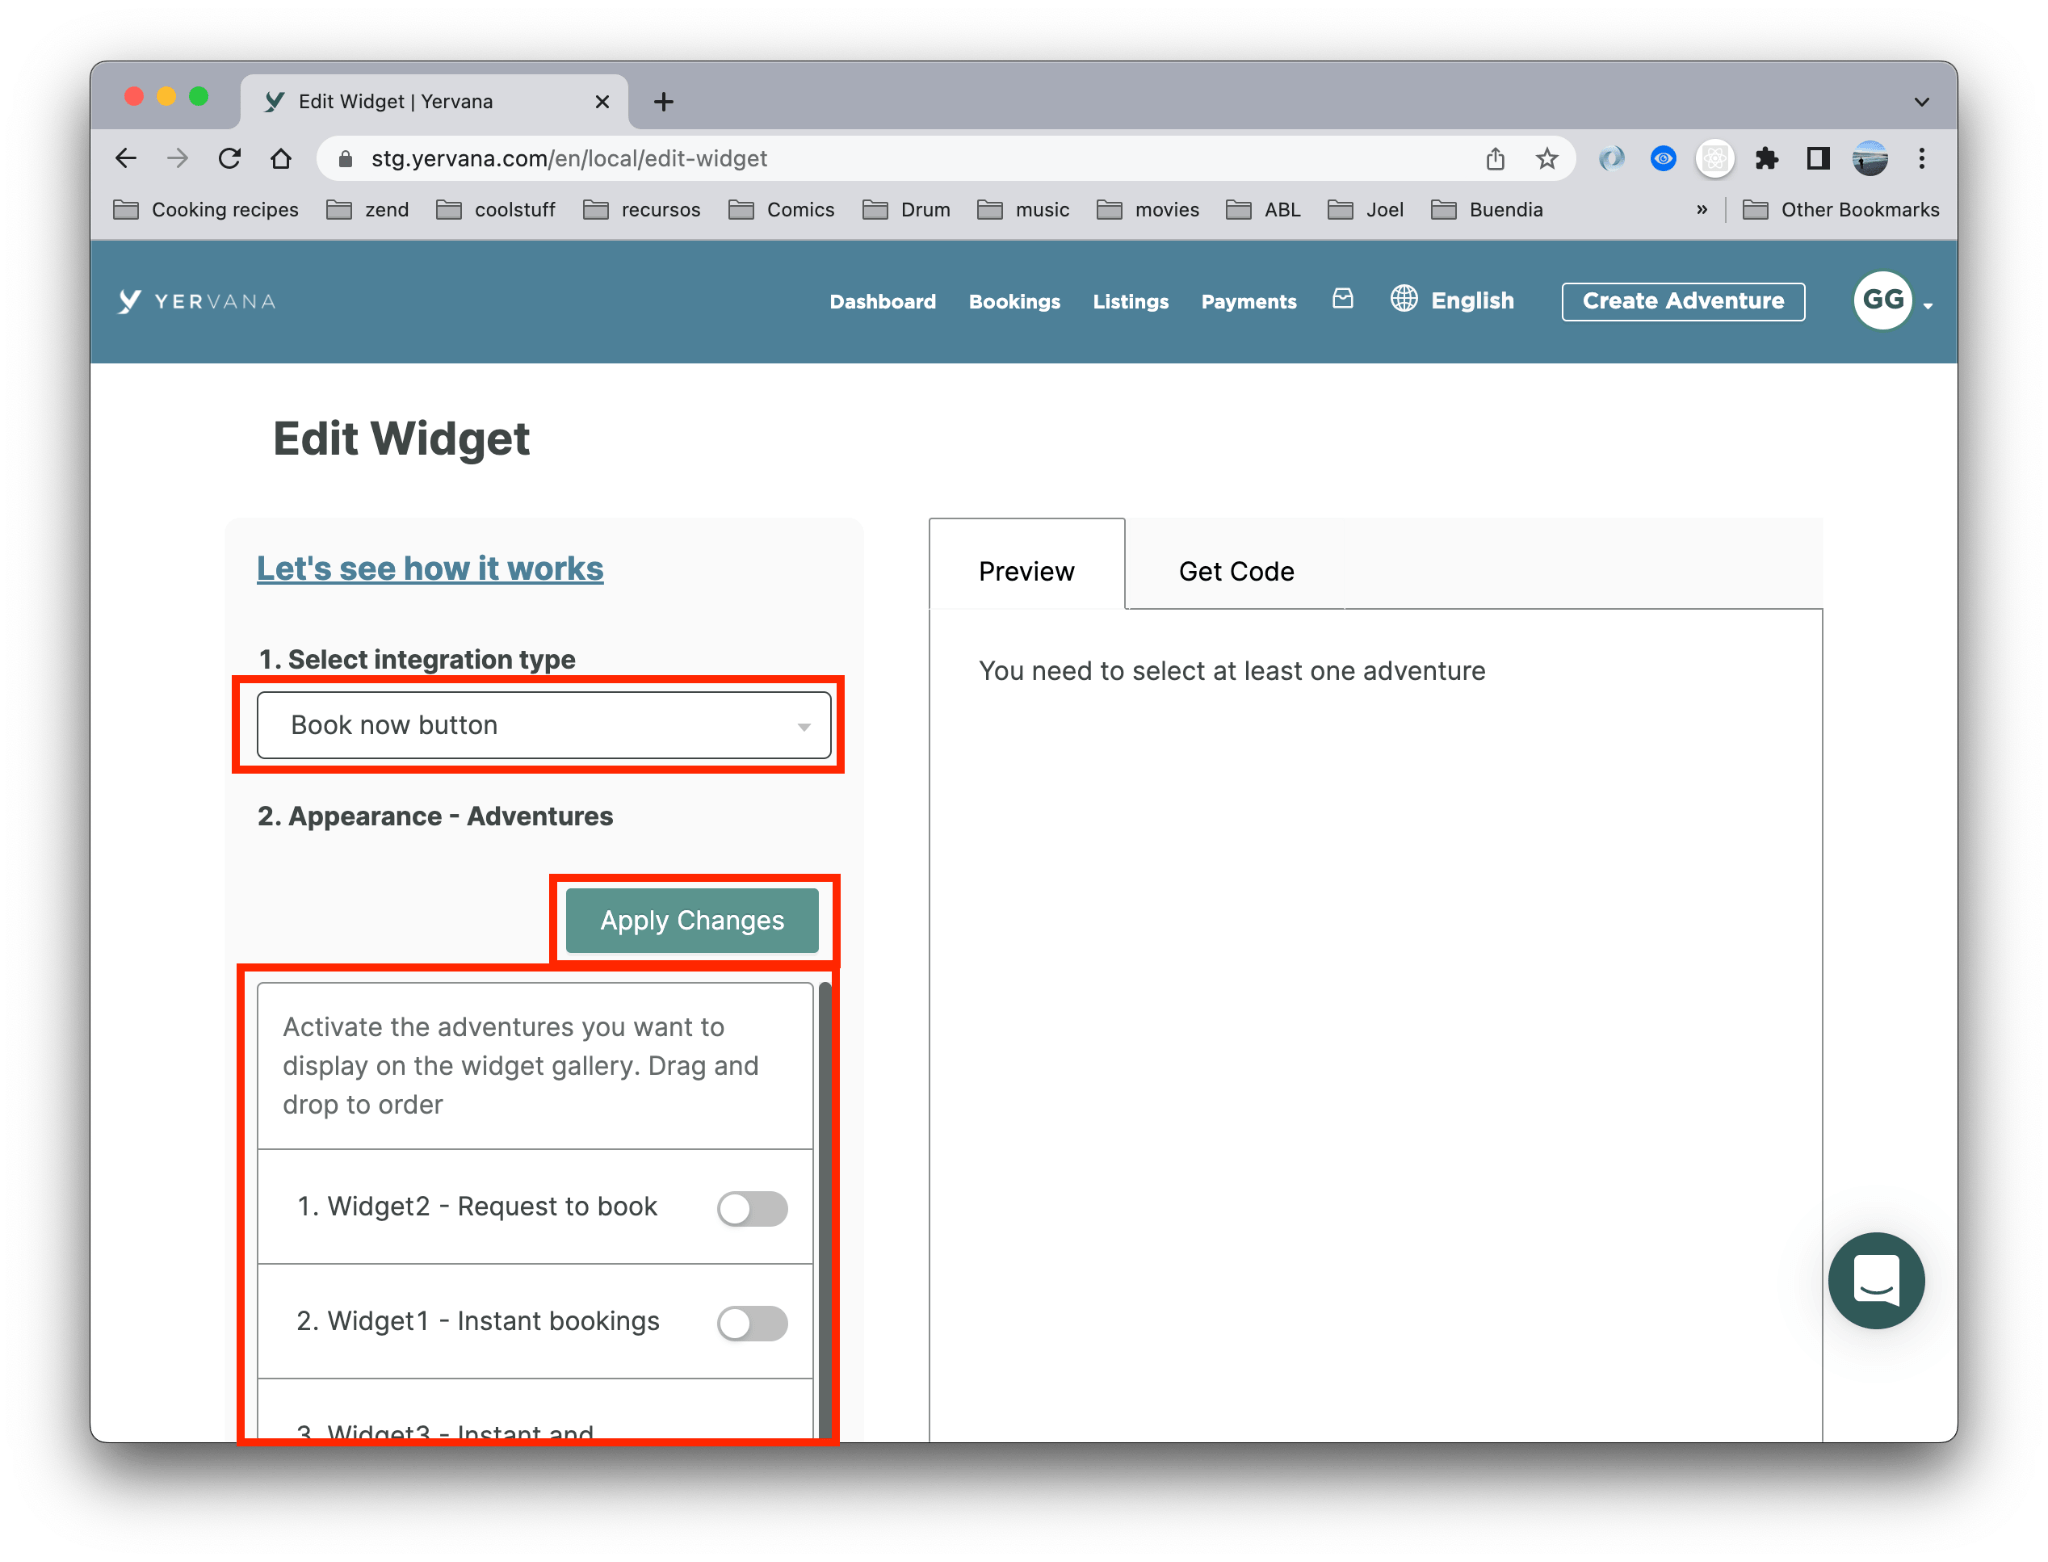 Image 2
Step 3
Once you select one or more adventures, click the button Apply Changes to update the Preview area. Here, if you have the Book now button selected you will see a Book now button in the Preview area. Click this to test your settings and see how the widget will behave in your own website. If you want to add more adventures follow the same process. Click Apply Changes to update the Preview area.
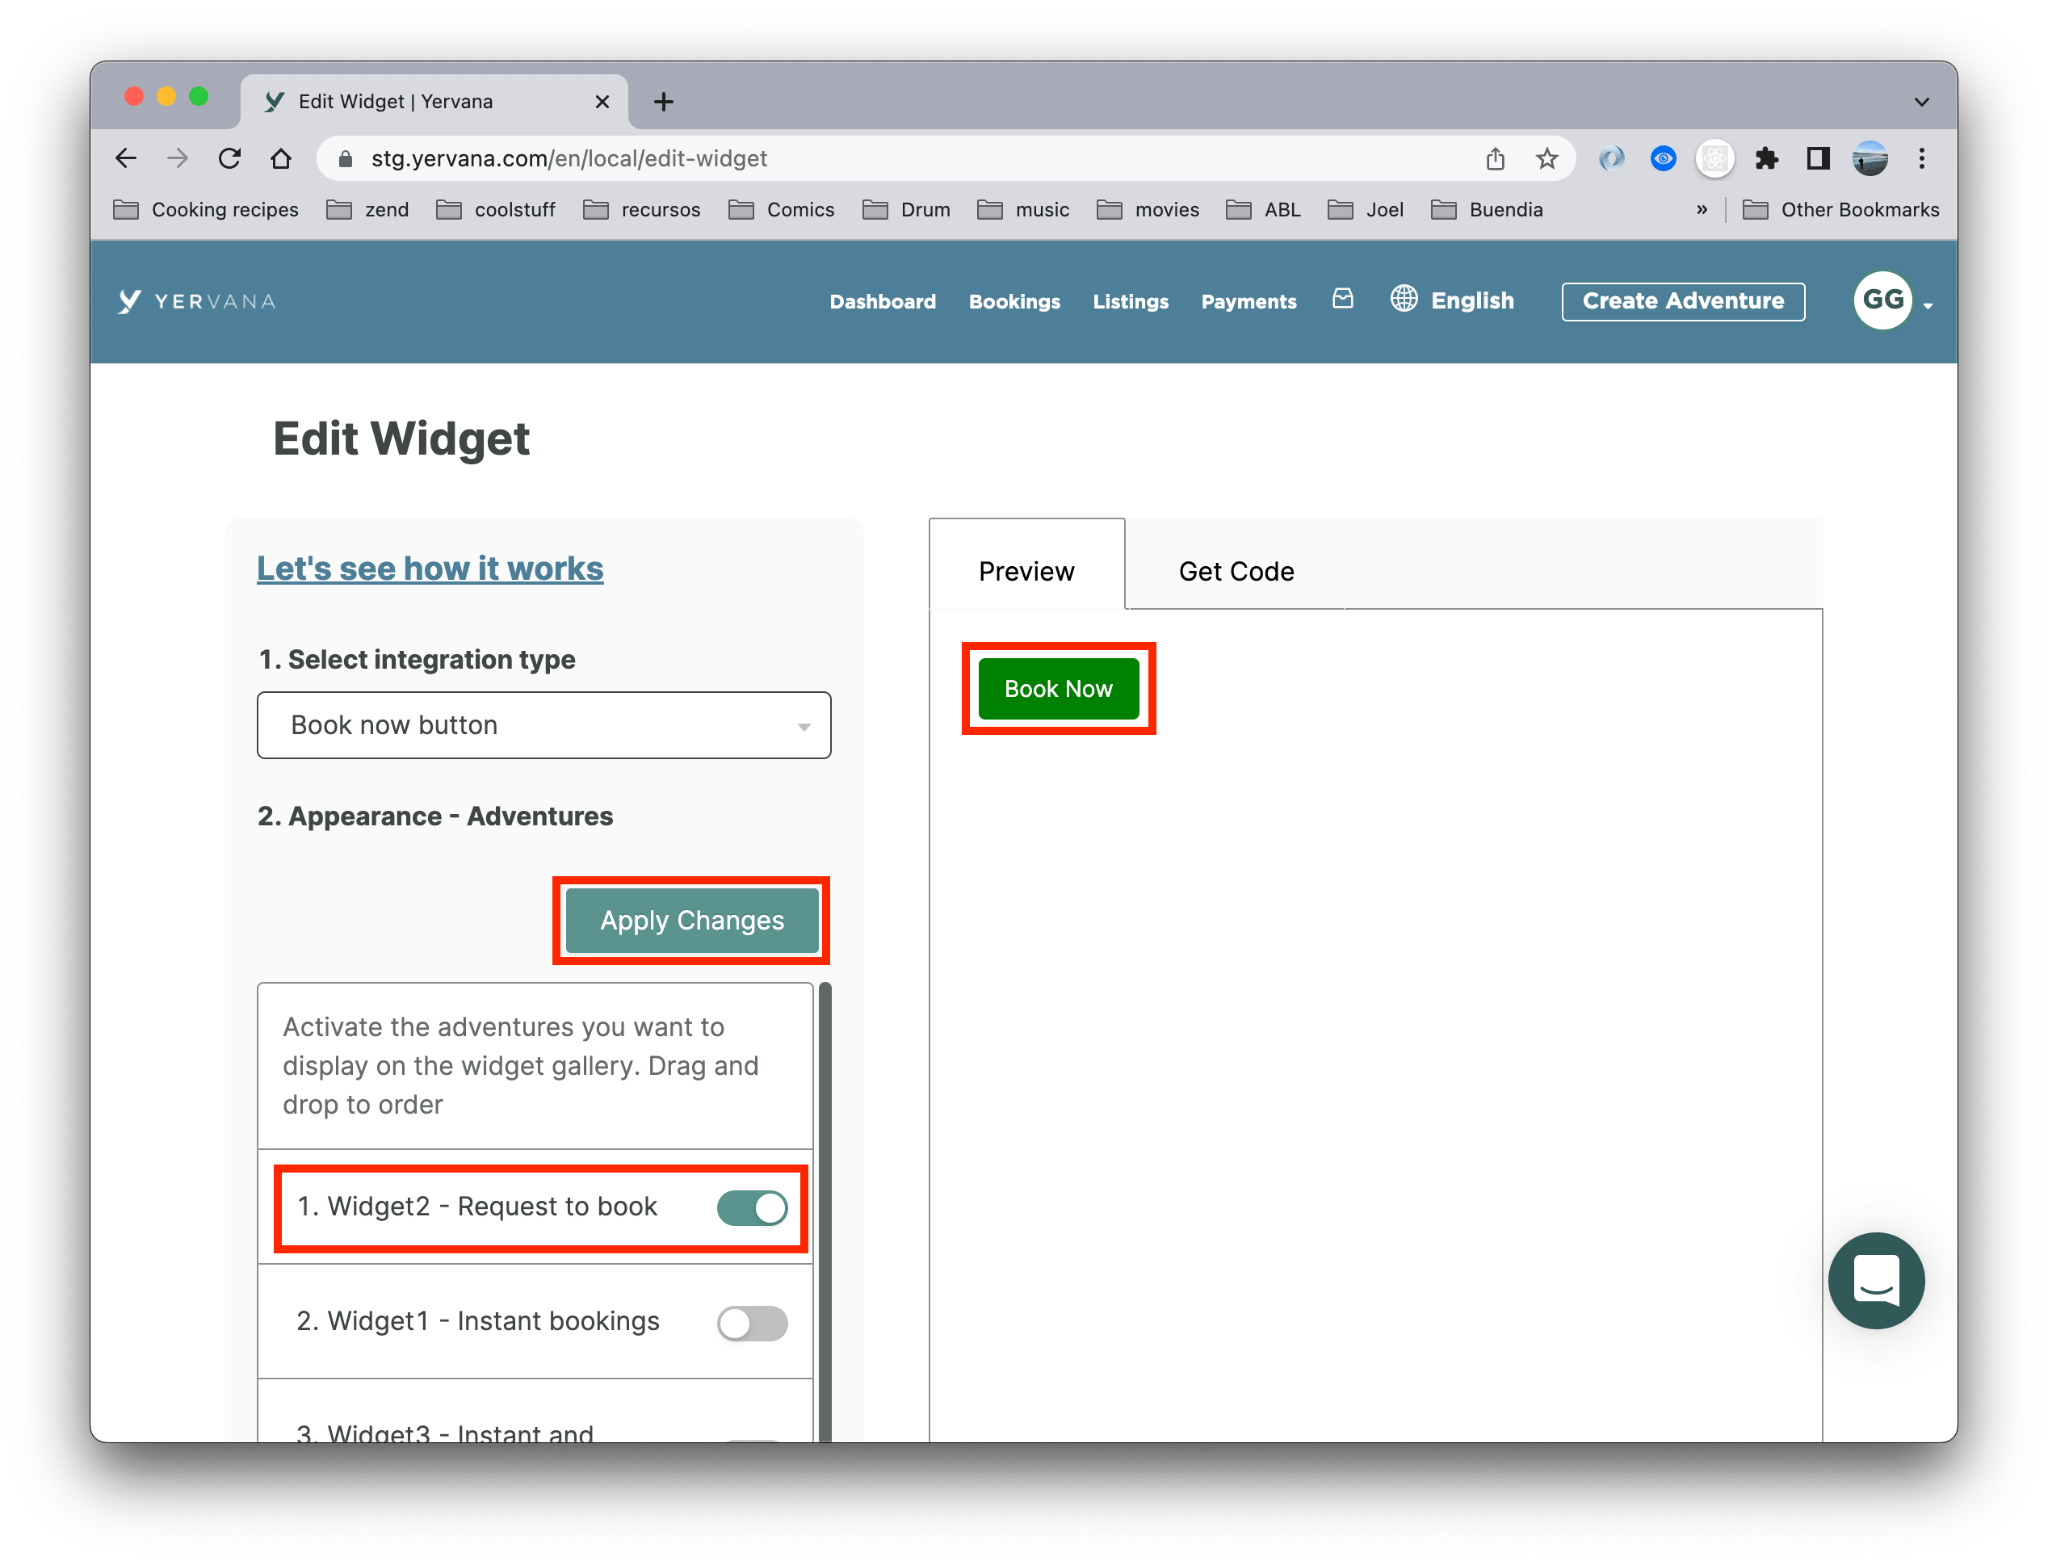
Click Book now to test your settings

Wix
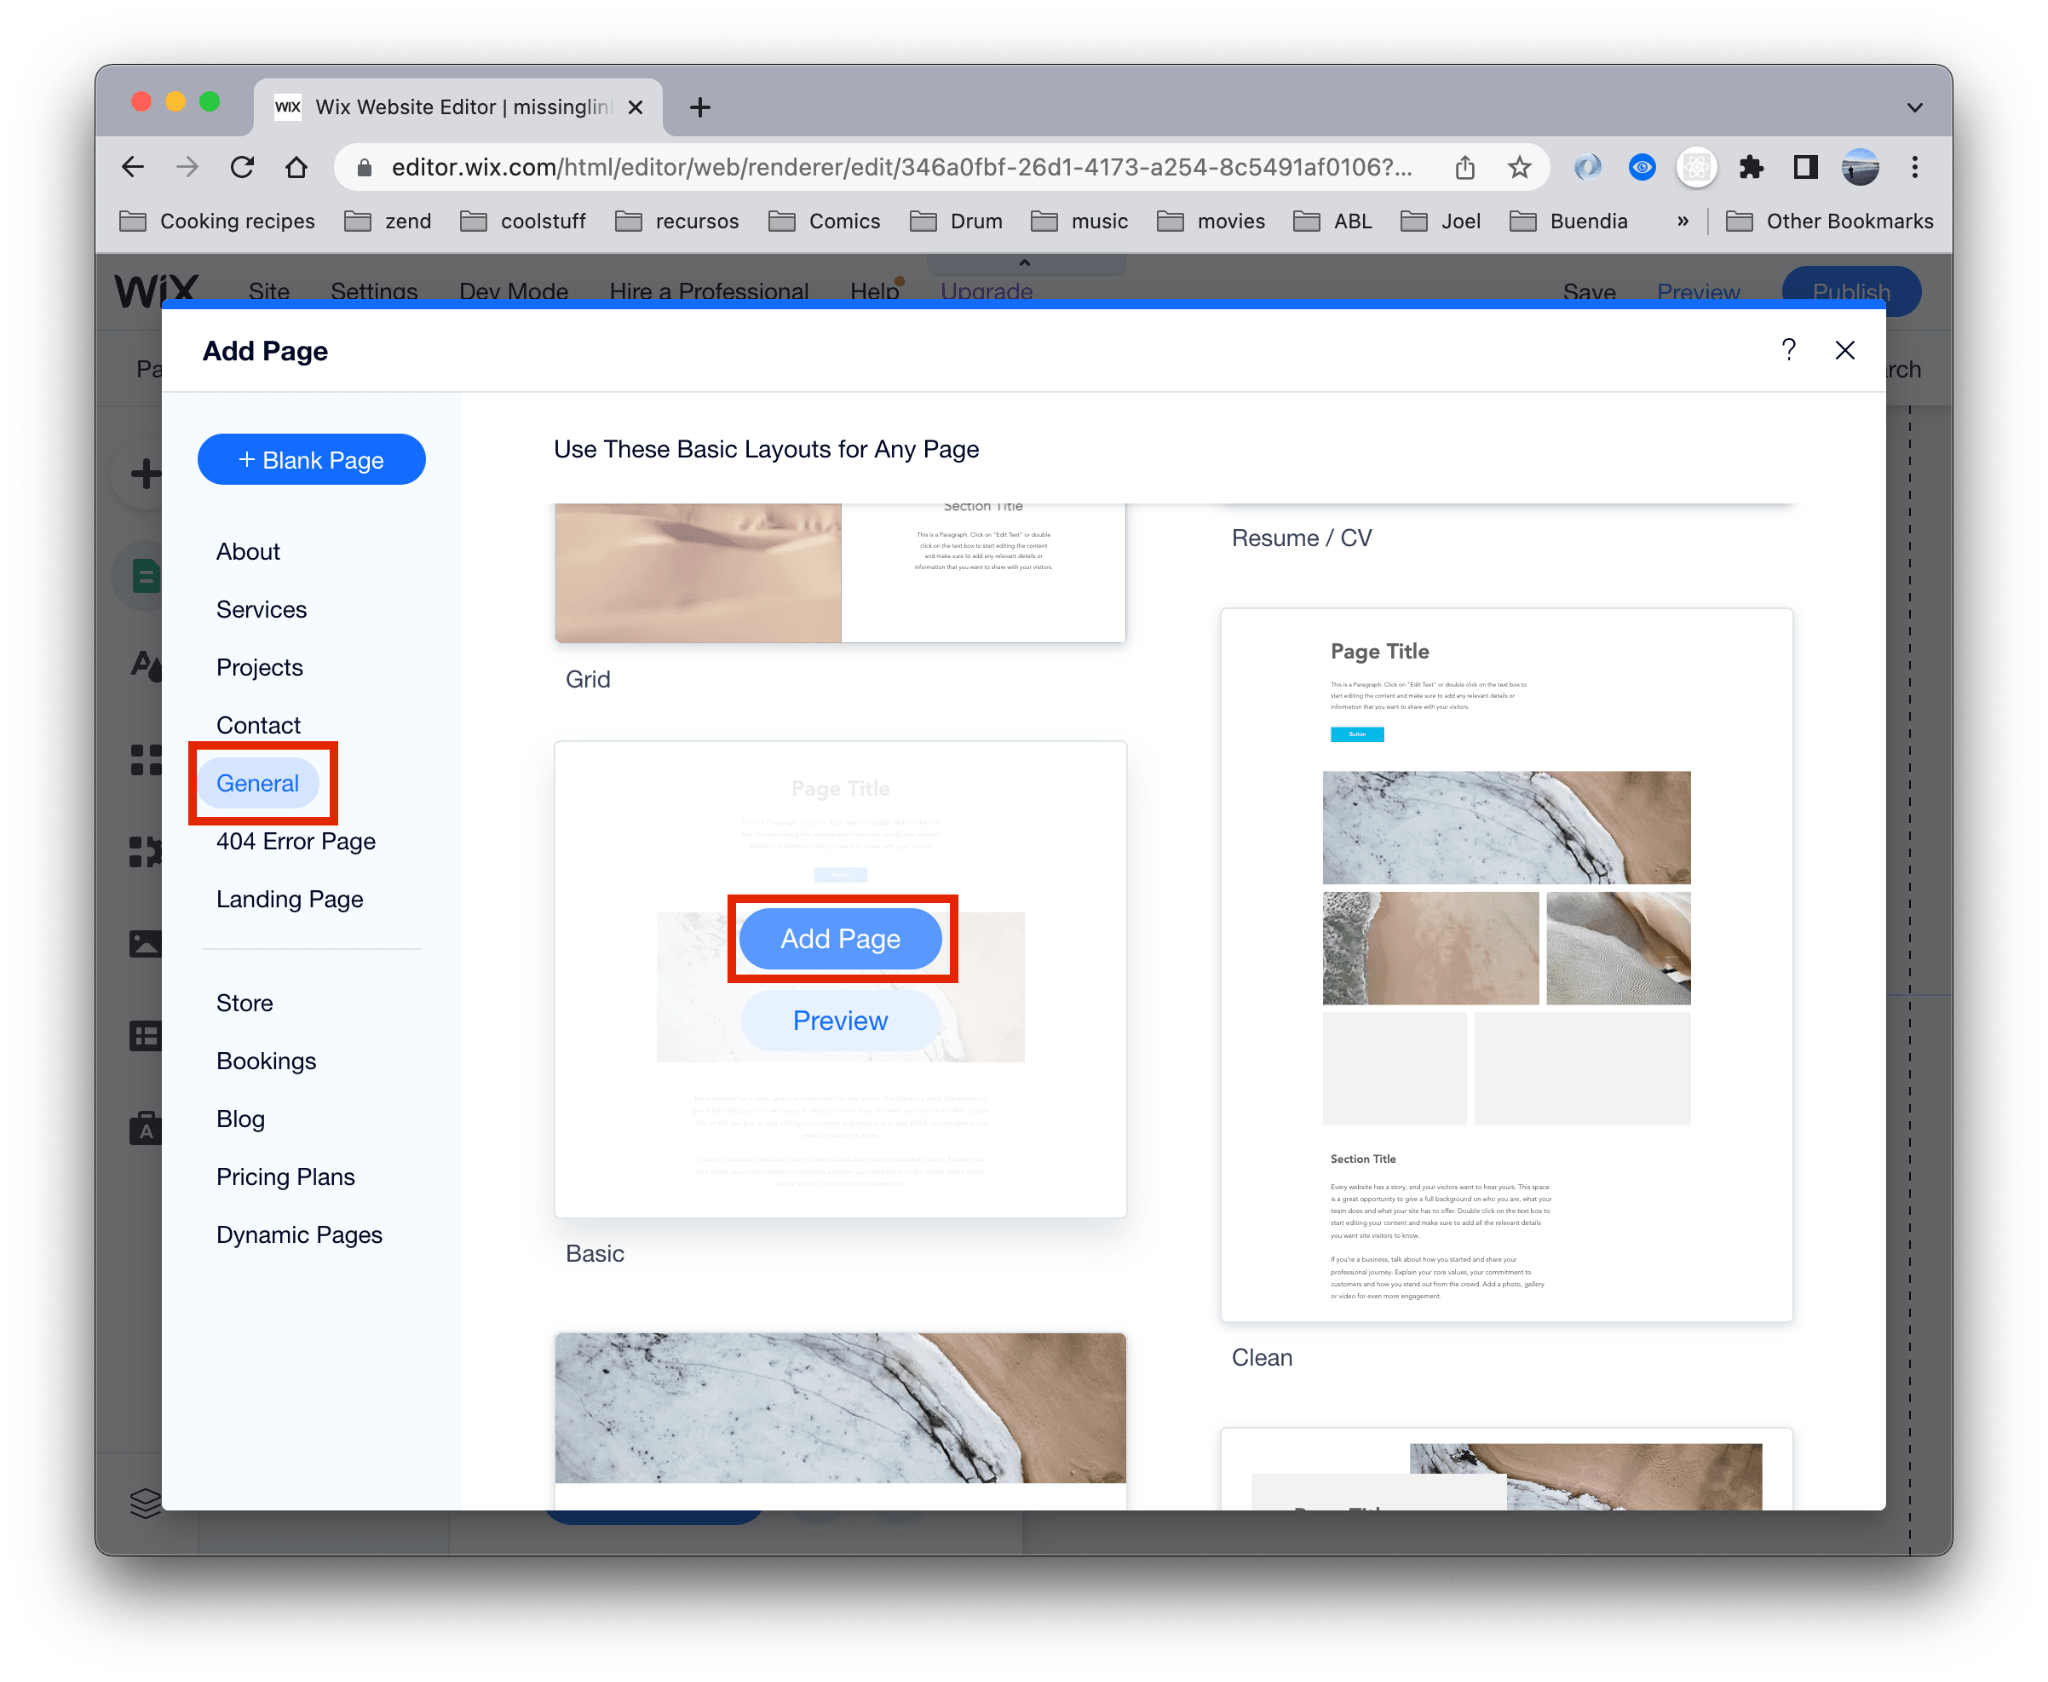
- Create a new page
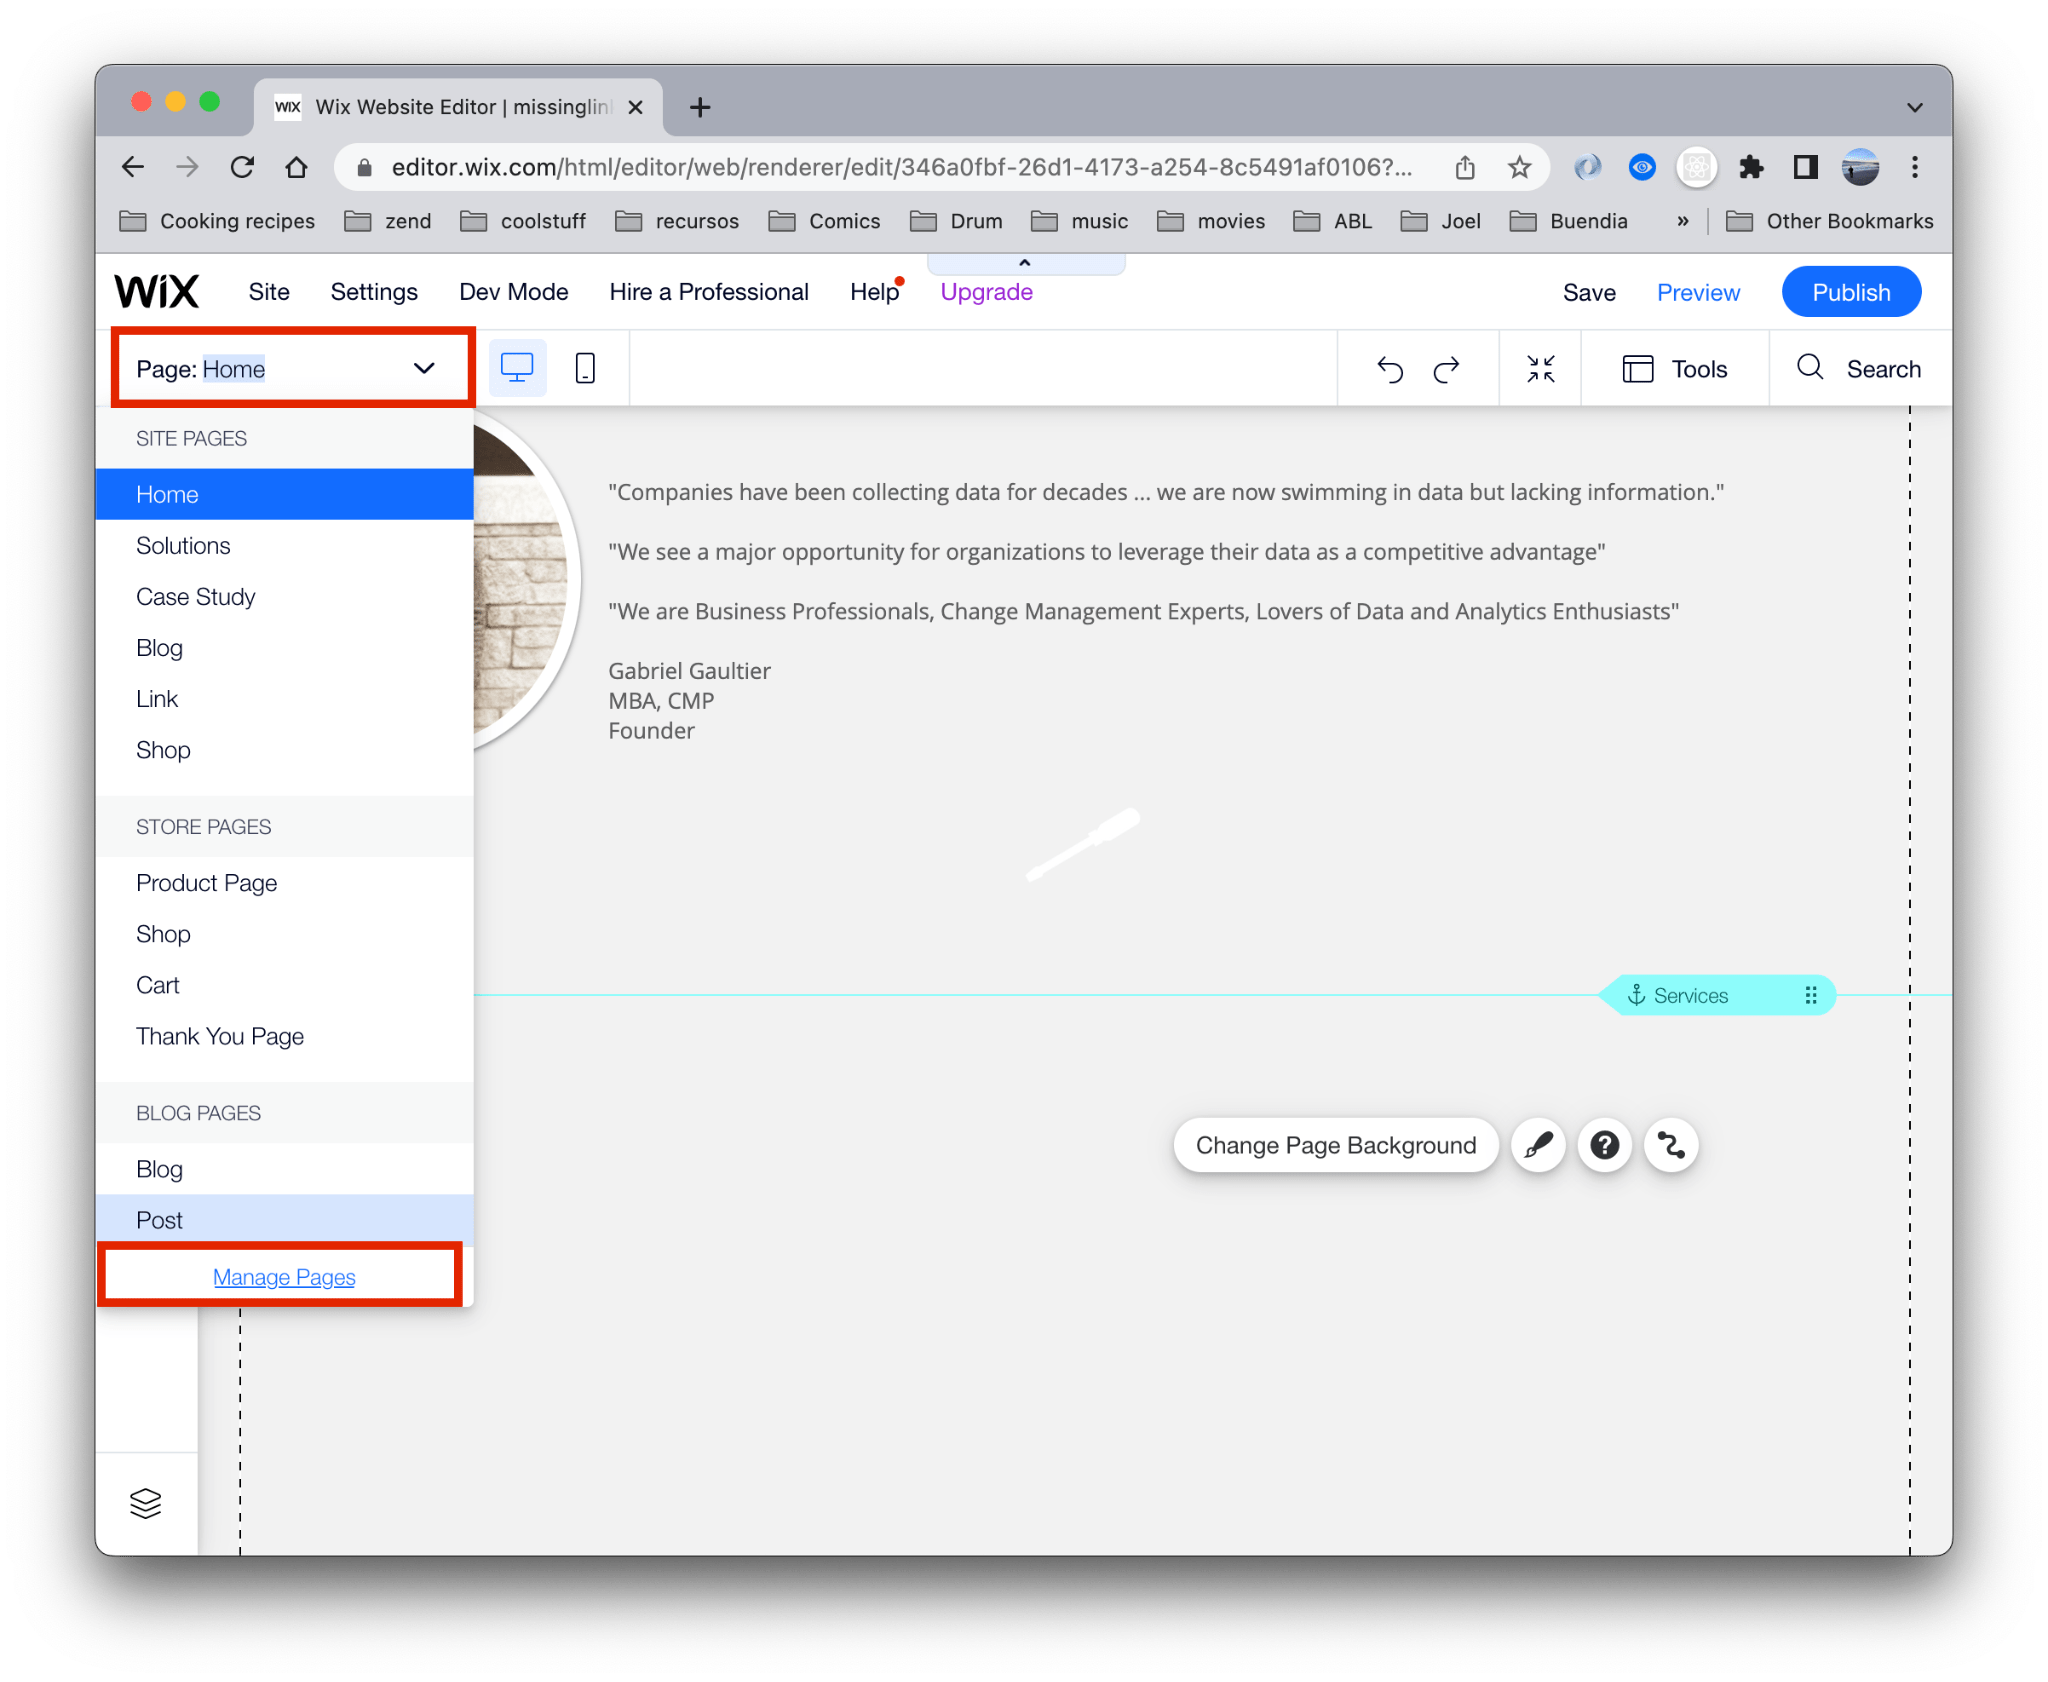
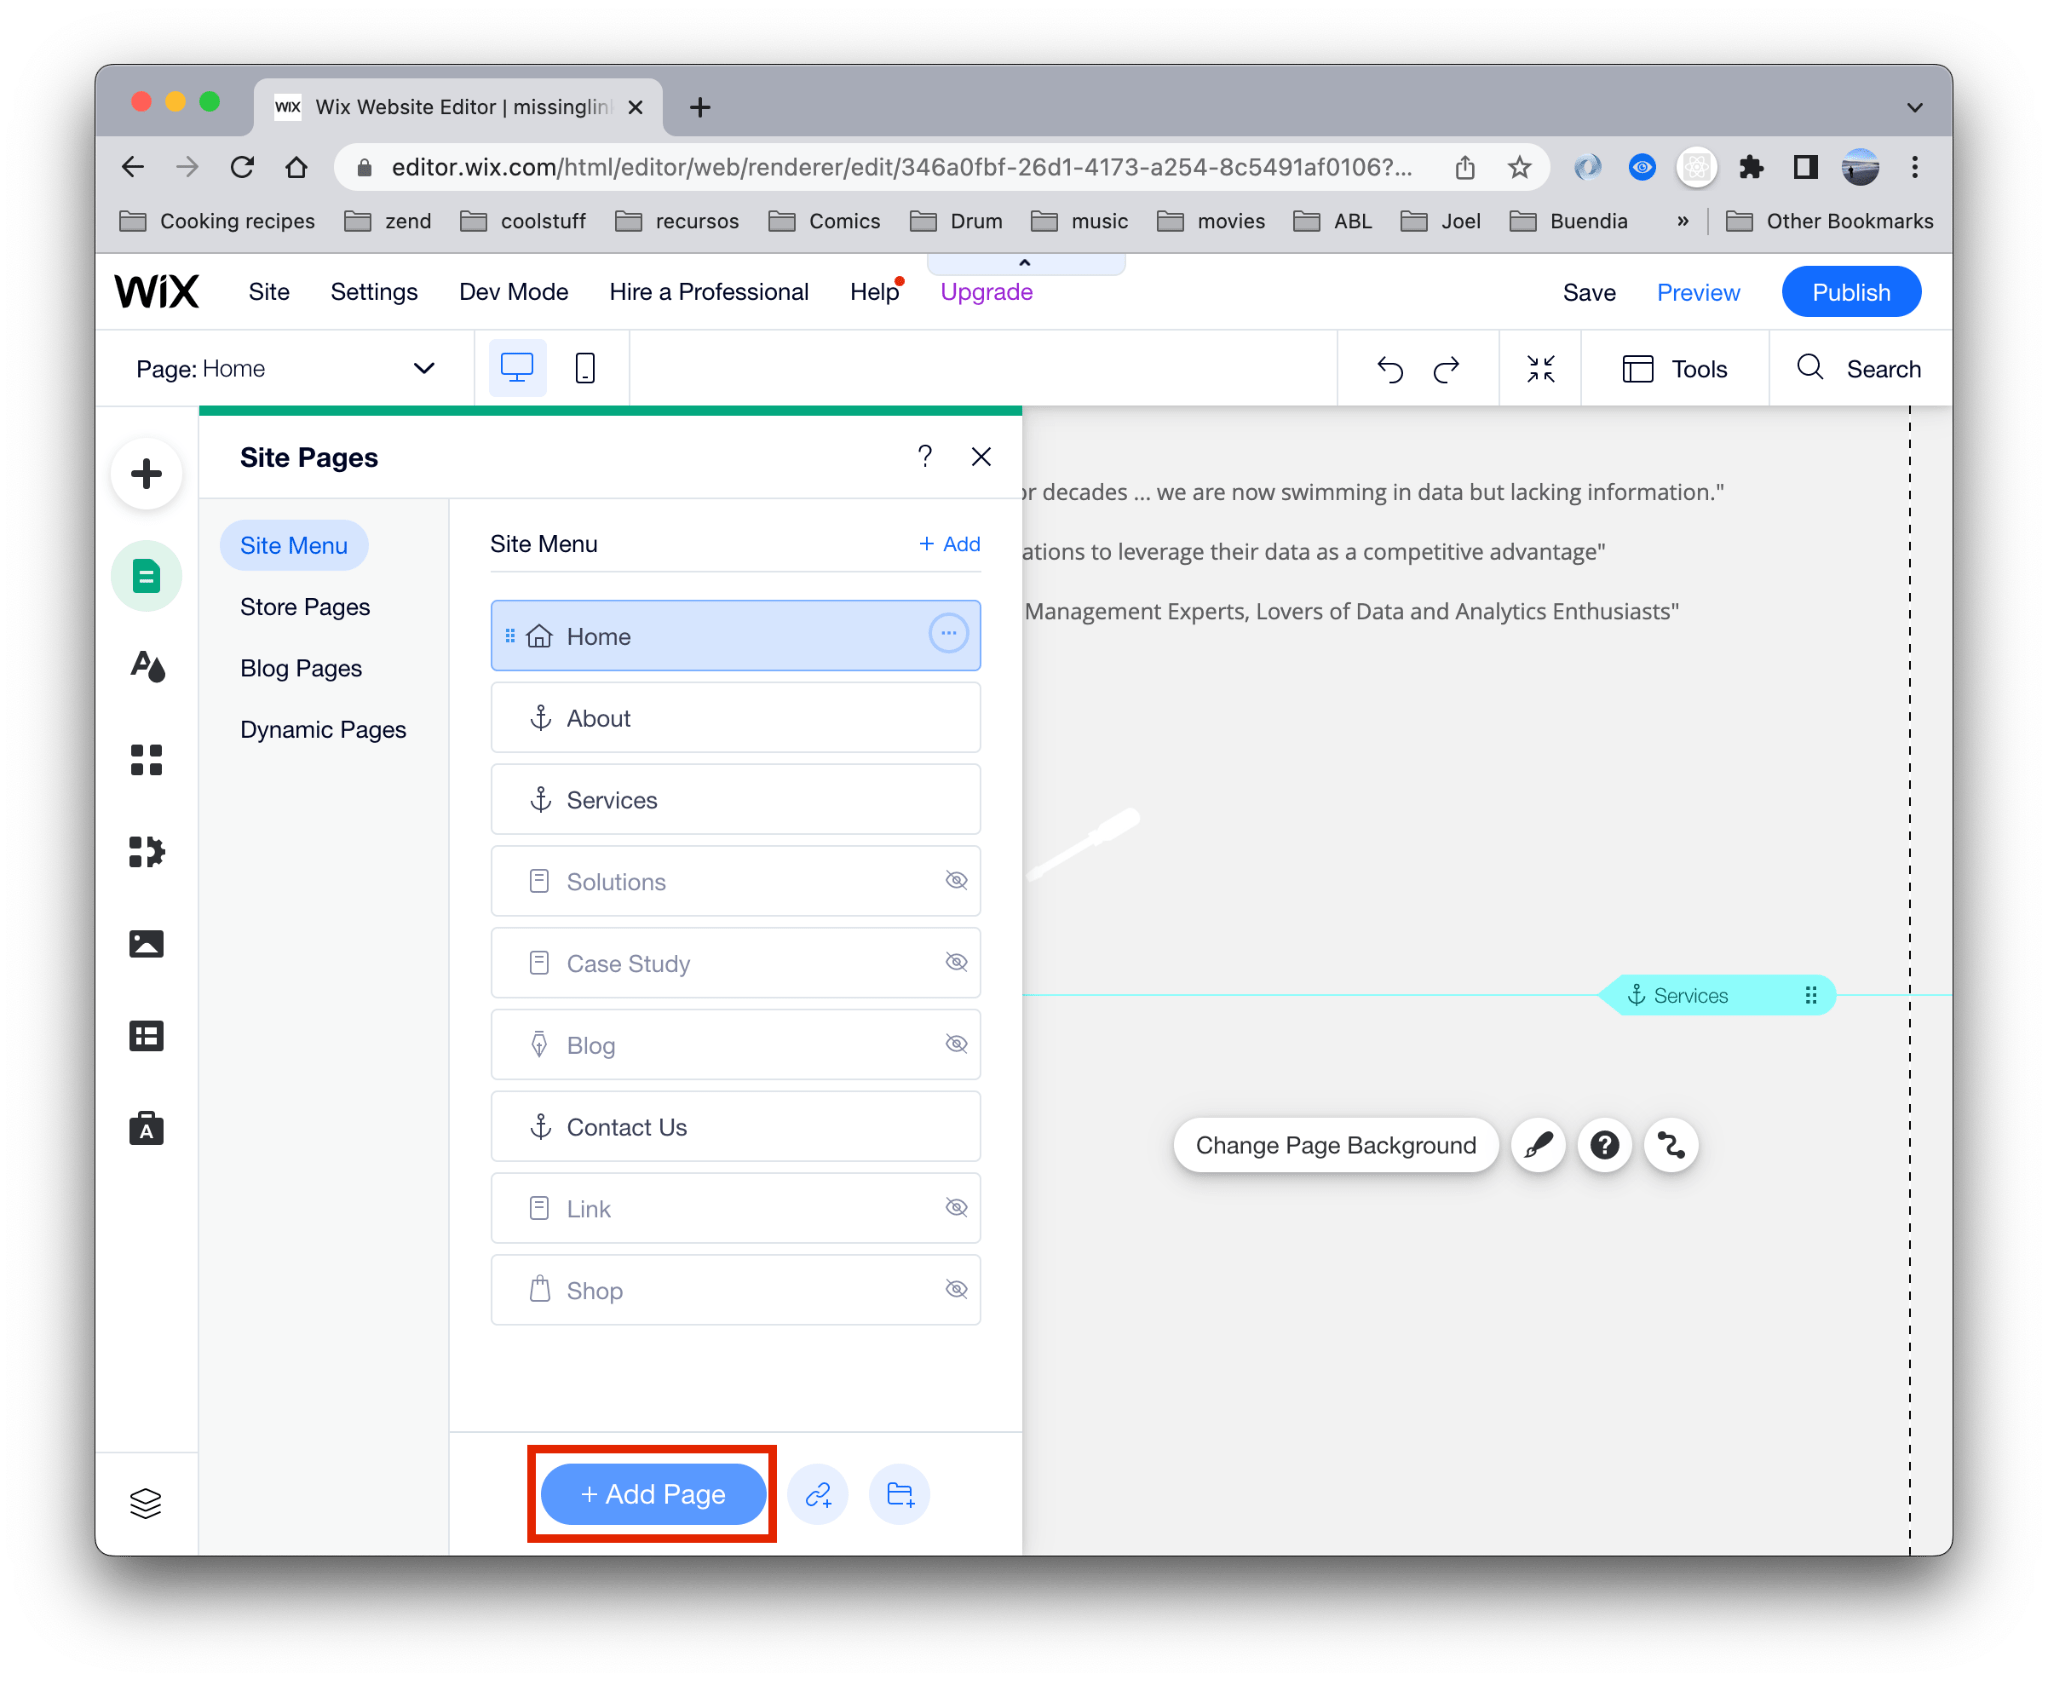
- Select button Add Page
- Now you need to select a template. In this example we’ve used Grid from General
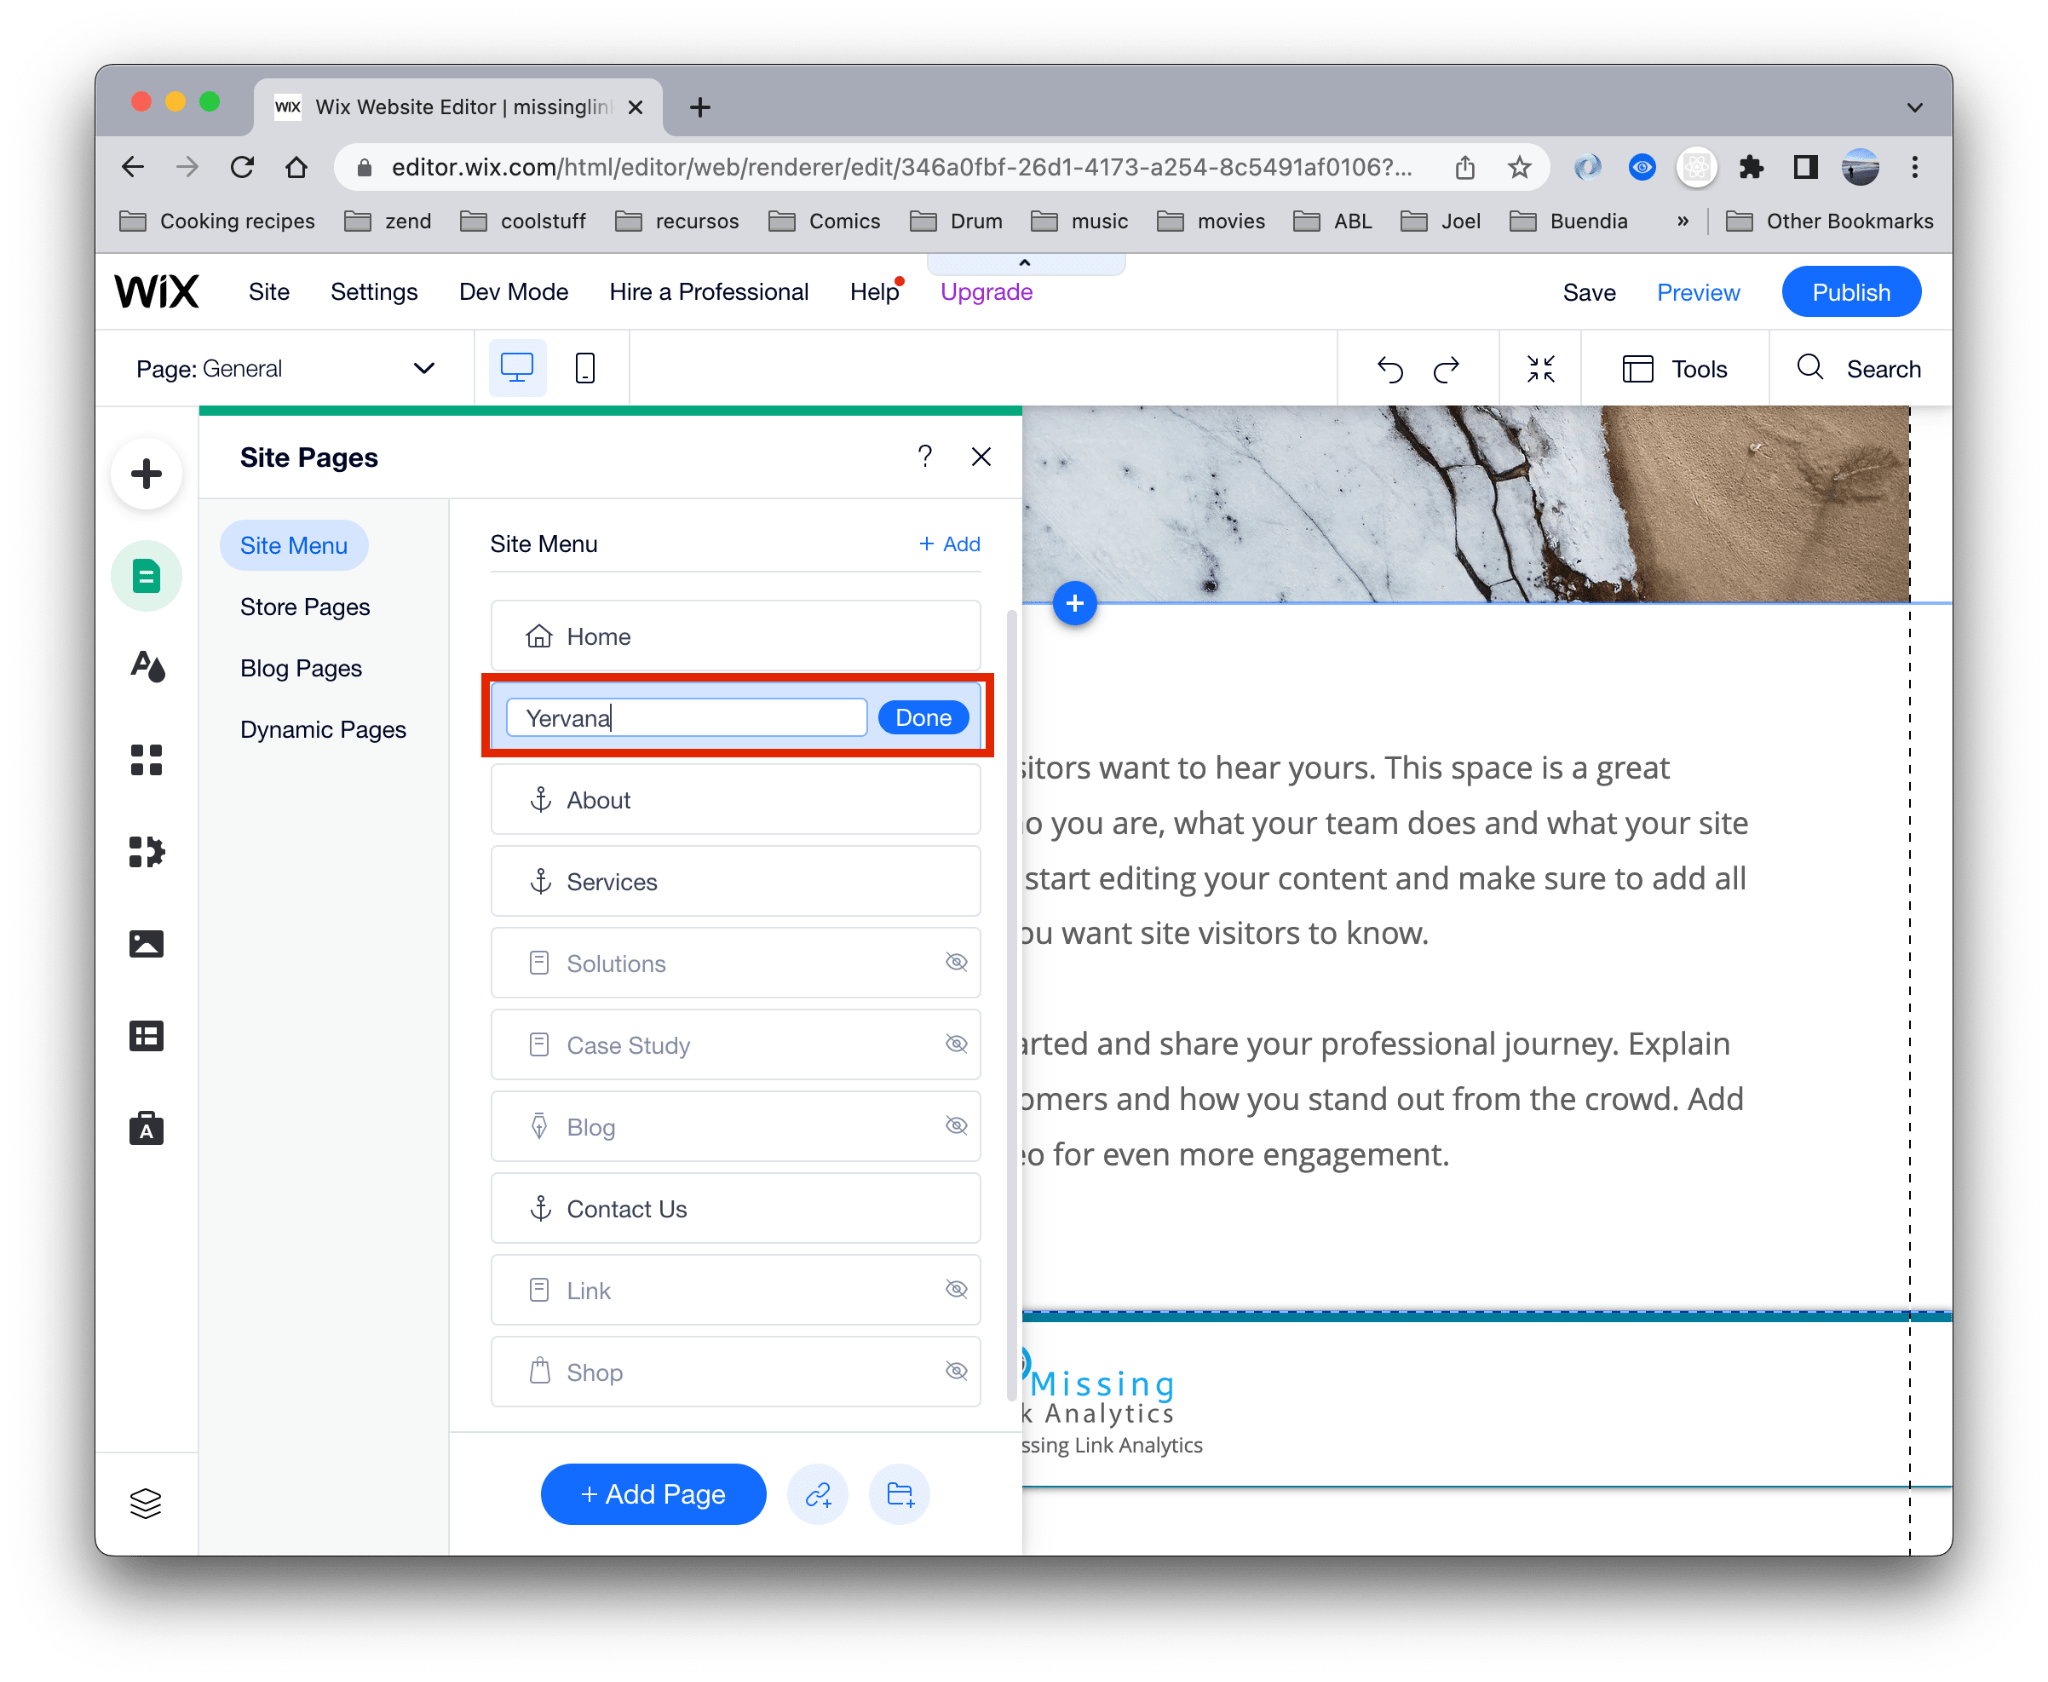
- Double click to update the page’s name
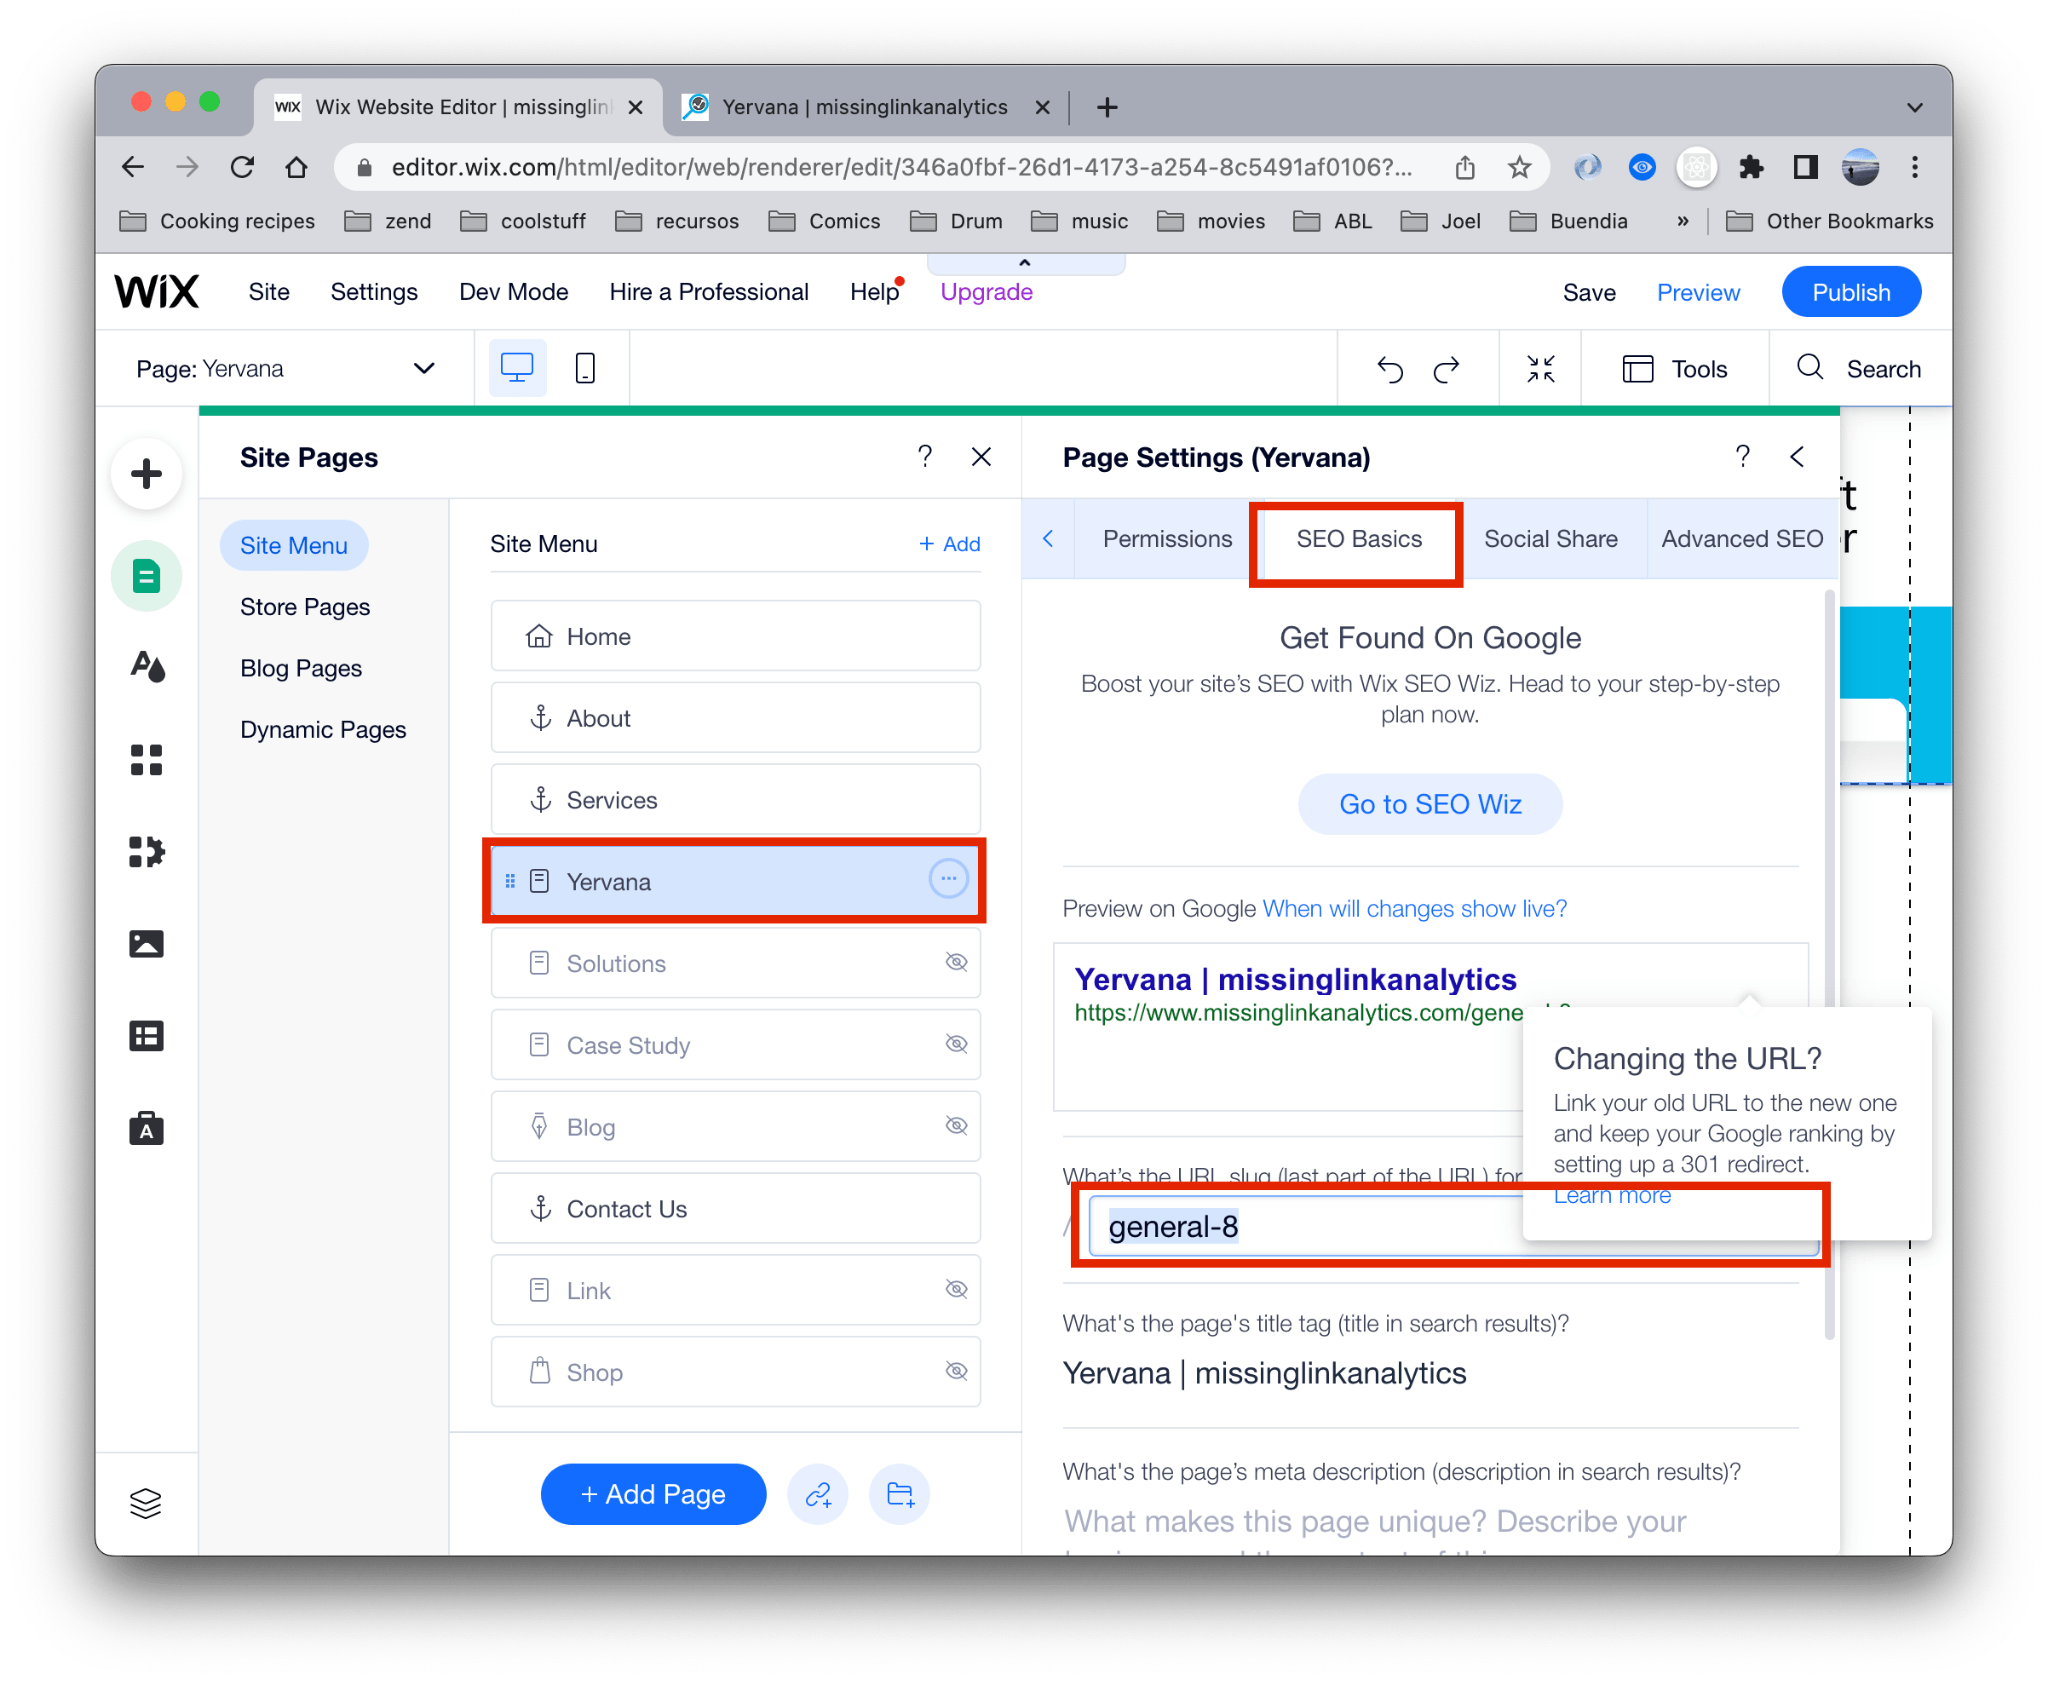
- Once the page is created updating the url might be useful. Click the three dots and select Settings. ON the panel select SEO Basics, then change the url name
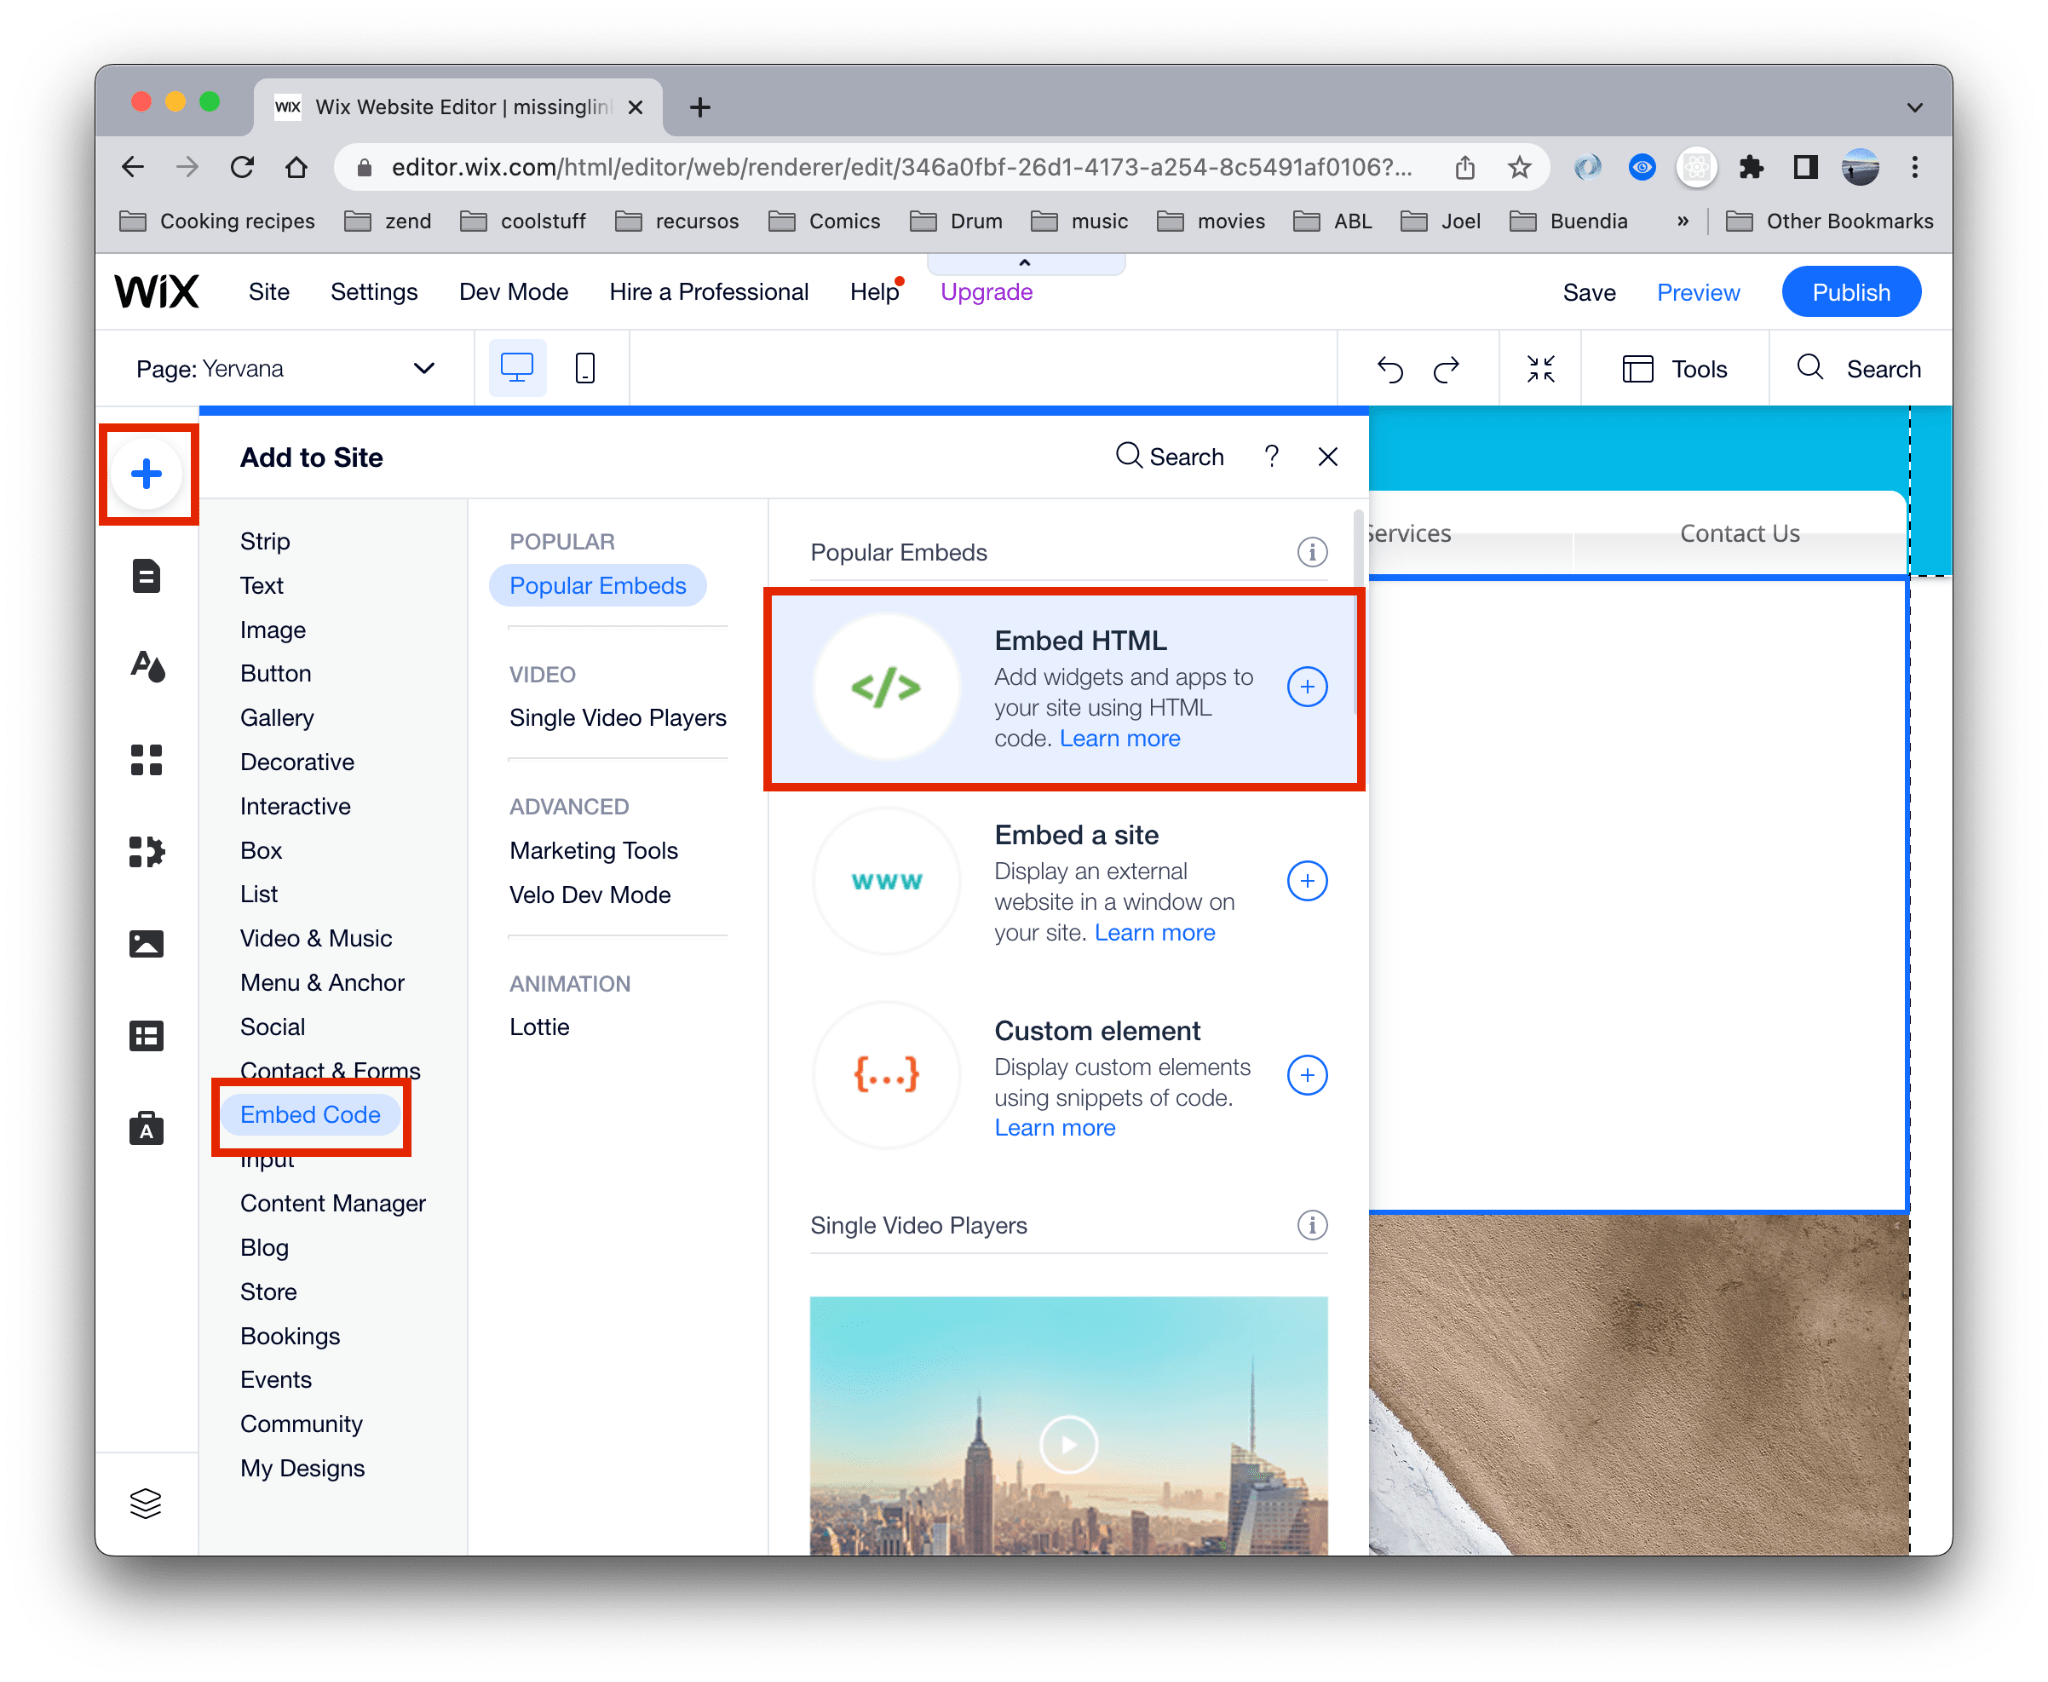
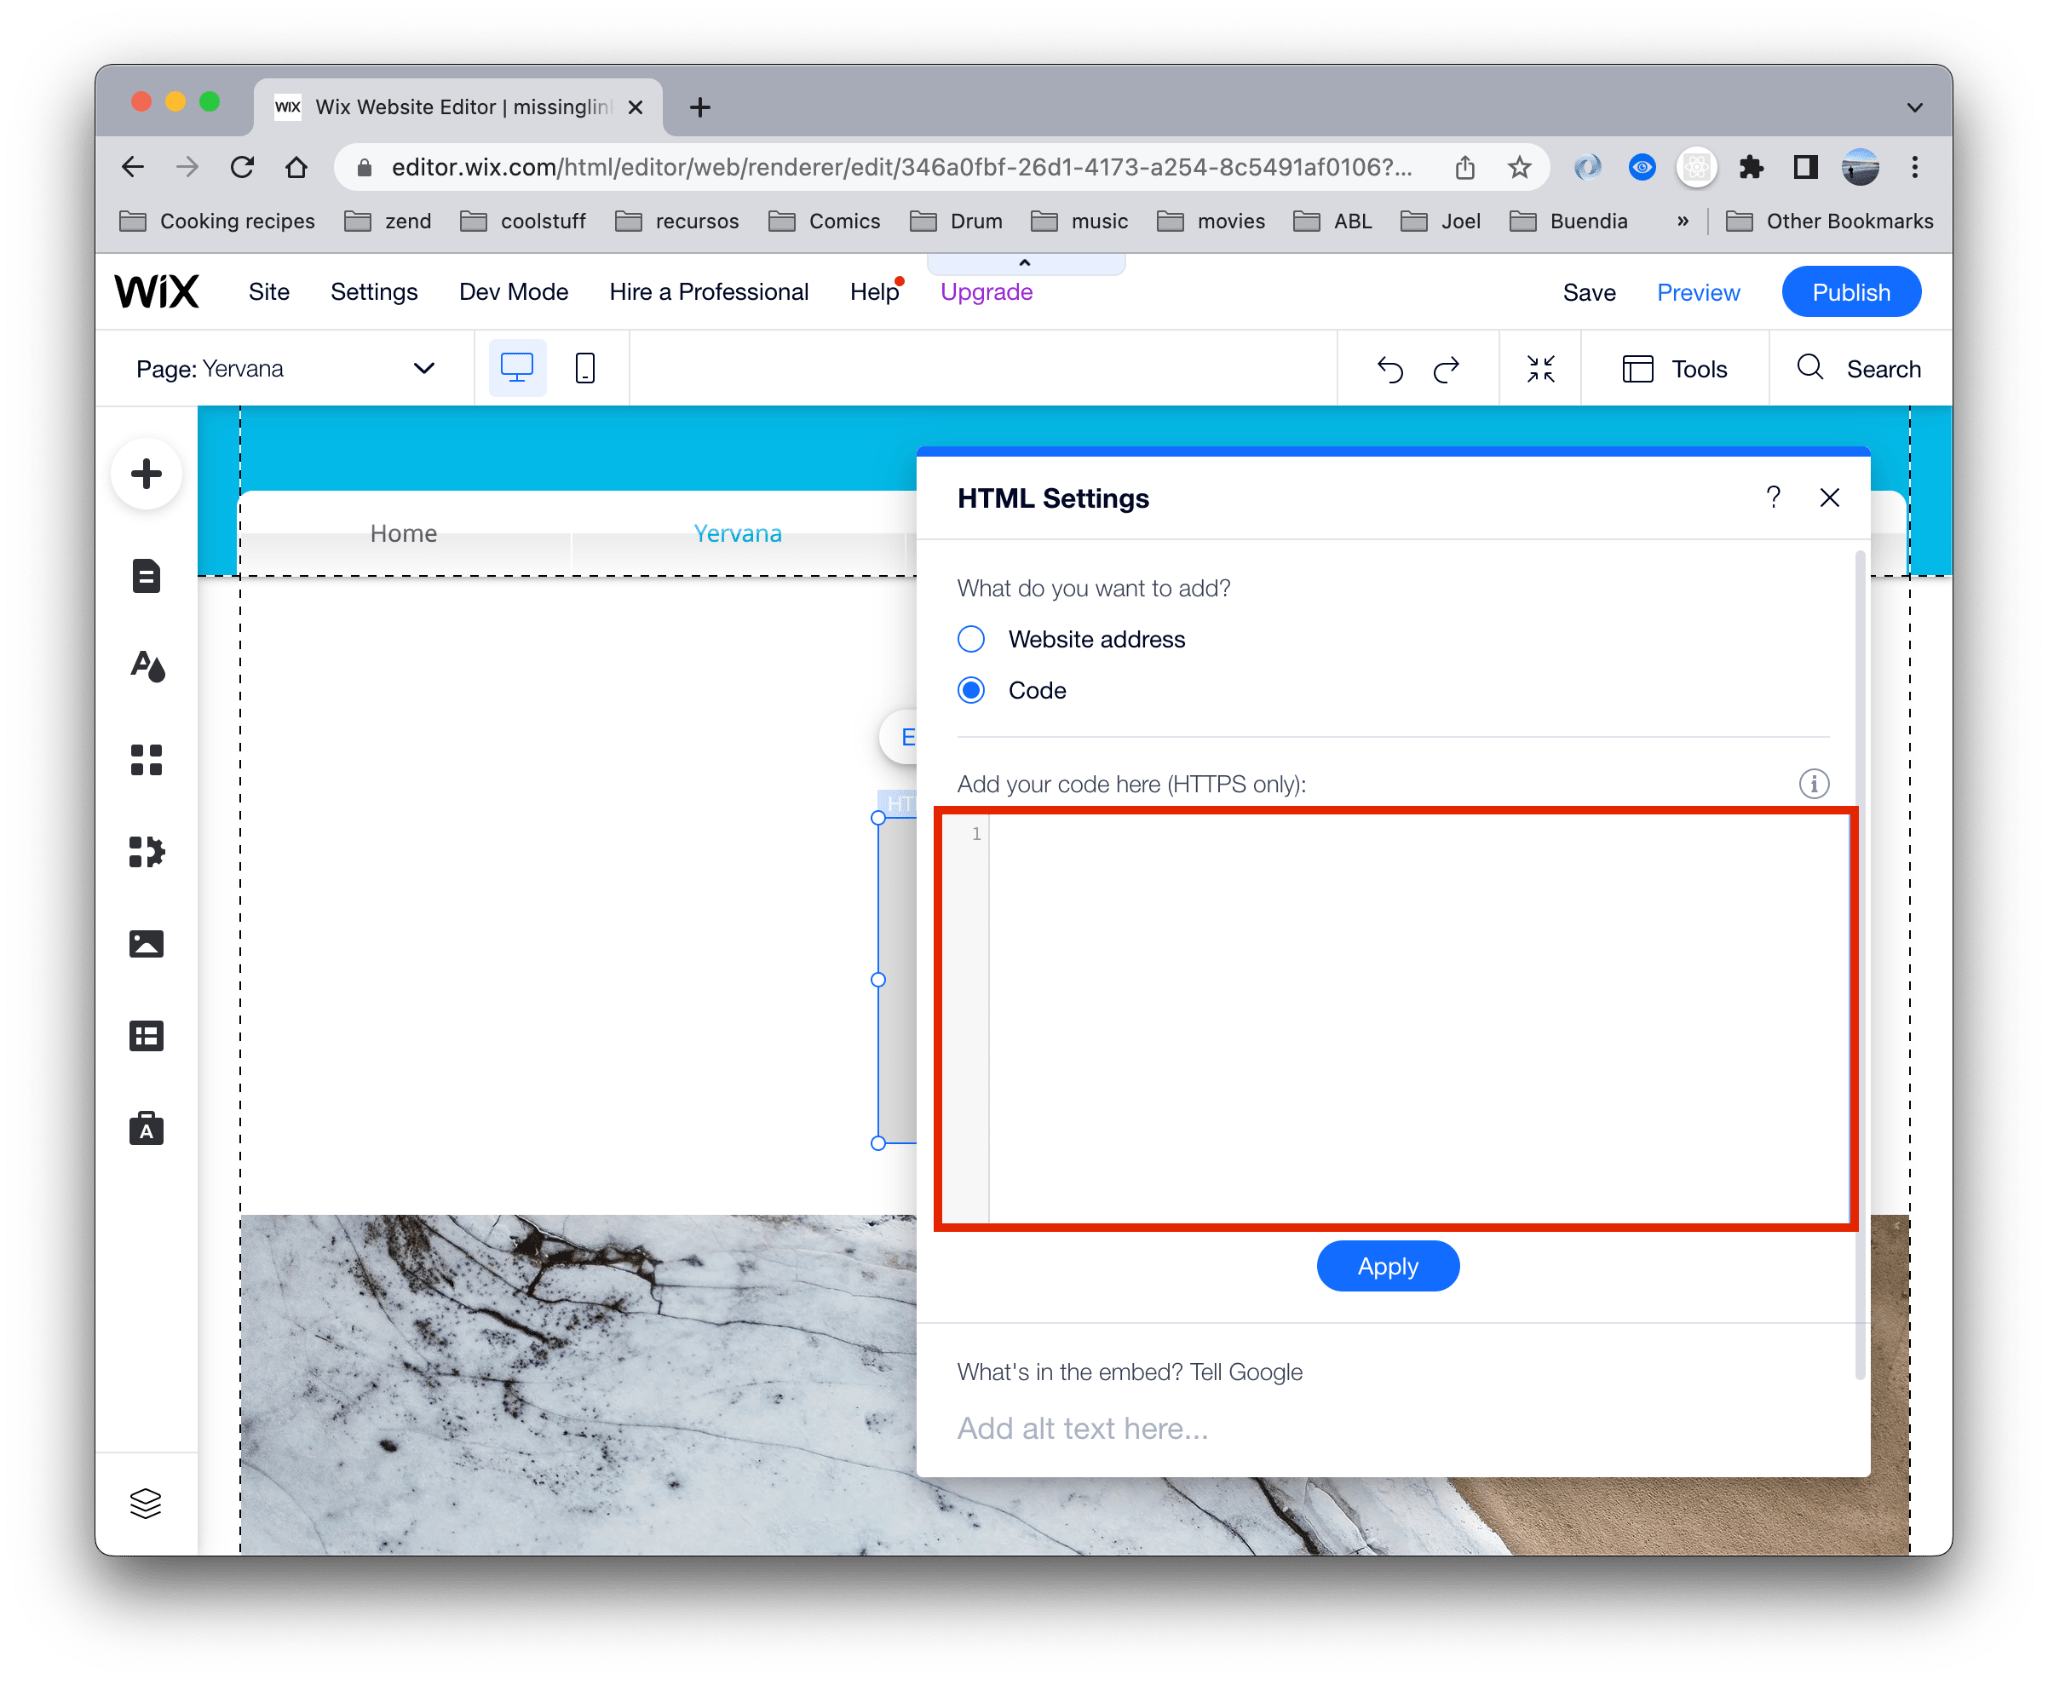
- In the template select the area where you want the widget to go and add an Embed HTML component. Click + button, then Embed Code, then Embed HTML
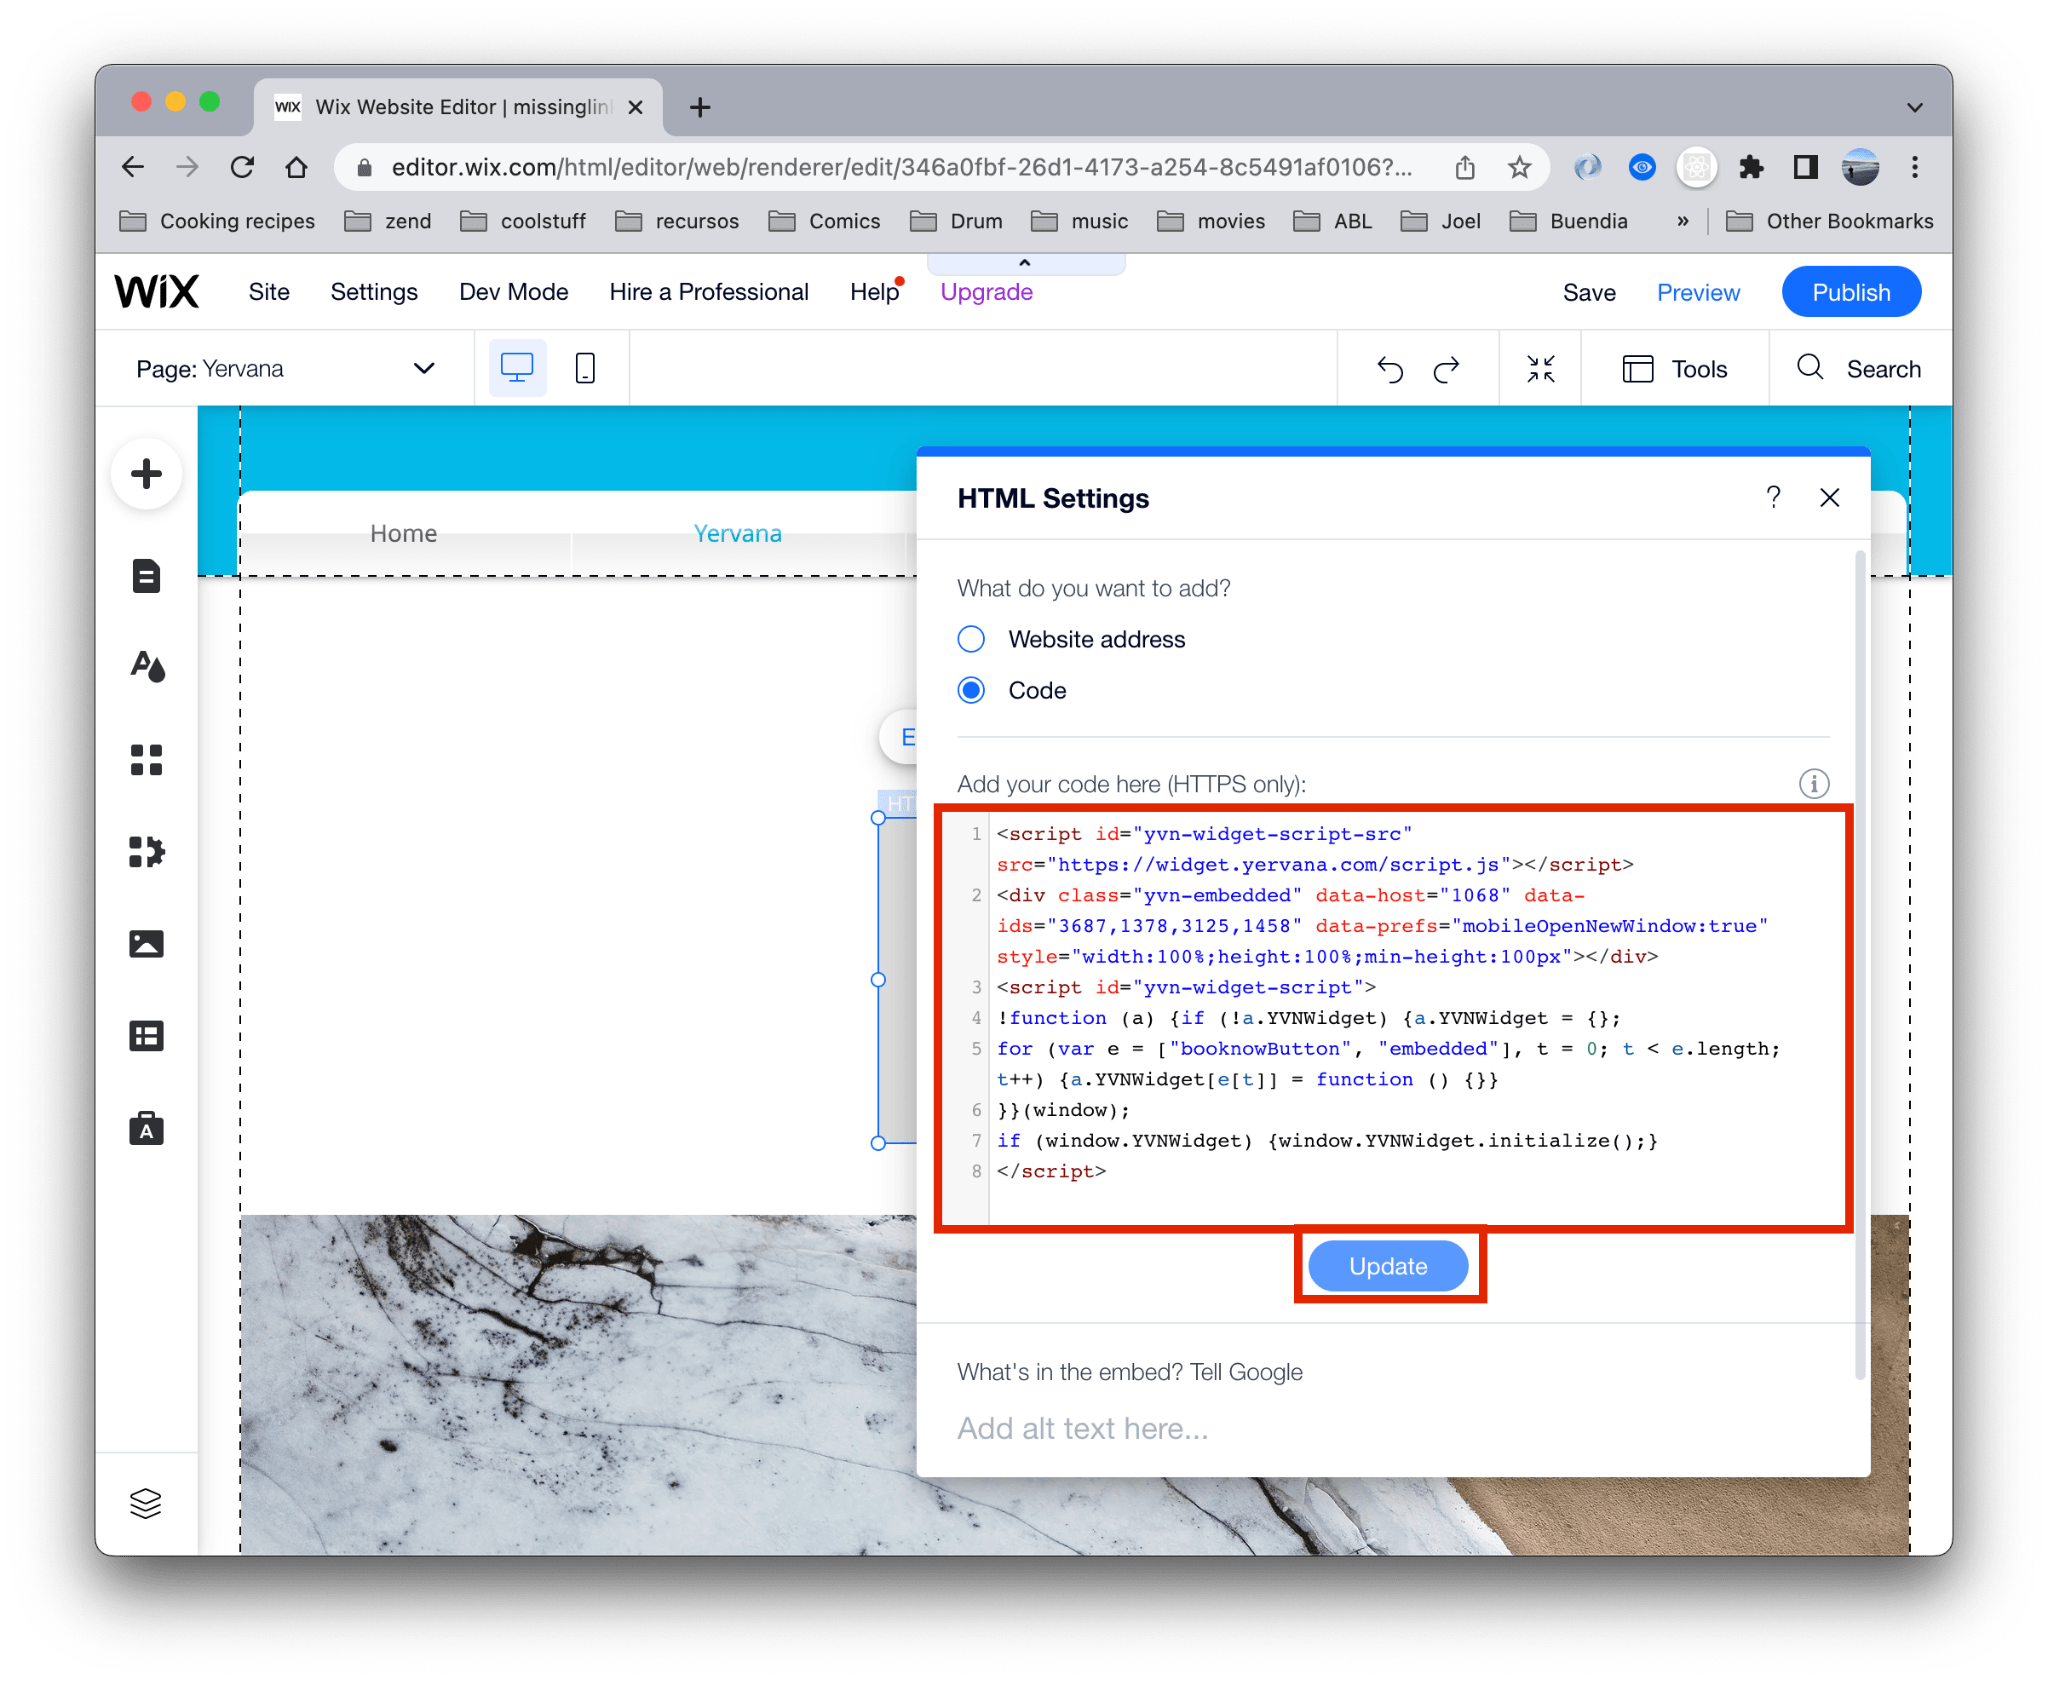
- Once the Embed component is added, a modal window will show up. In the text area paste the injection code generated in your dashboard at yervana.com. Read Yervana Widget Generator
- After copy and pasting the code, click the Update button. The widget should be displayed
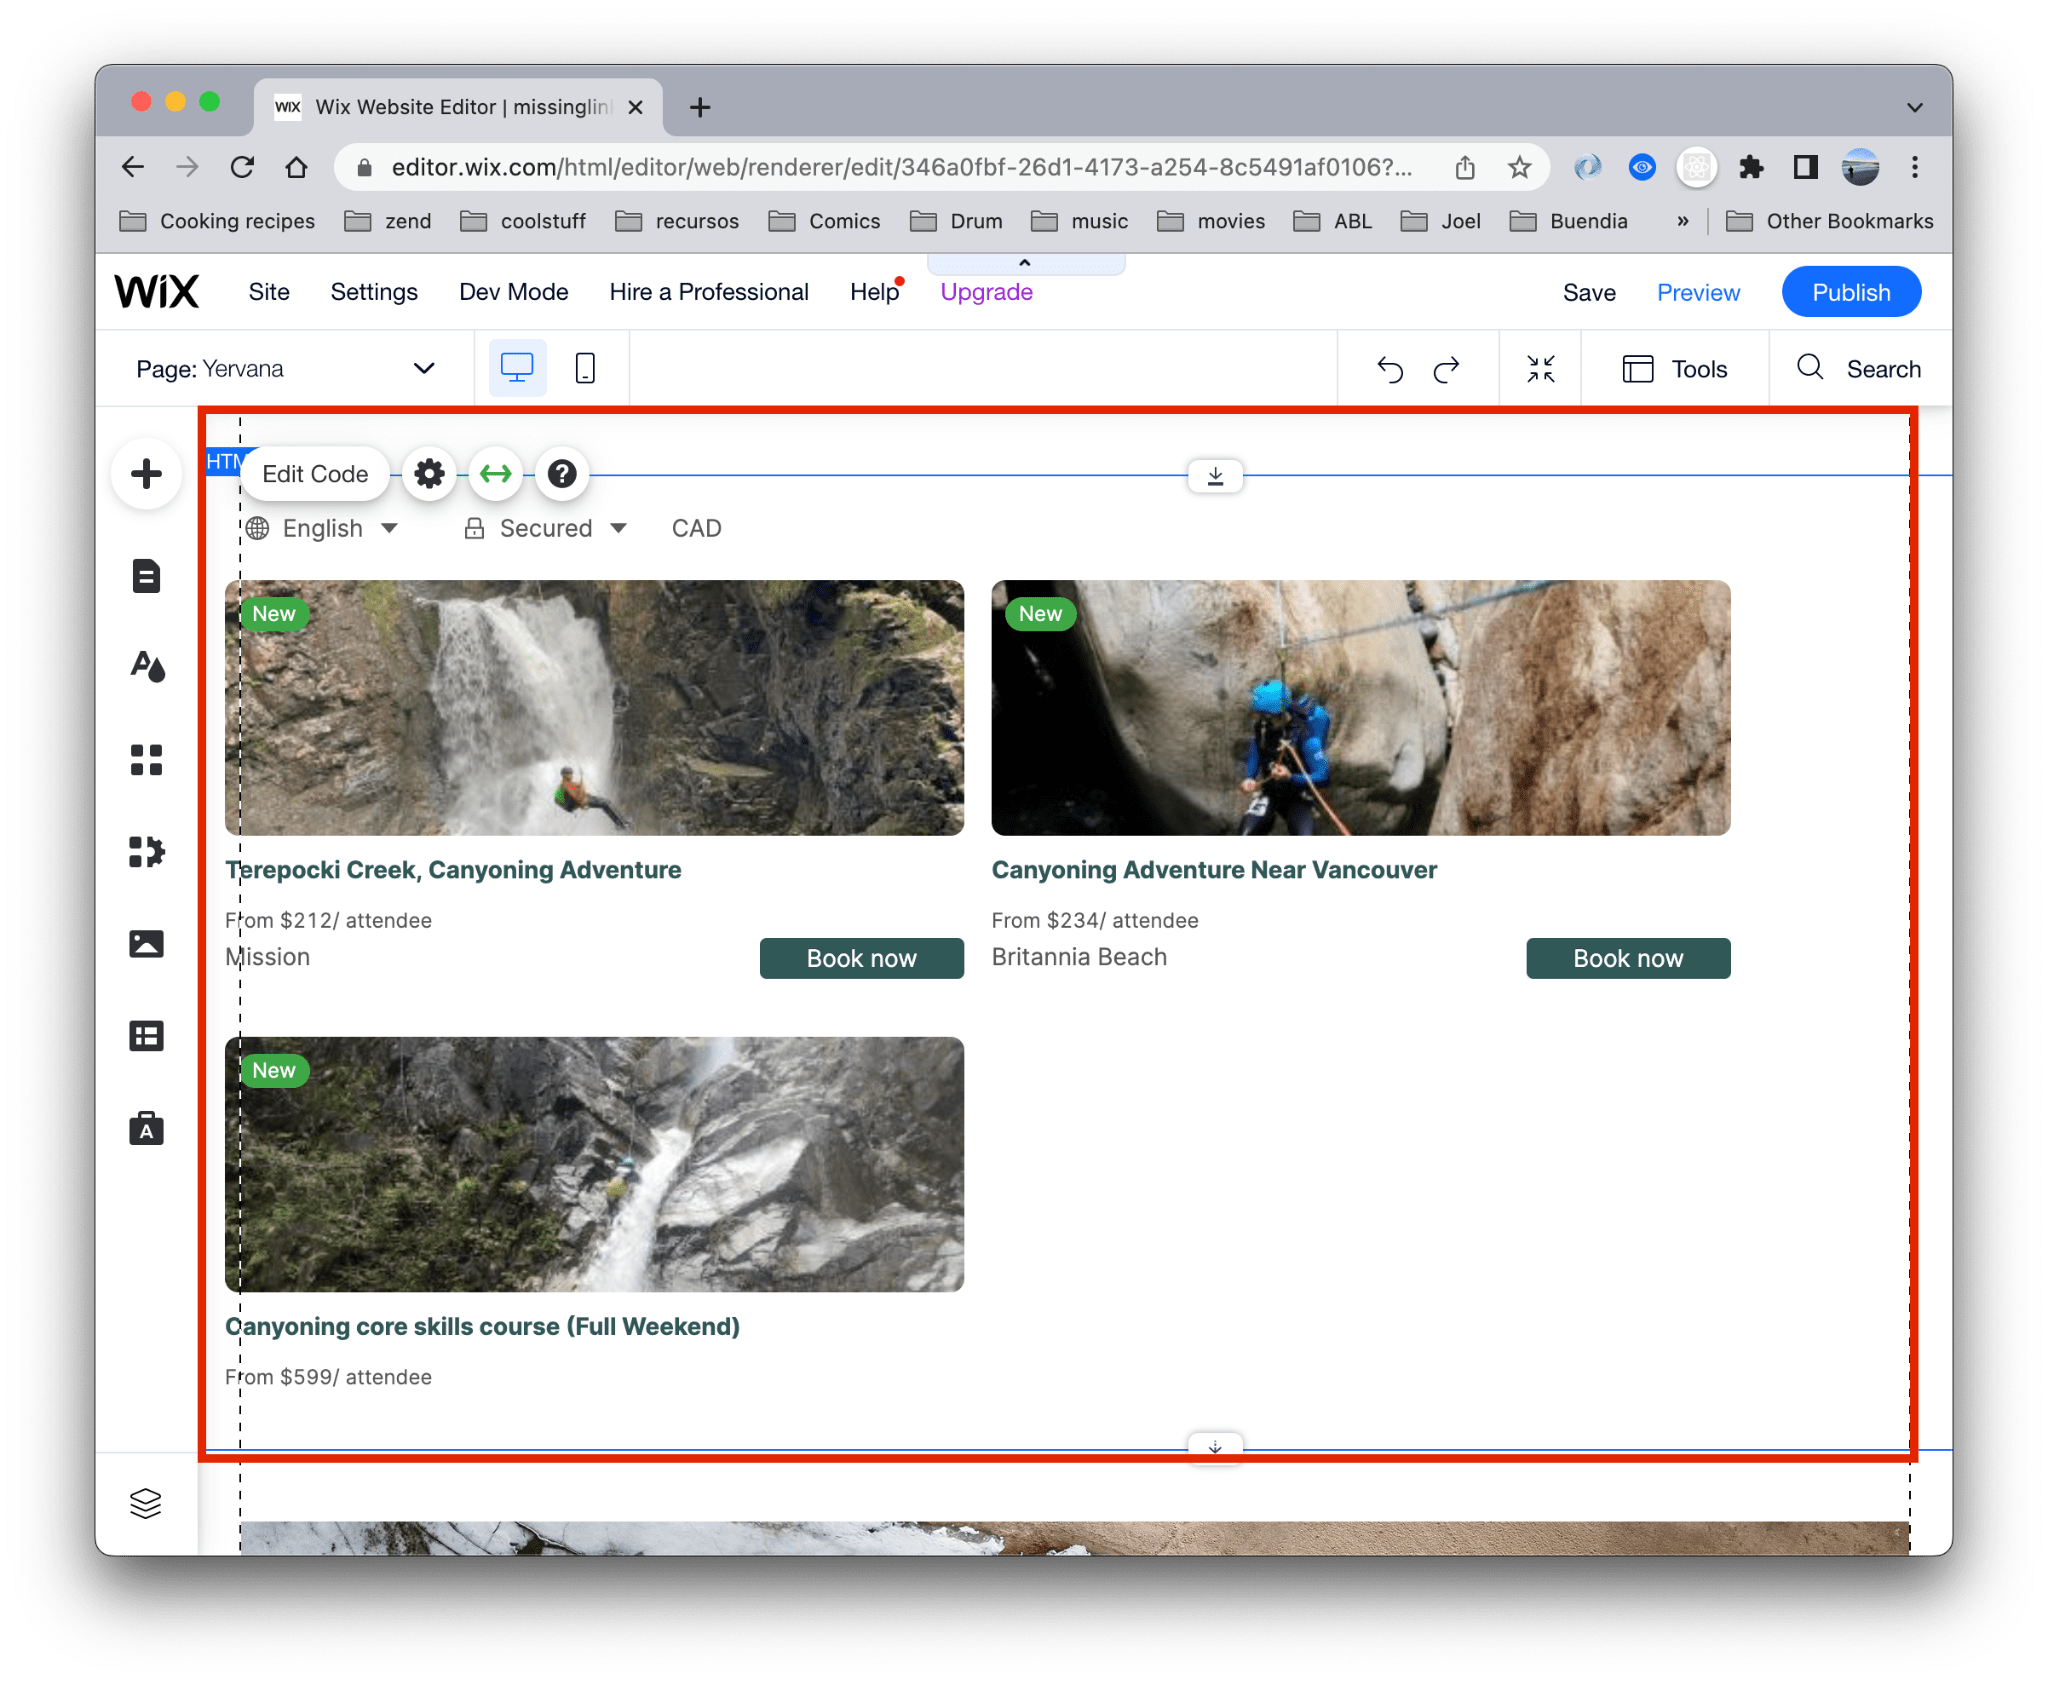
- The Embed component will look smaller. Use the handlers to adjust the size of the widget.

- After resizing the component, the widget should start looking like the image below
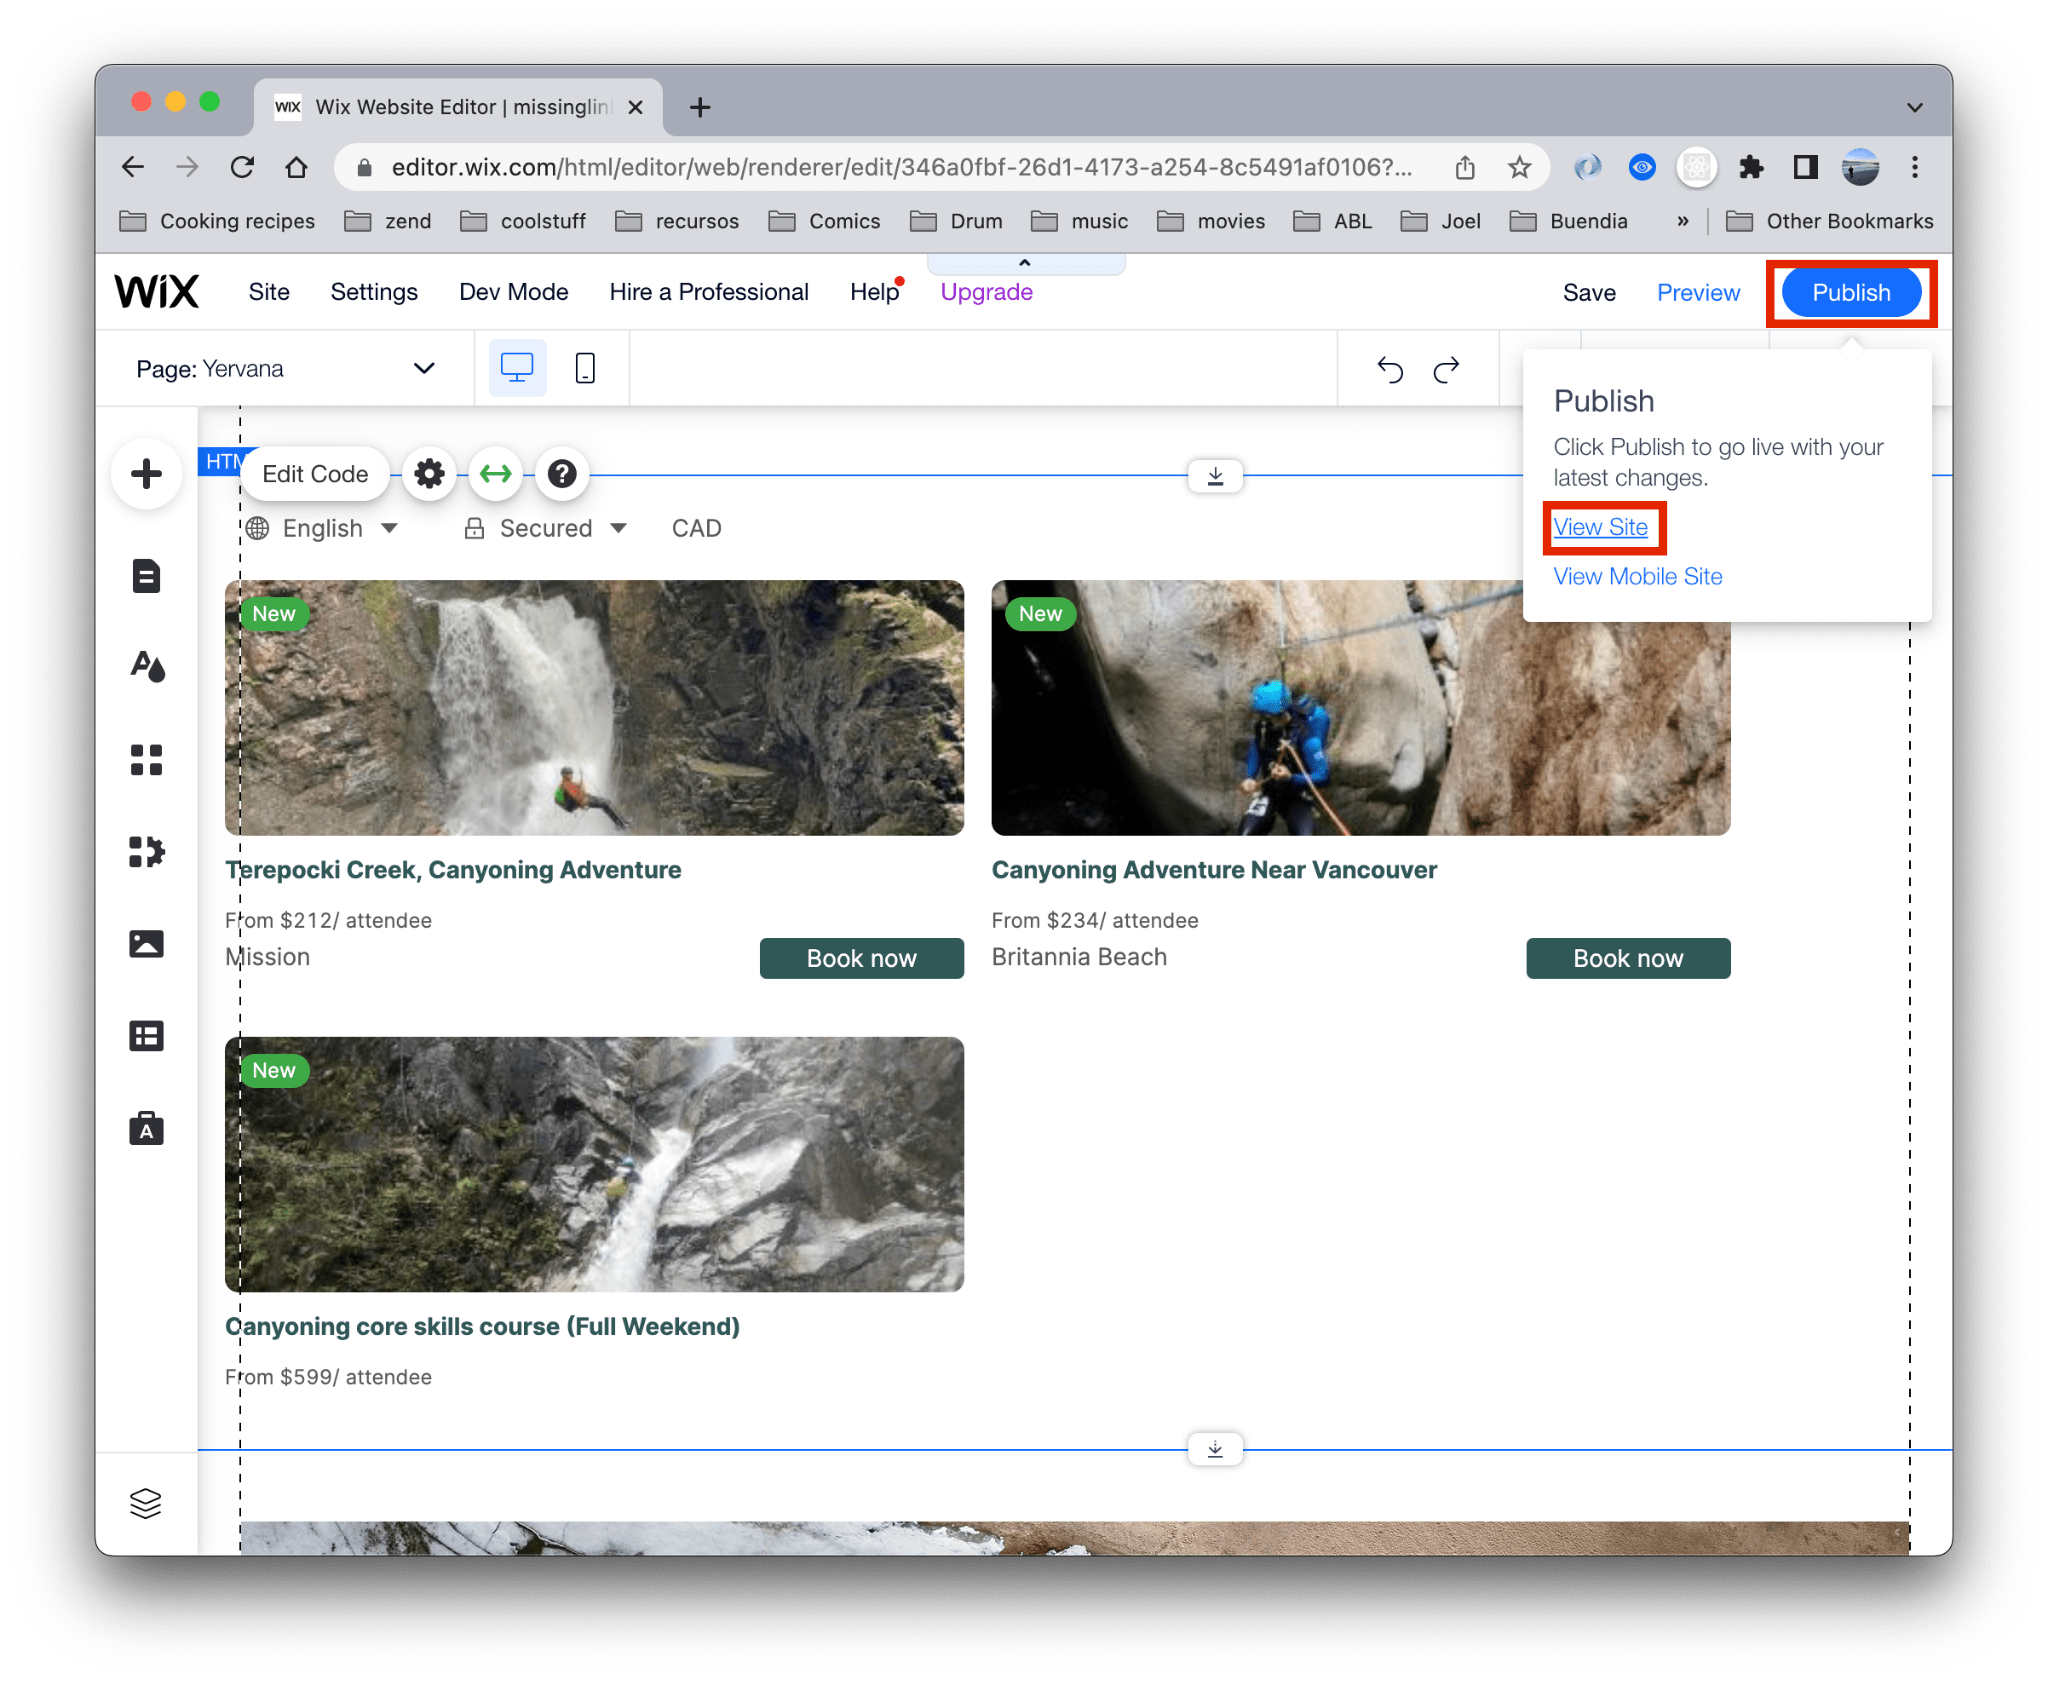
- When the installation of the widget is working, publish the changes by clicking the Publish button and click View Site link
WordPress
- Create/Edit a post or a page. Click Text tab
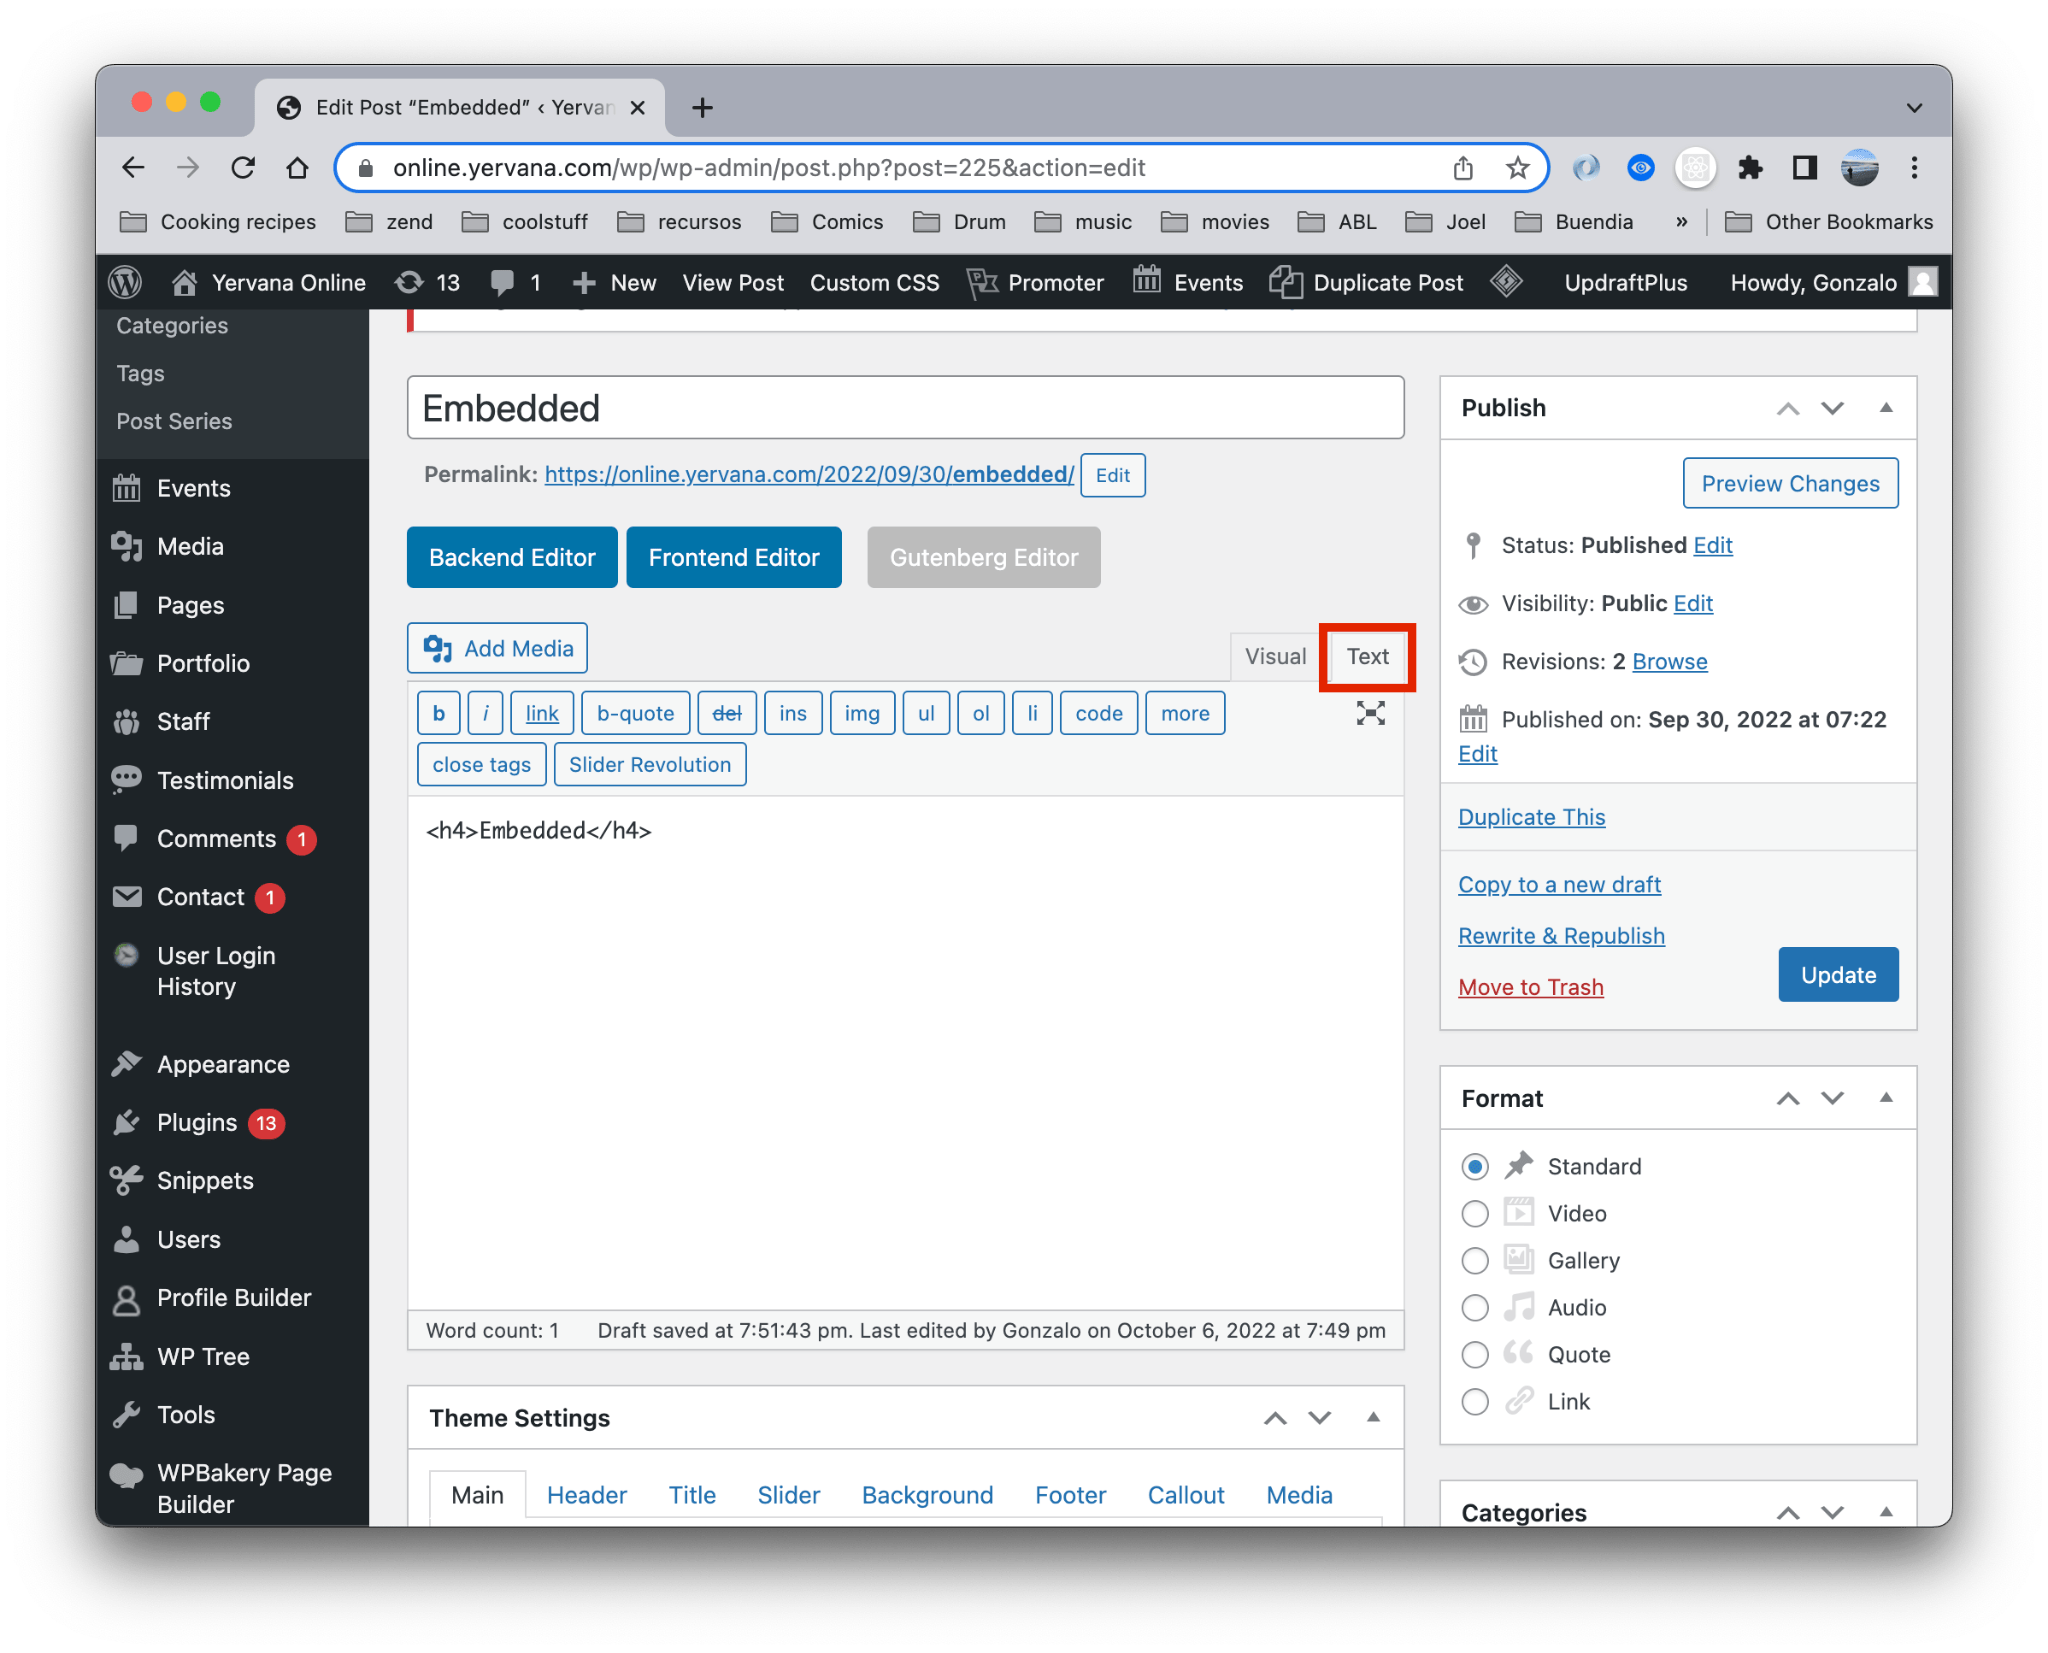
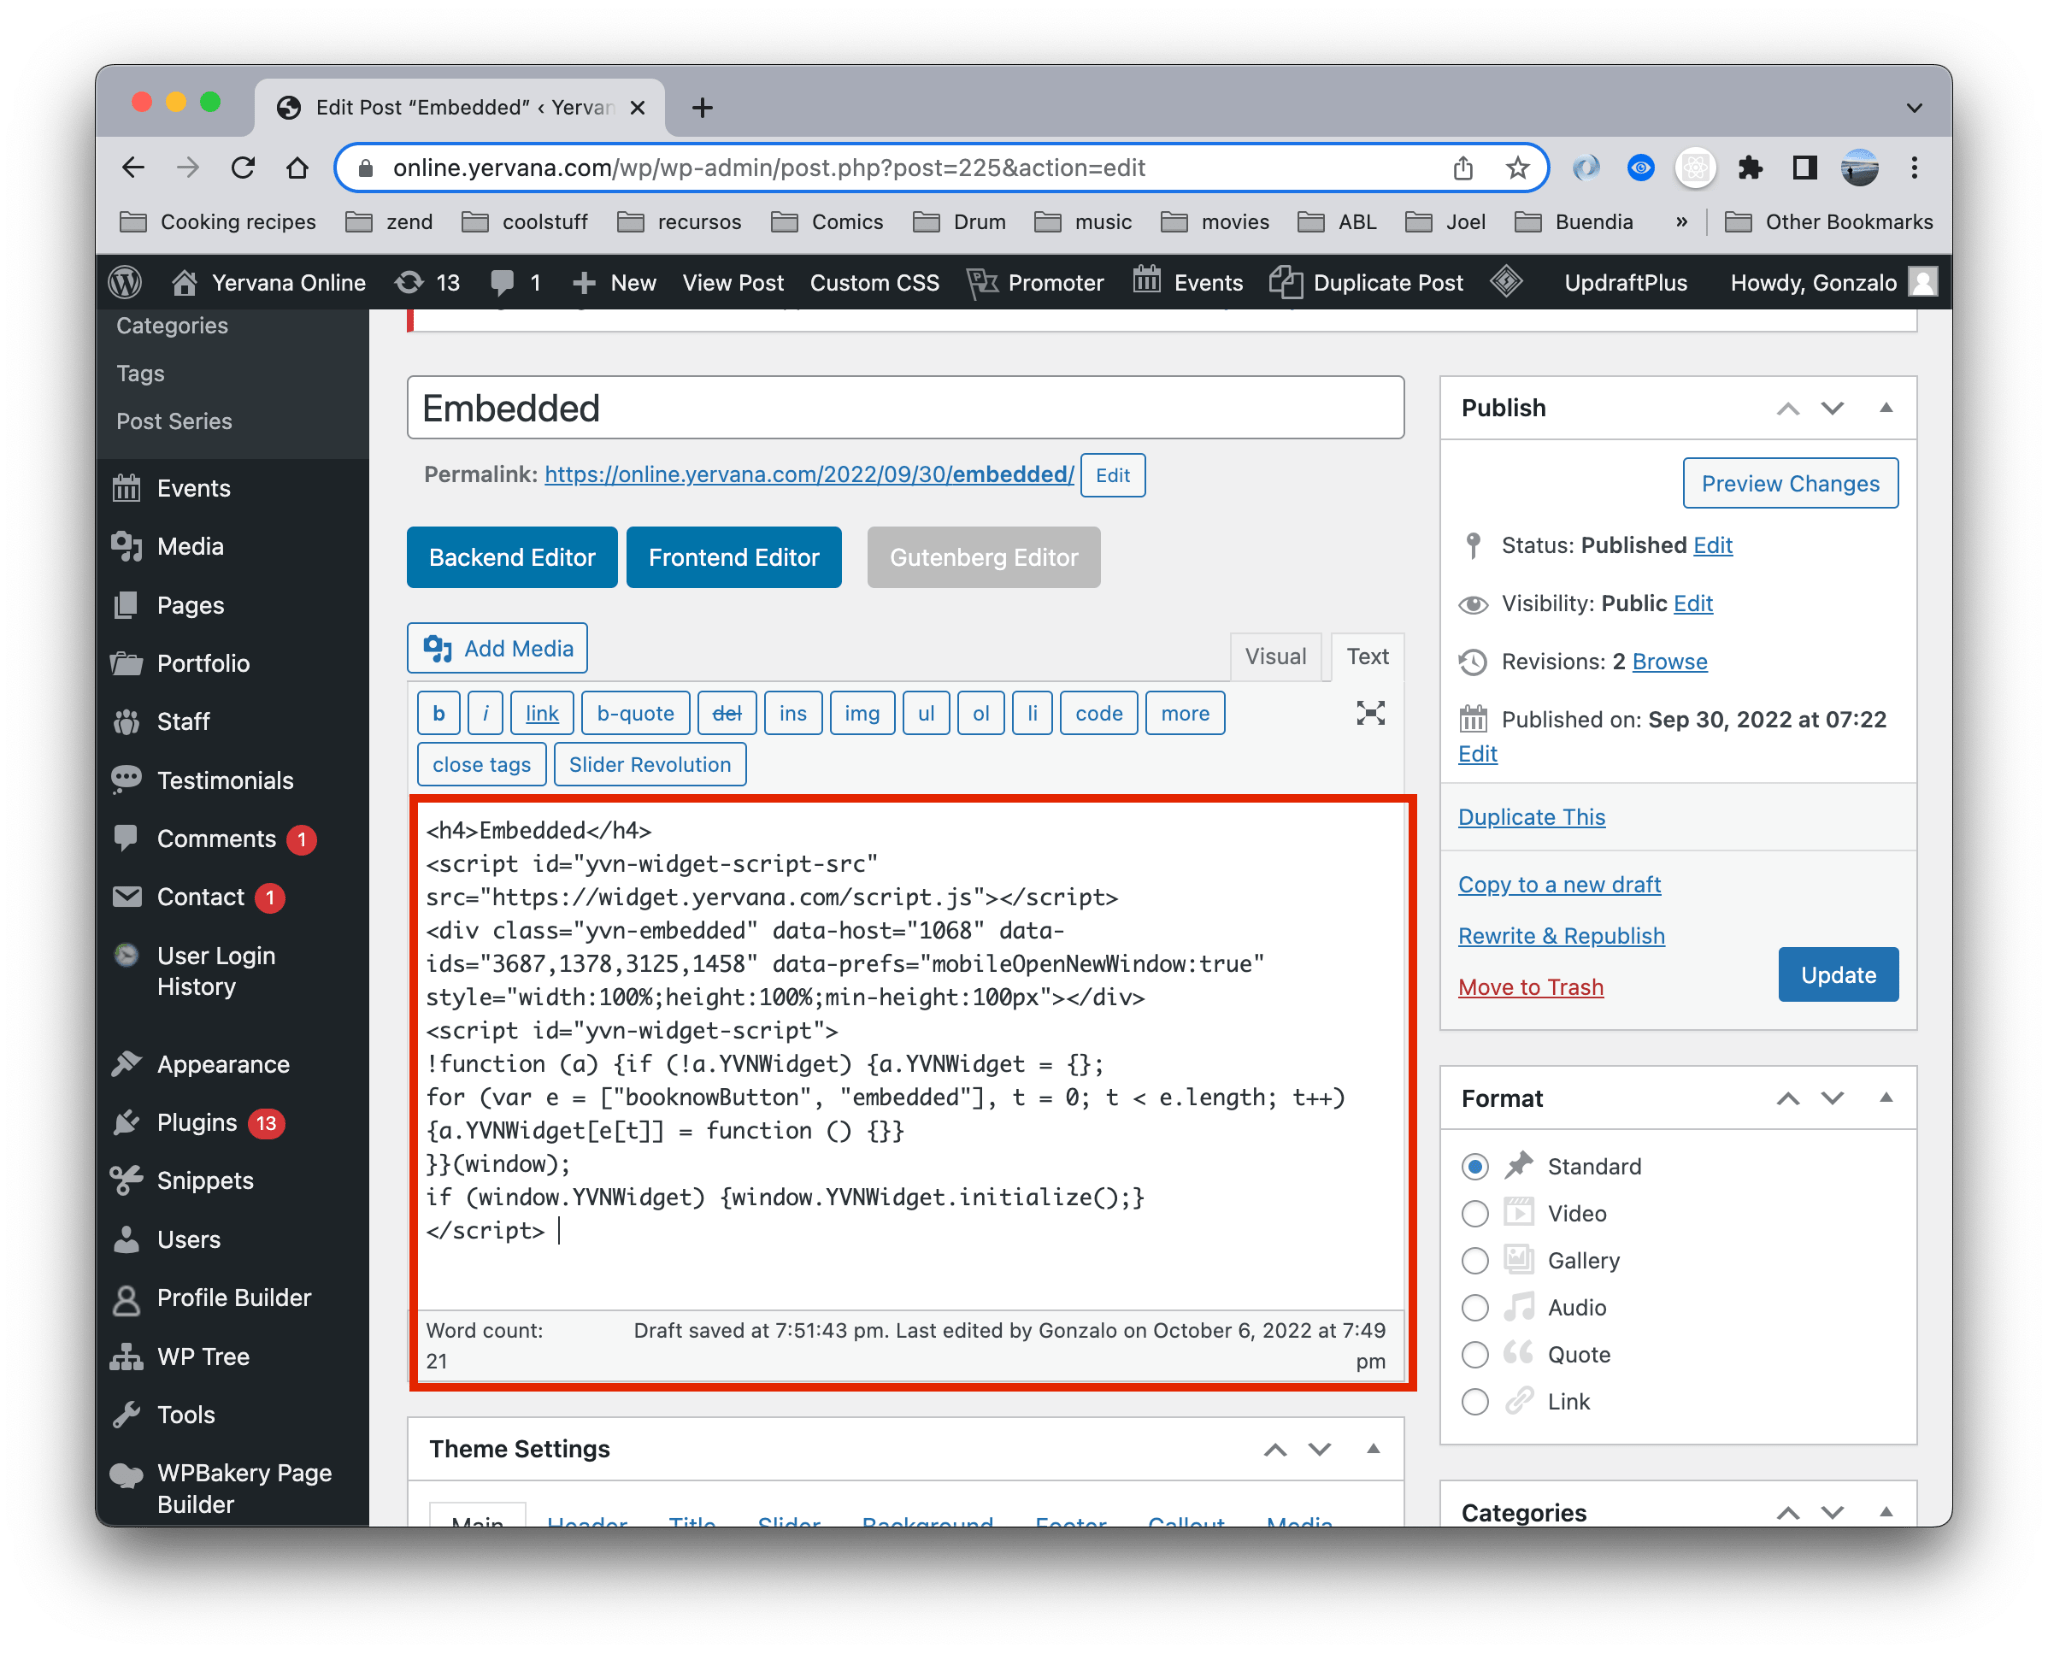
- In the text area paste the code generated in your dashboard at yervana.com. Read Yervana Widget Generator
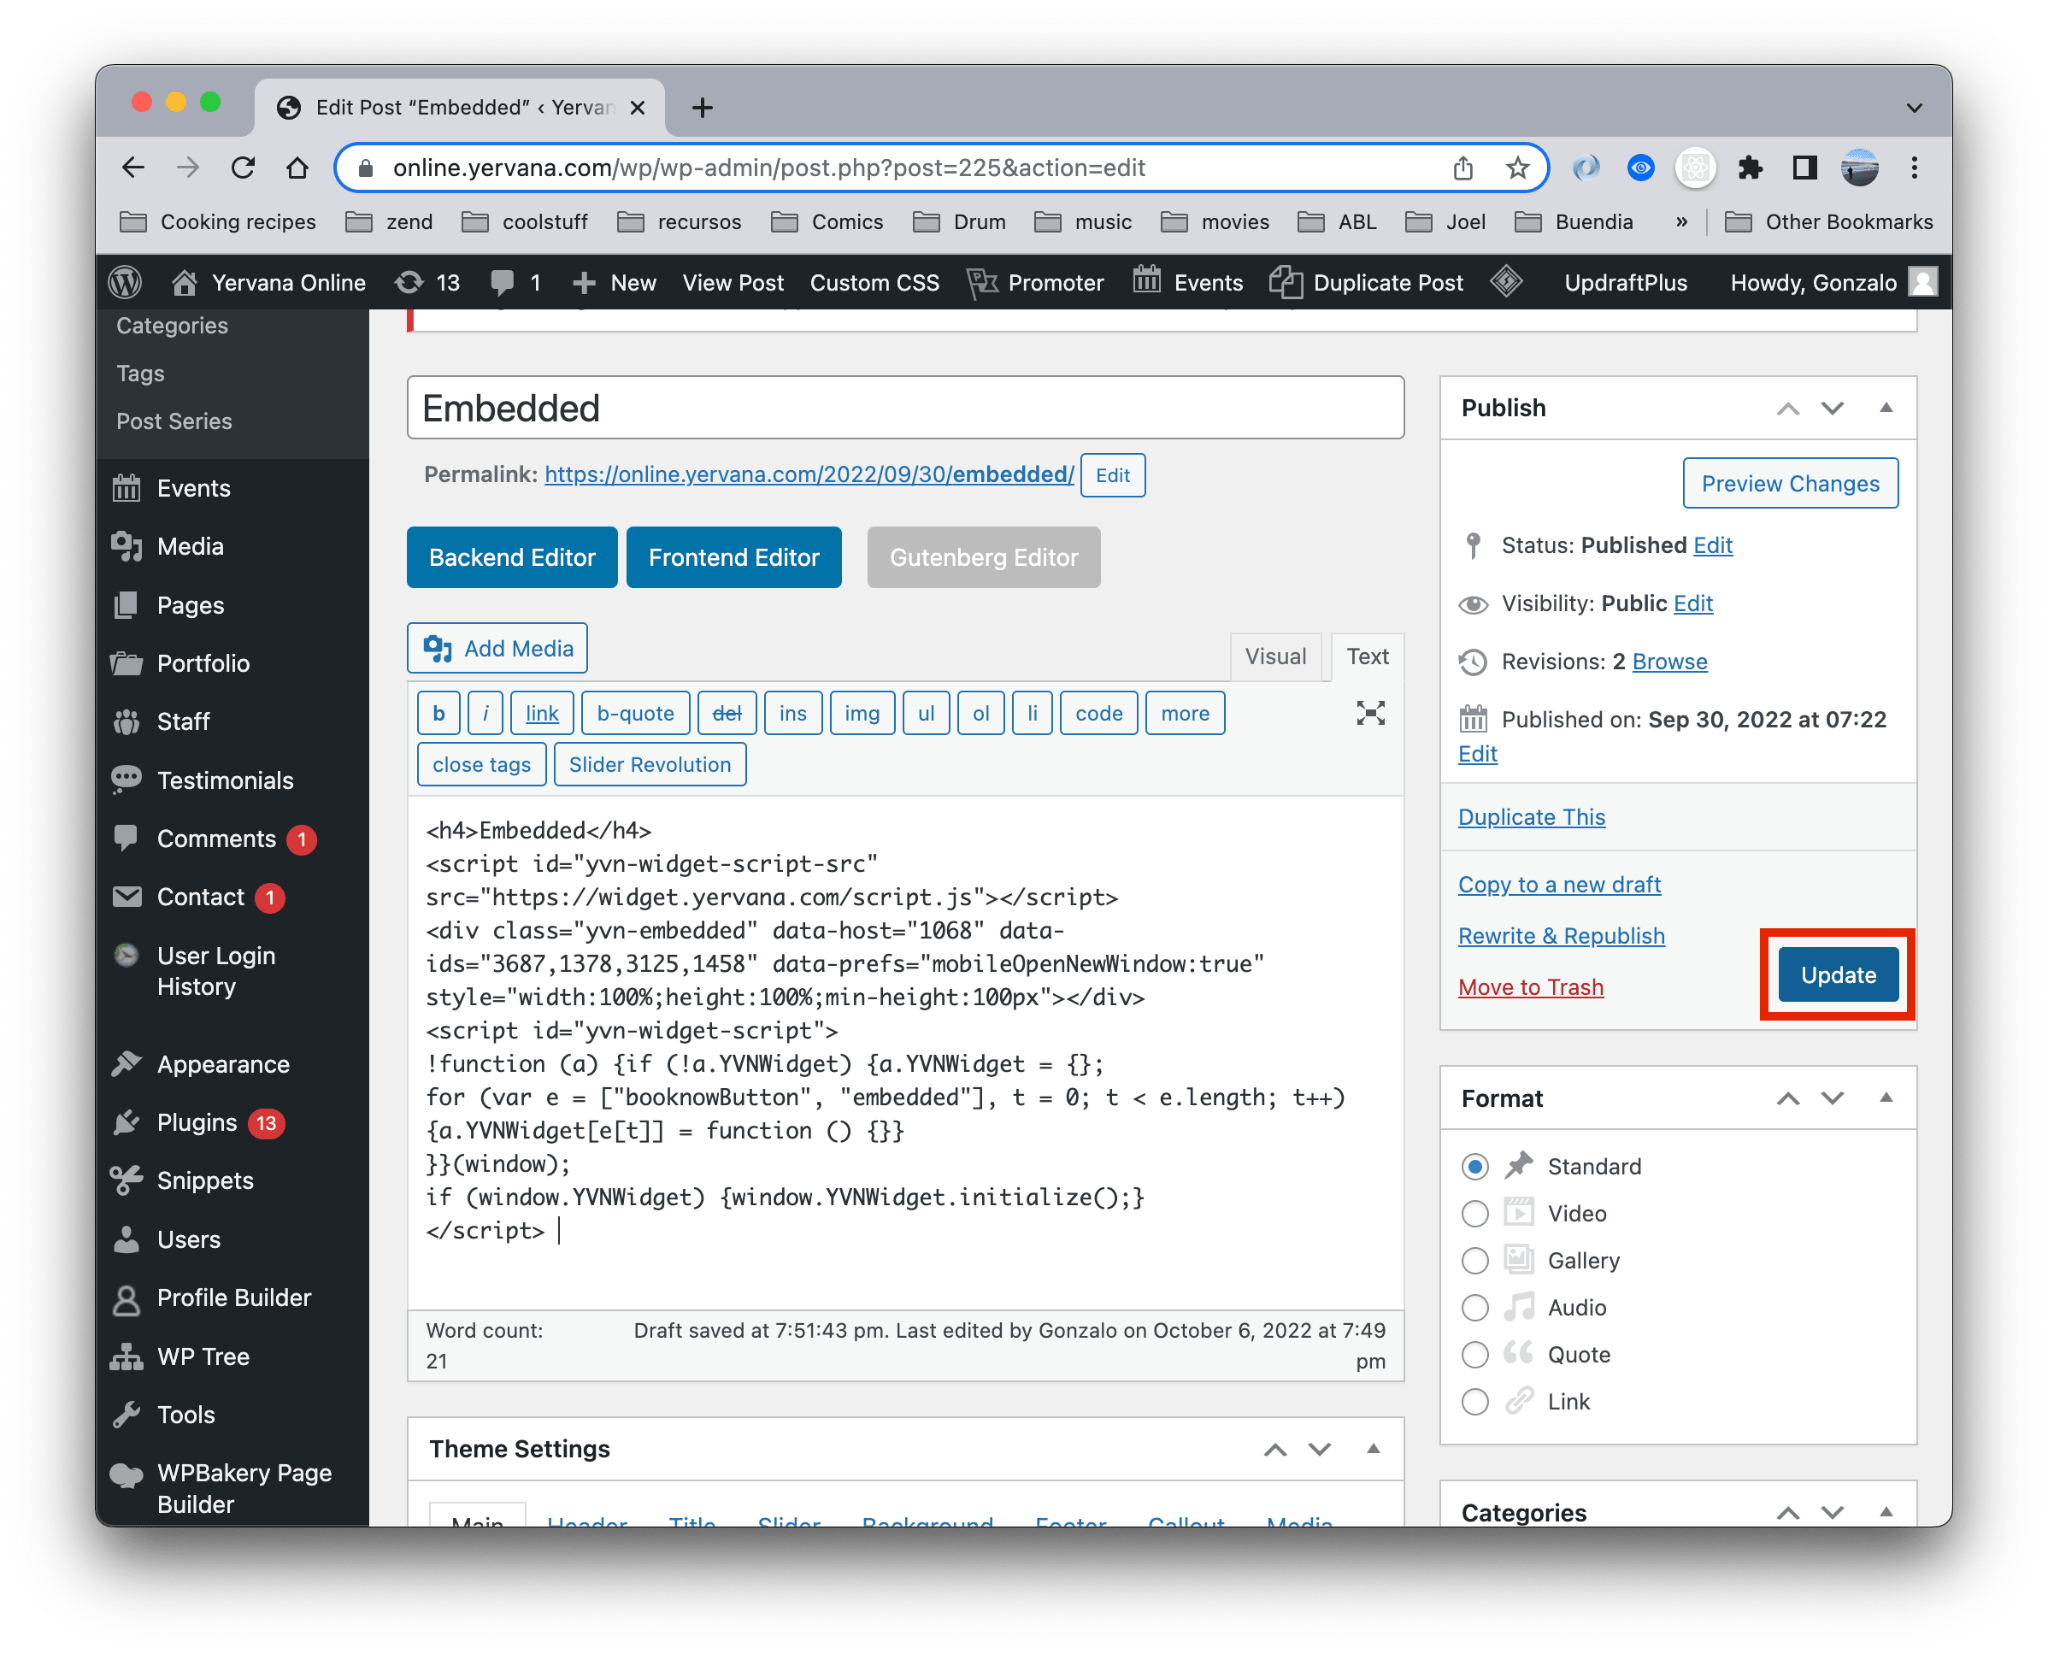
- After copy and pasting the code, click the Update button
- To preview click View post link
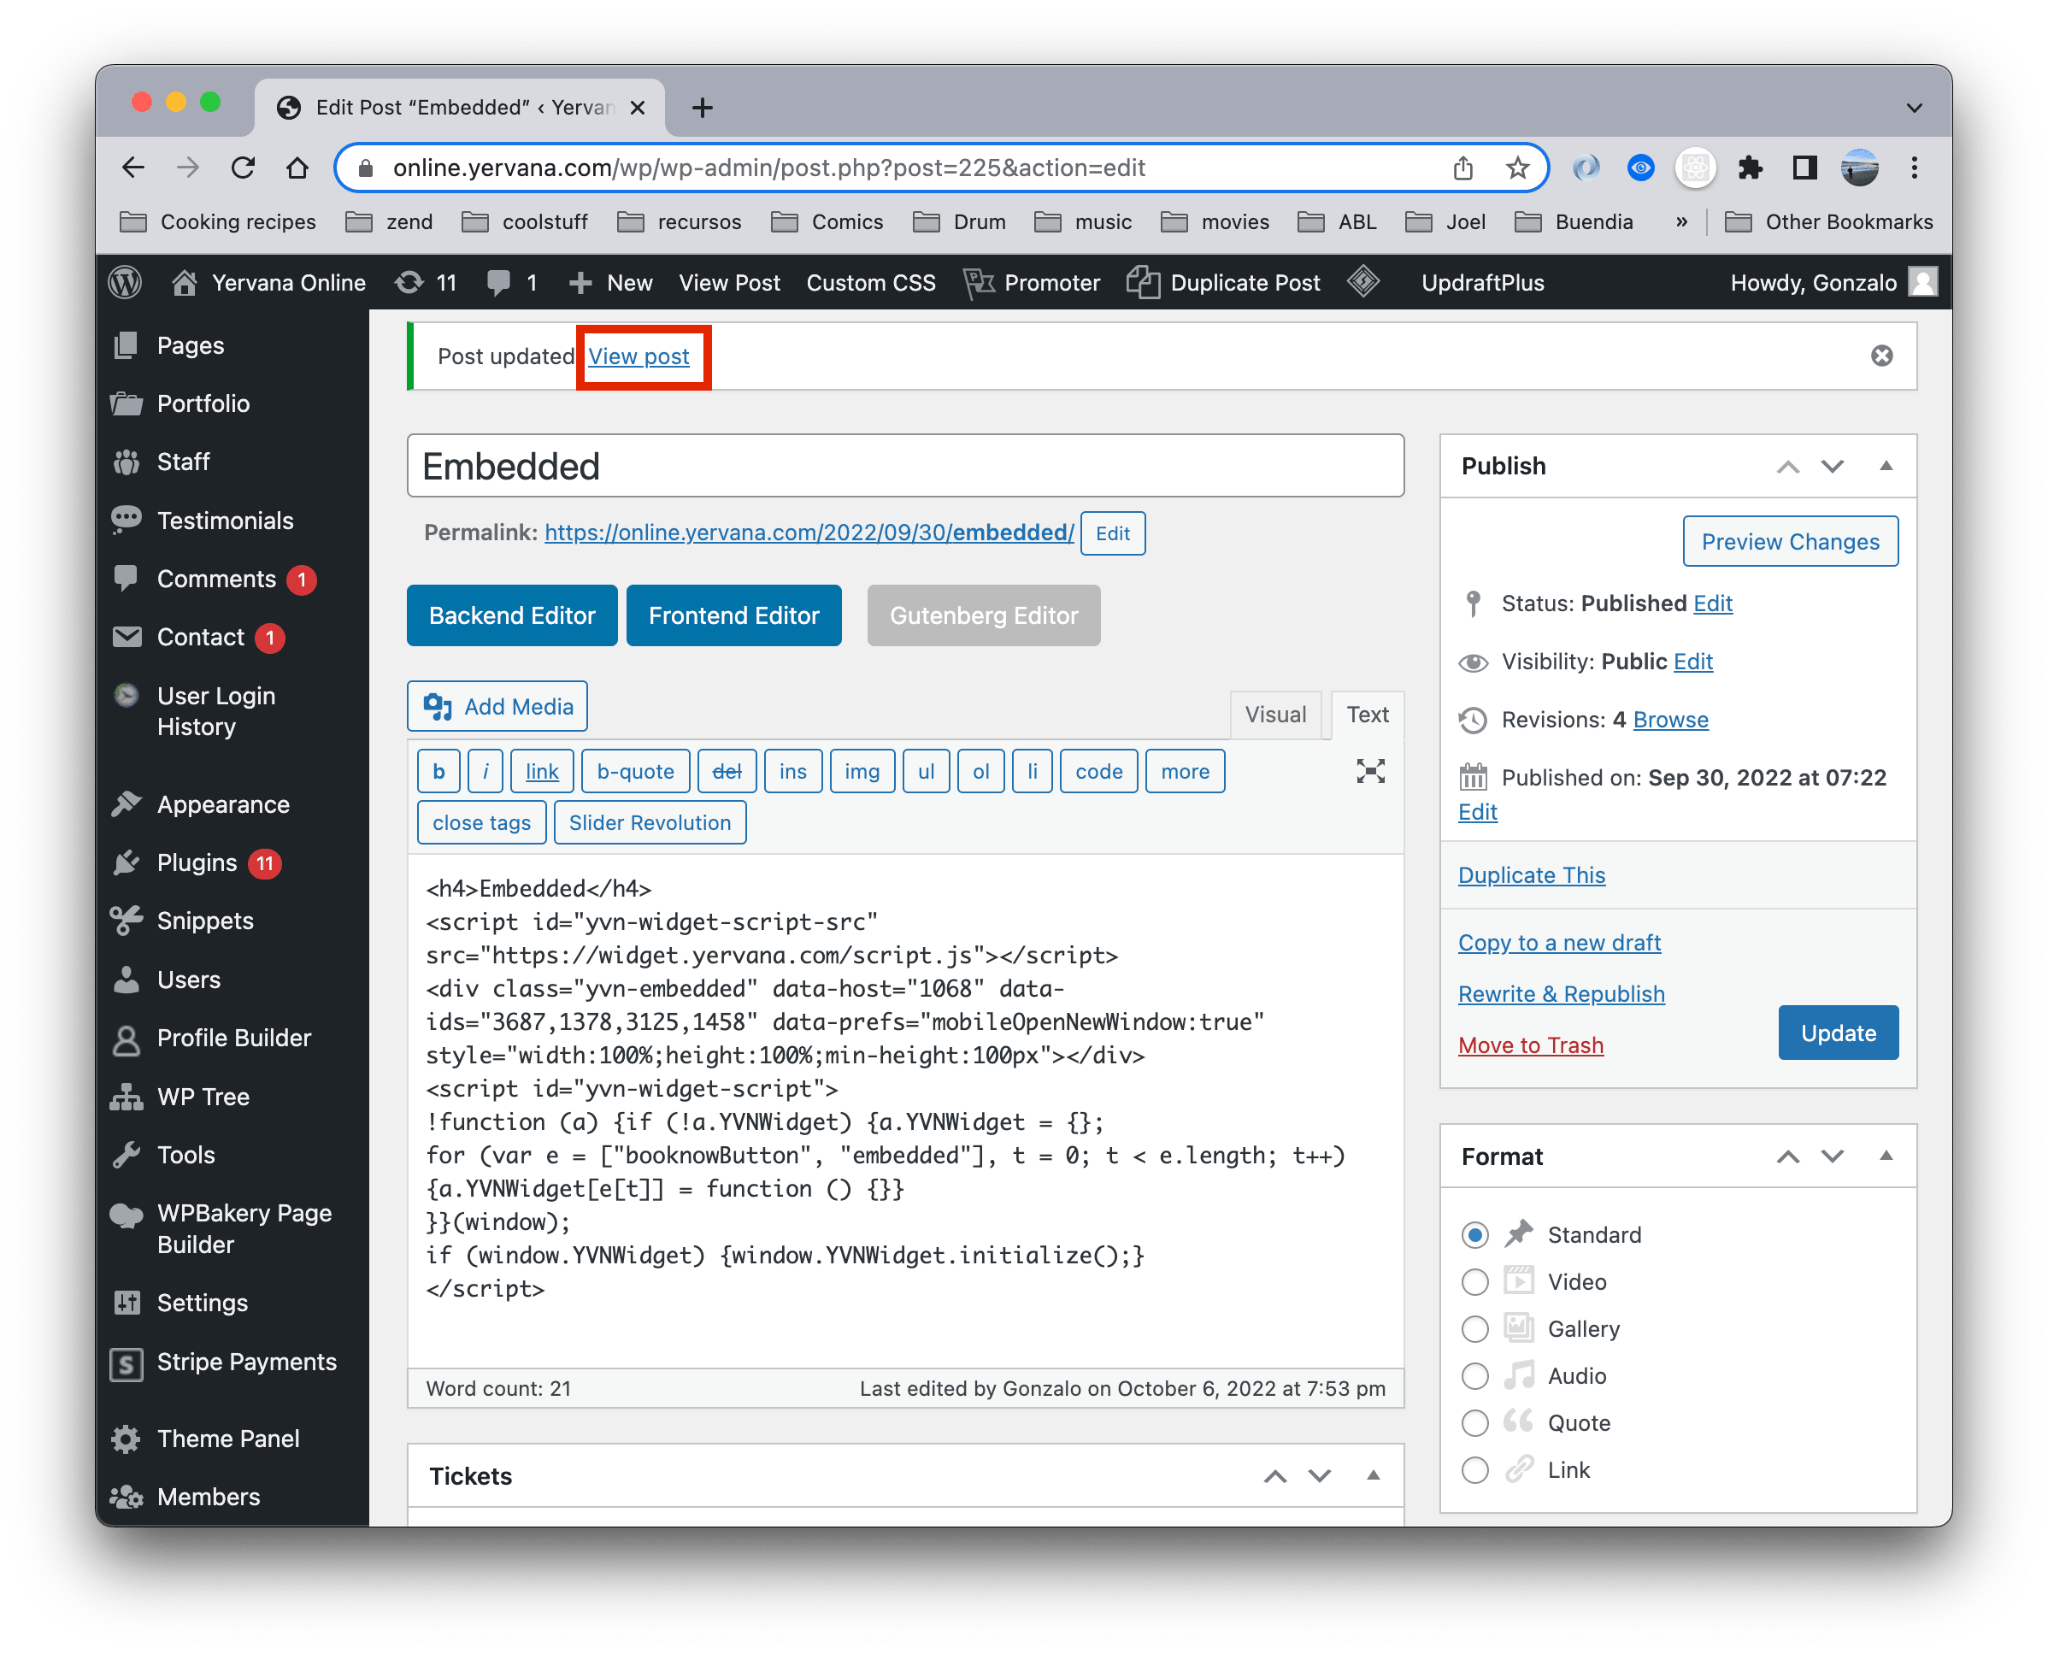
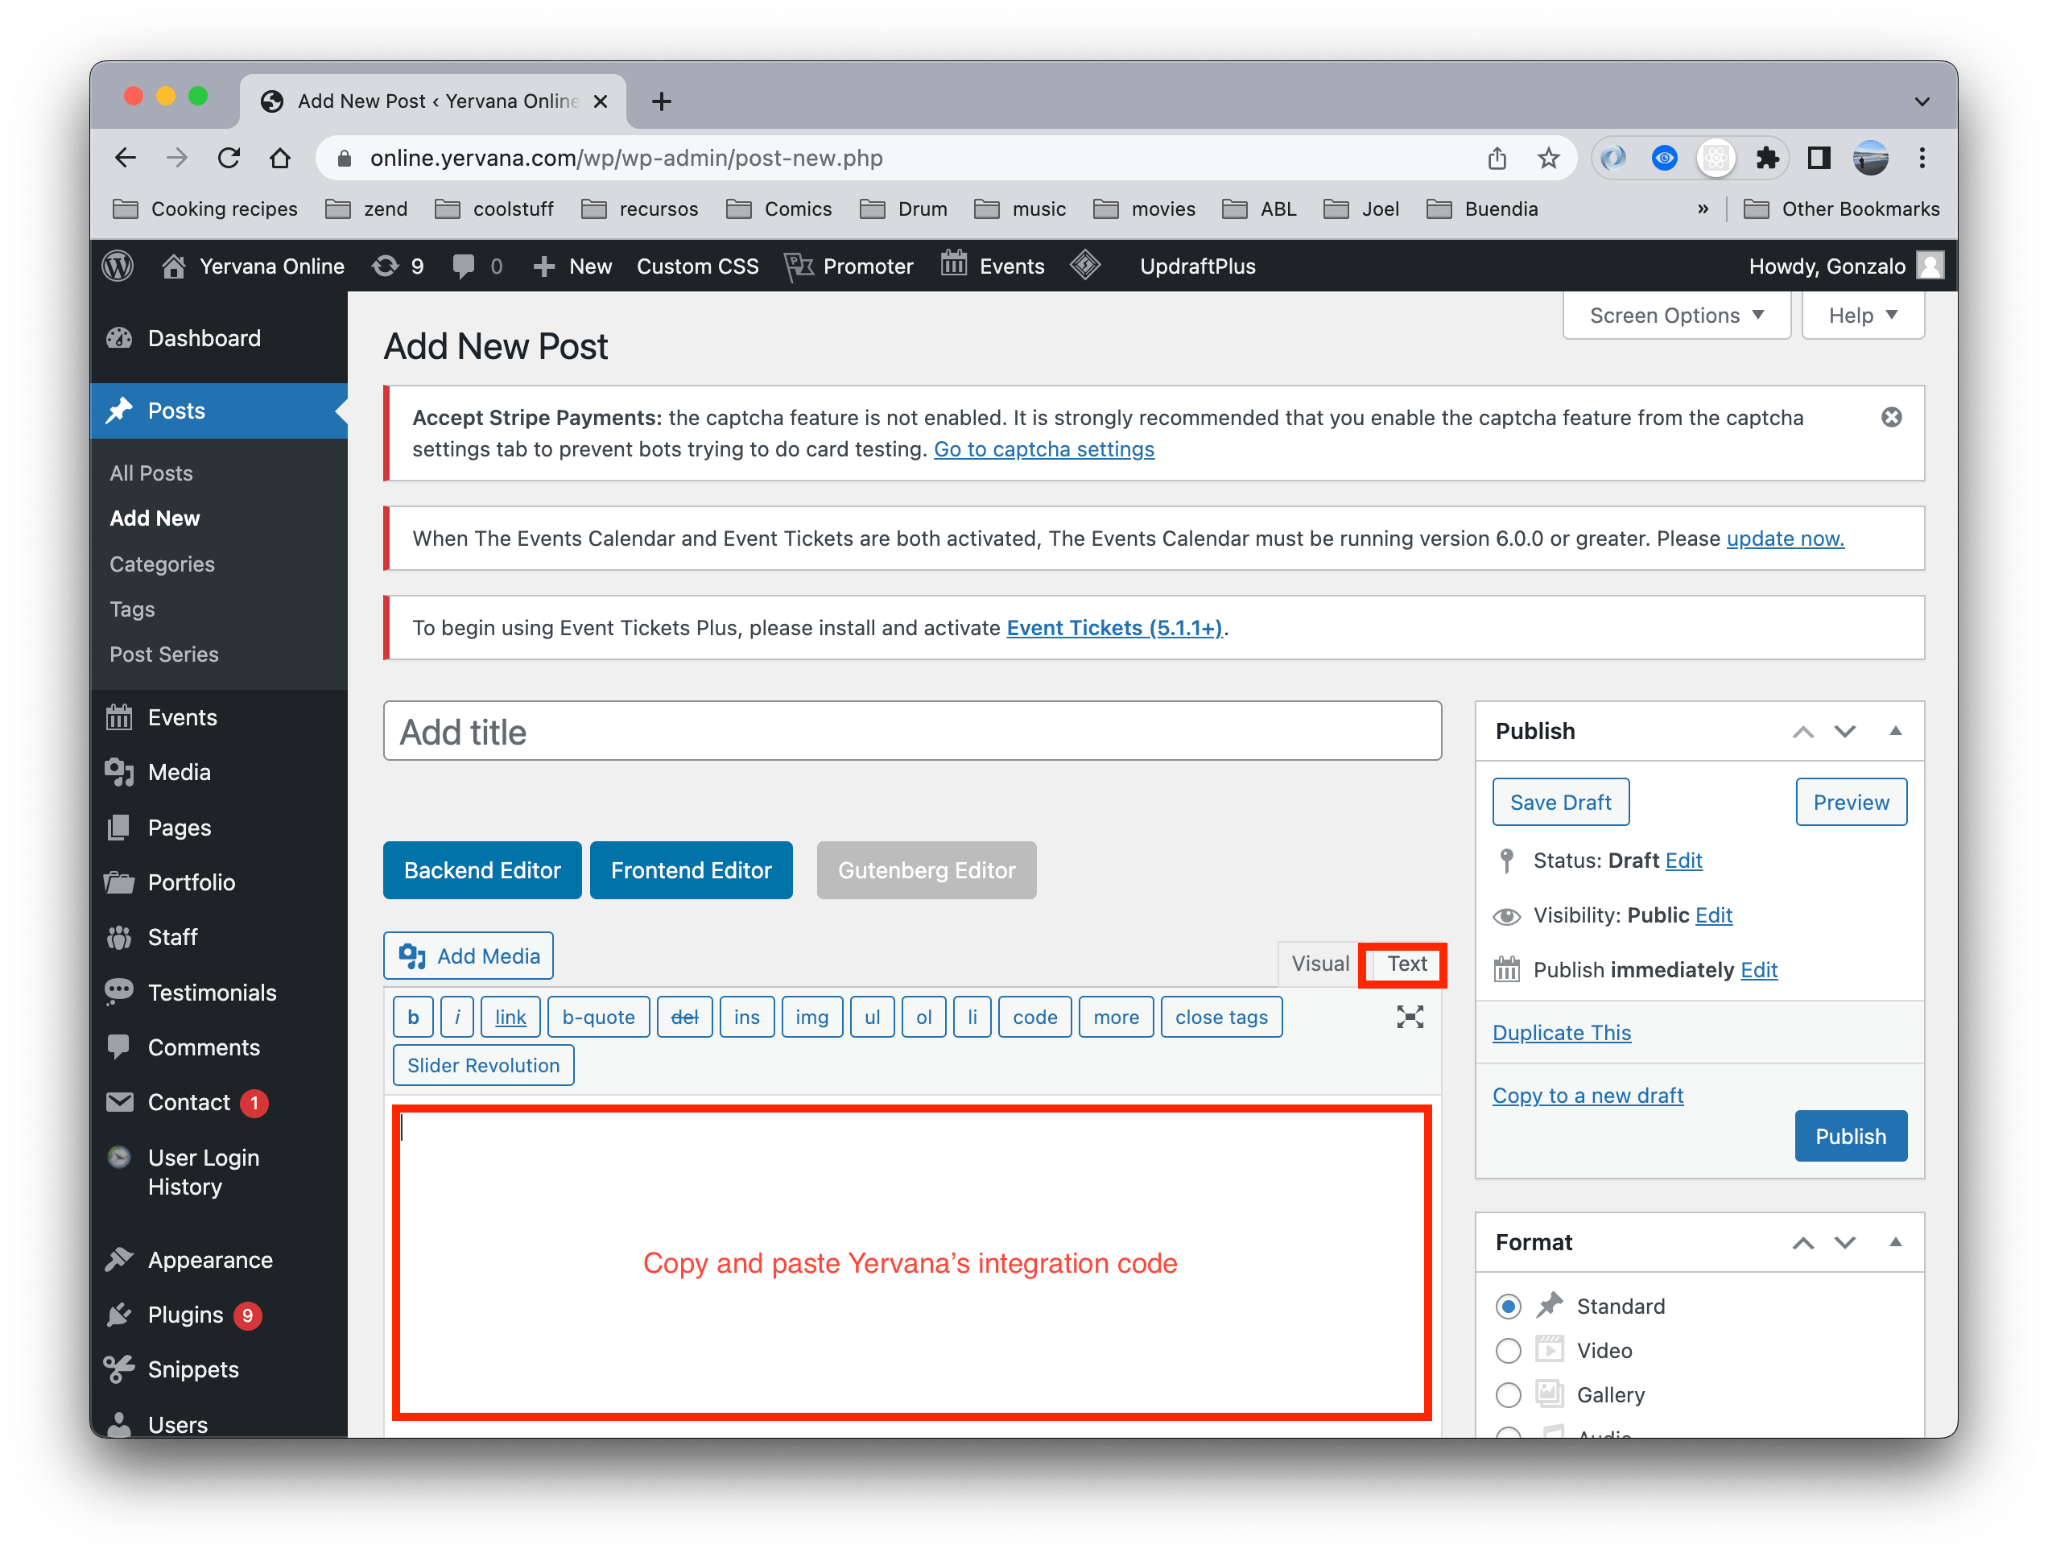 image 1
Squarespace
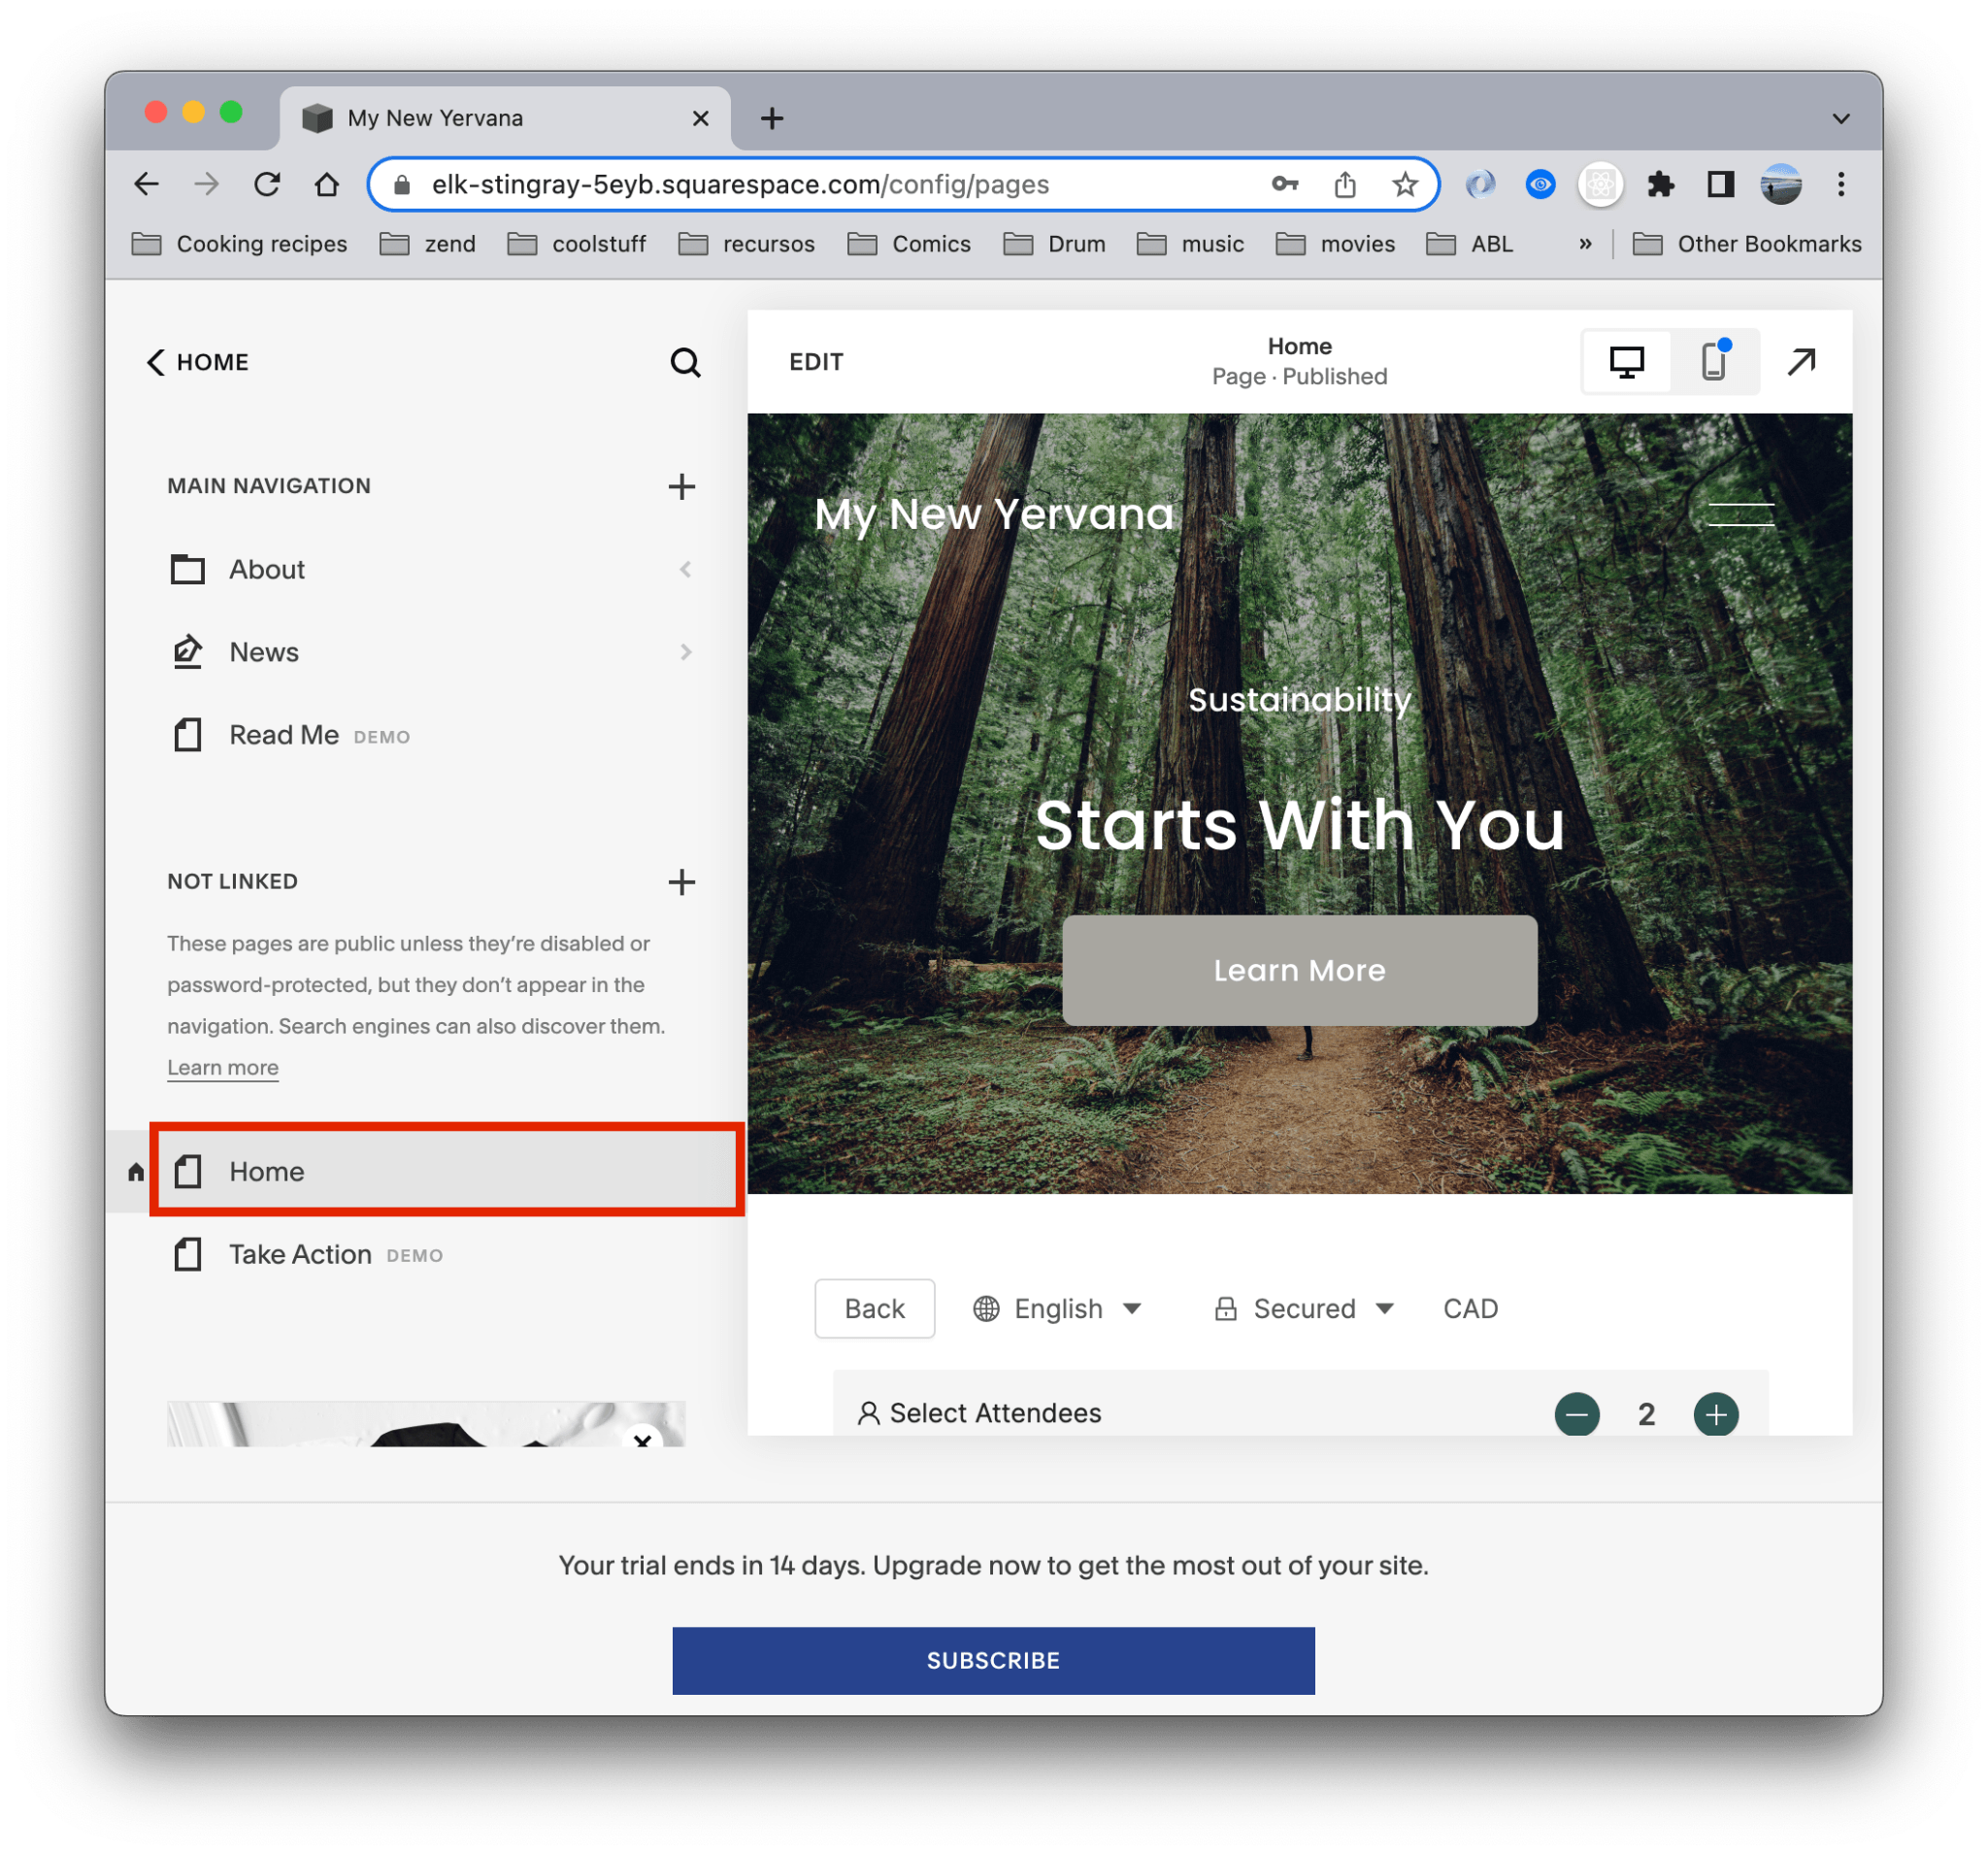
- Login into your account
- Select the page where you want to install the Widget
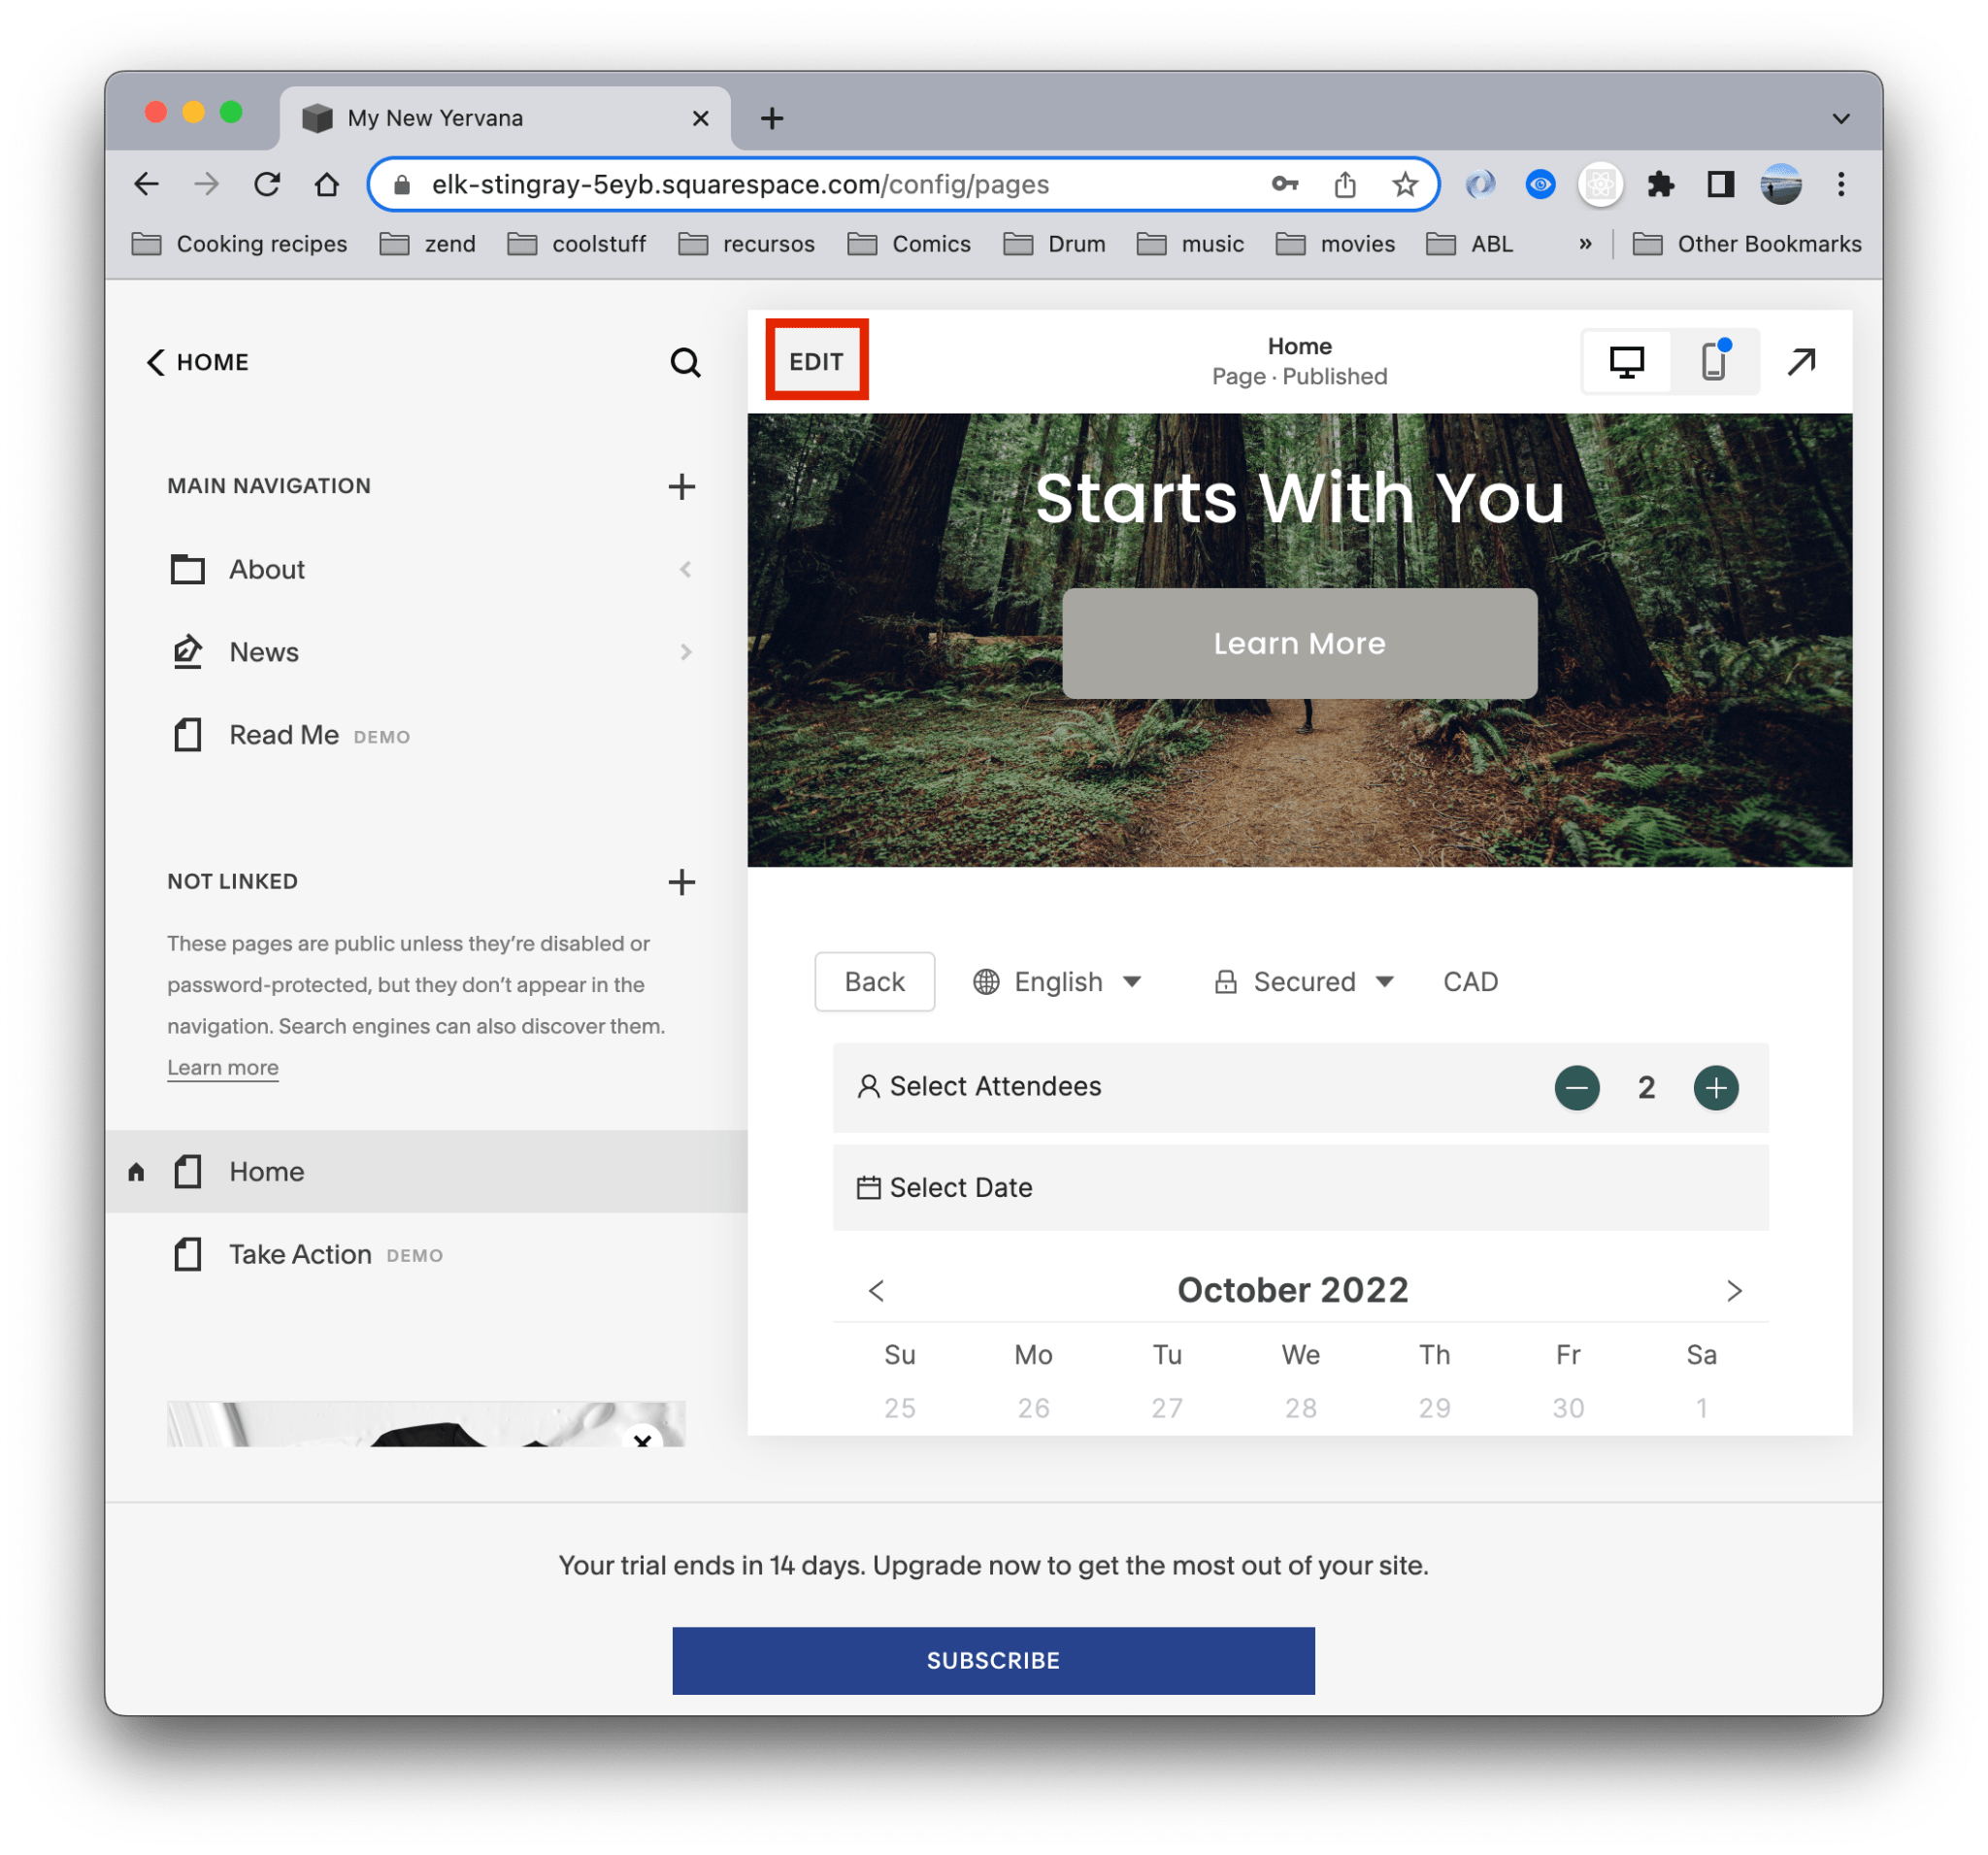
- Click Edit button
- Click Add section button
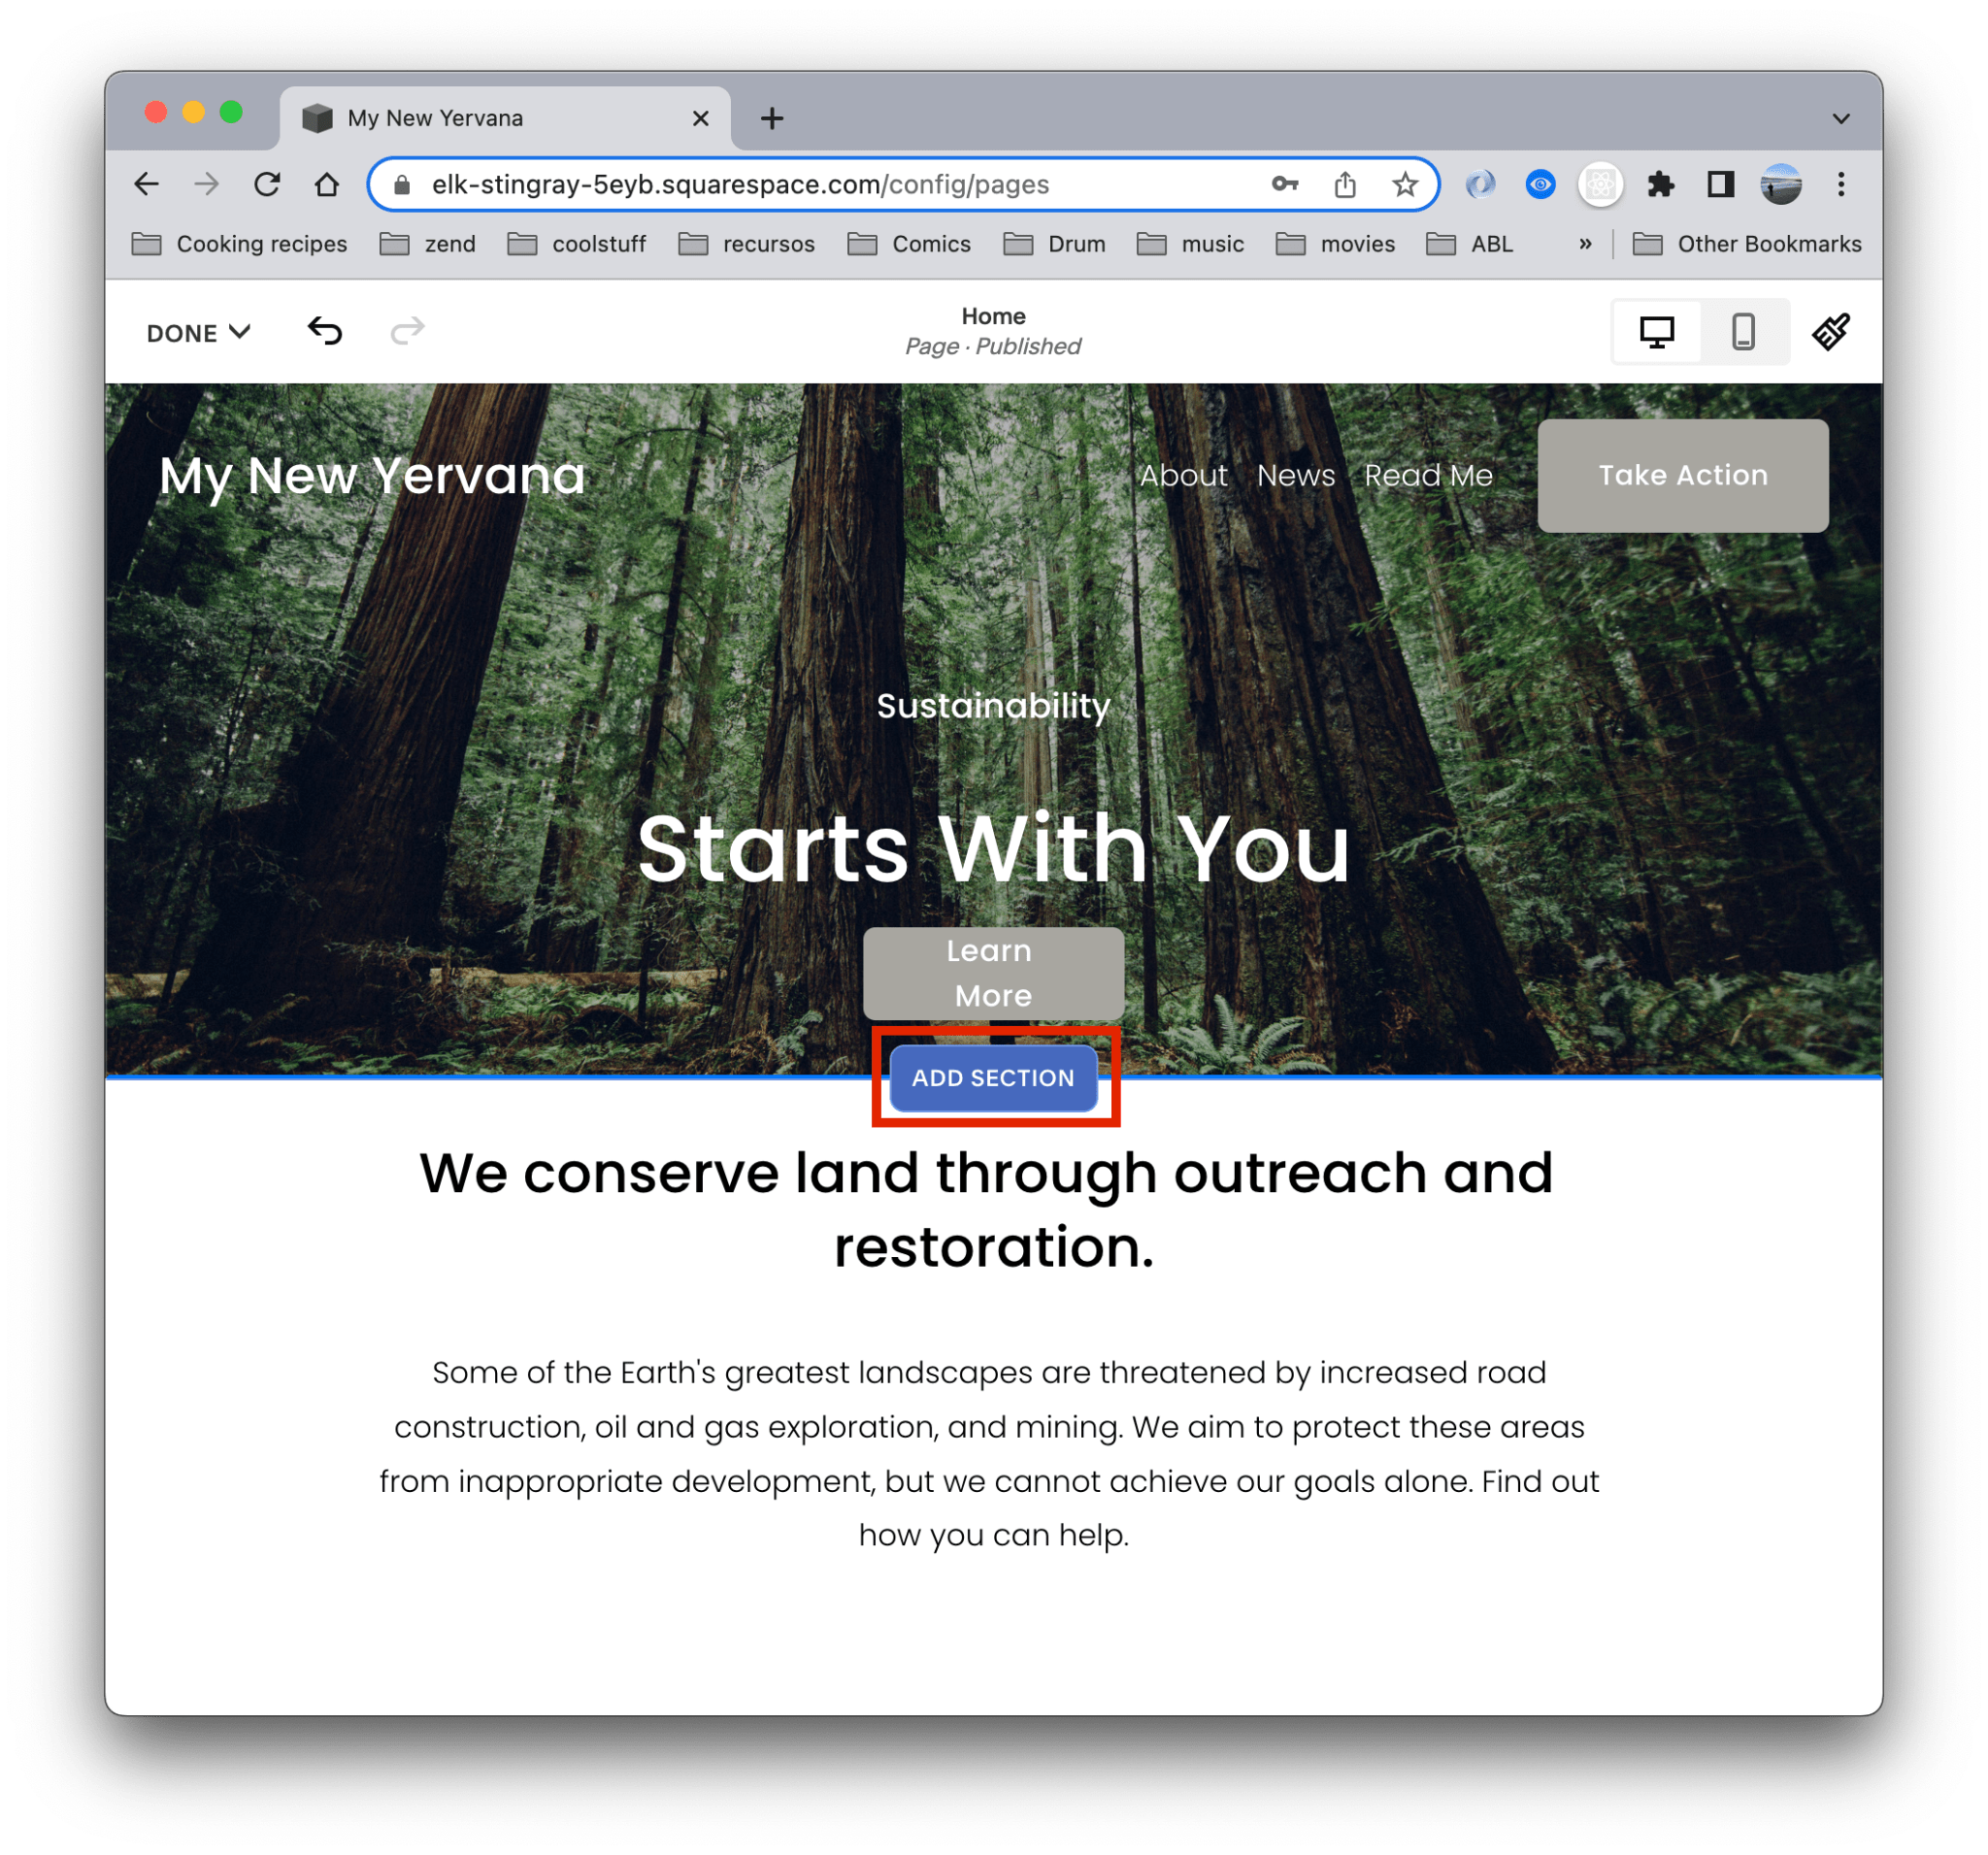
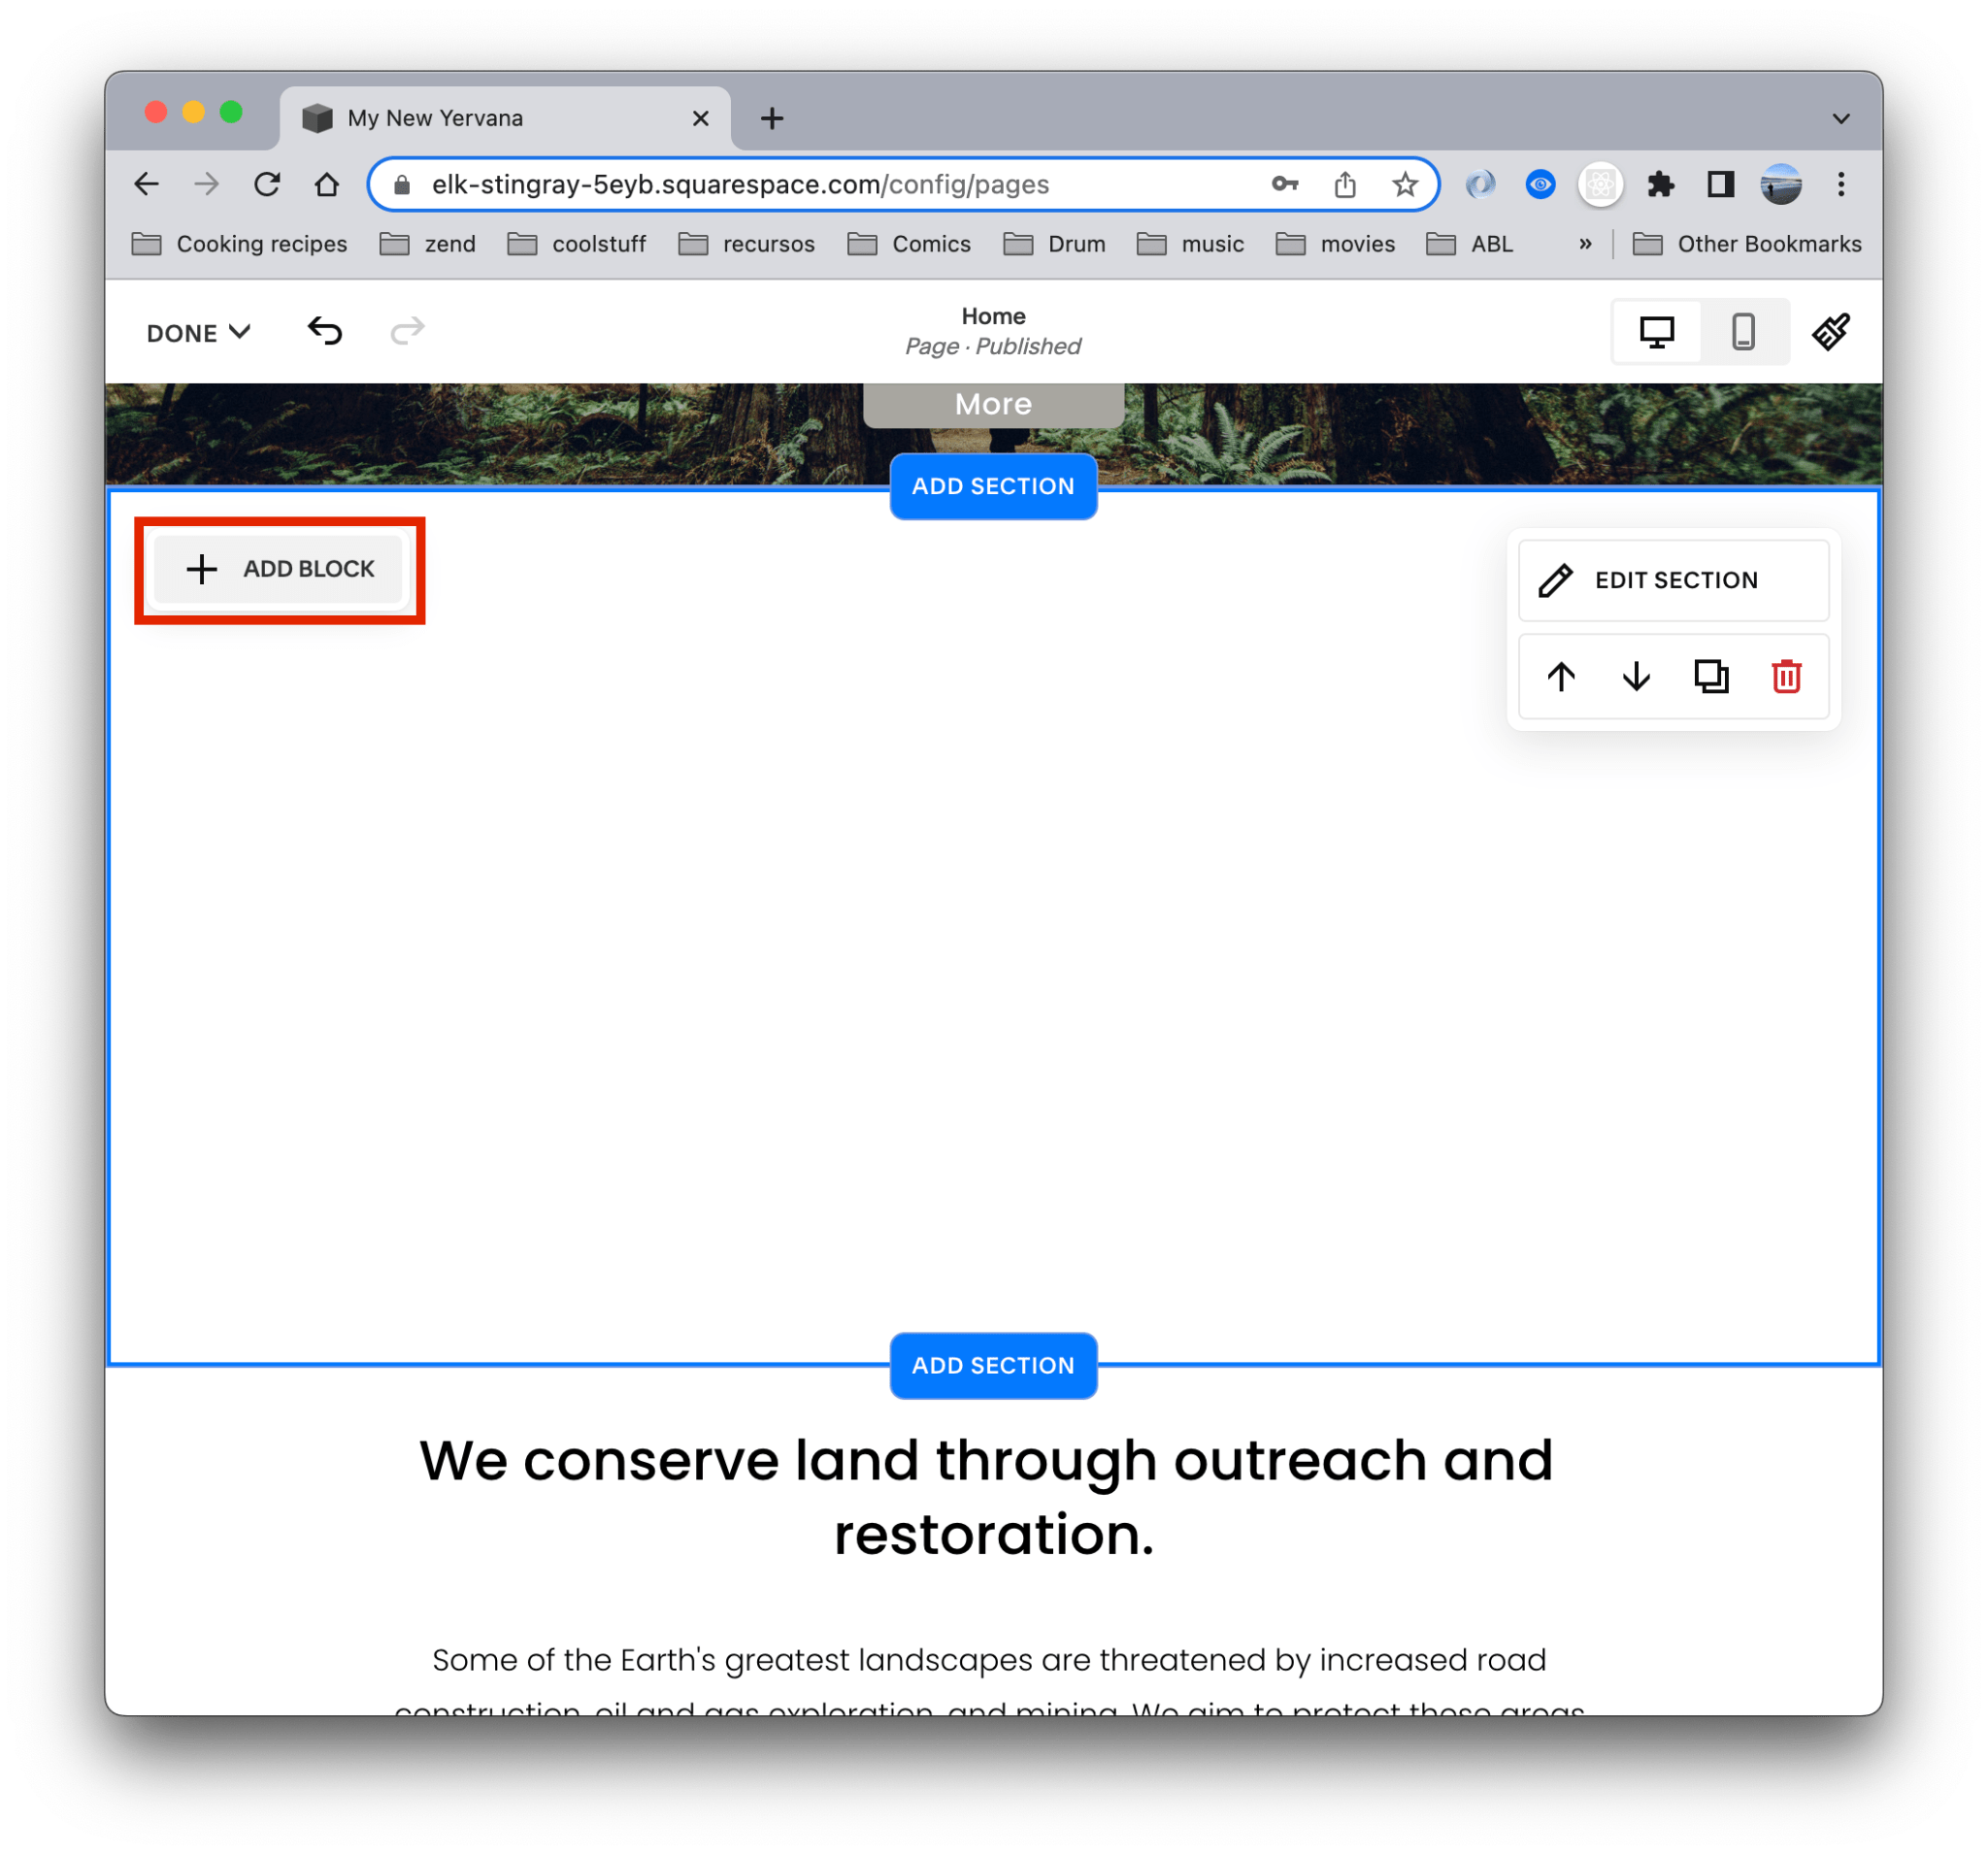
- After adding a new section you should see it like the image below. Click the Add Block button
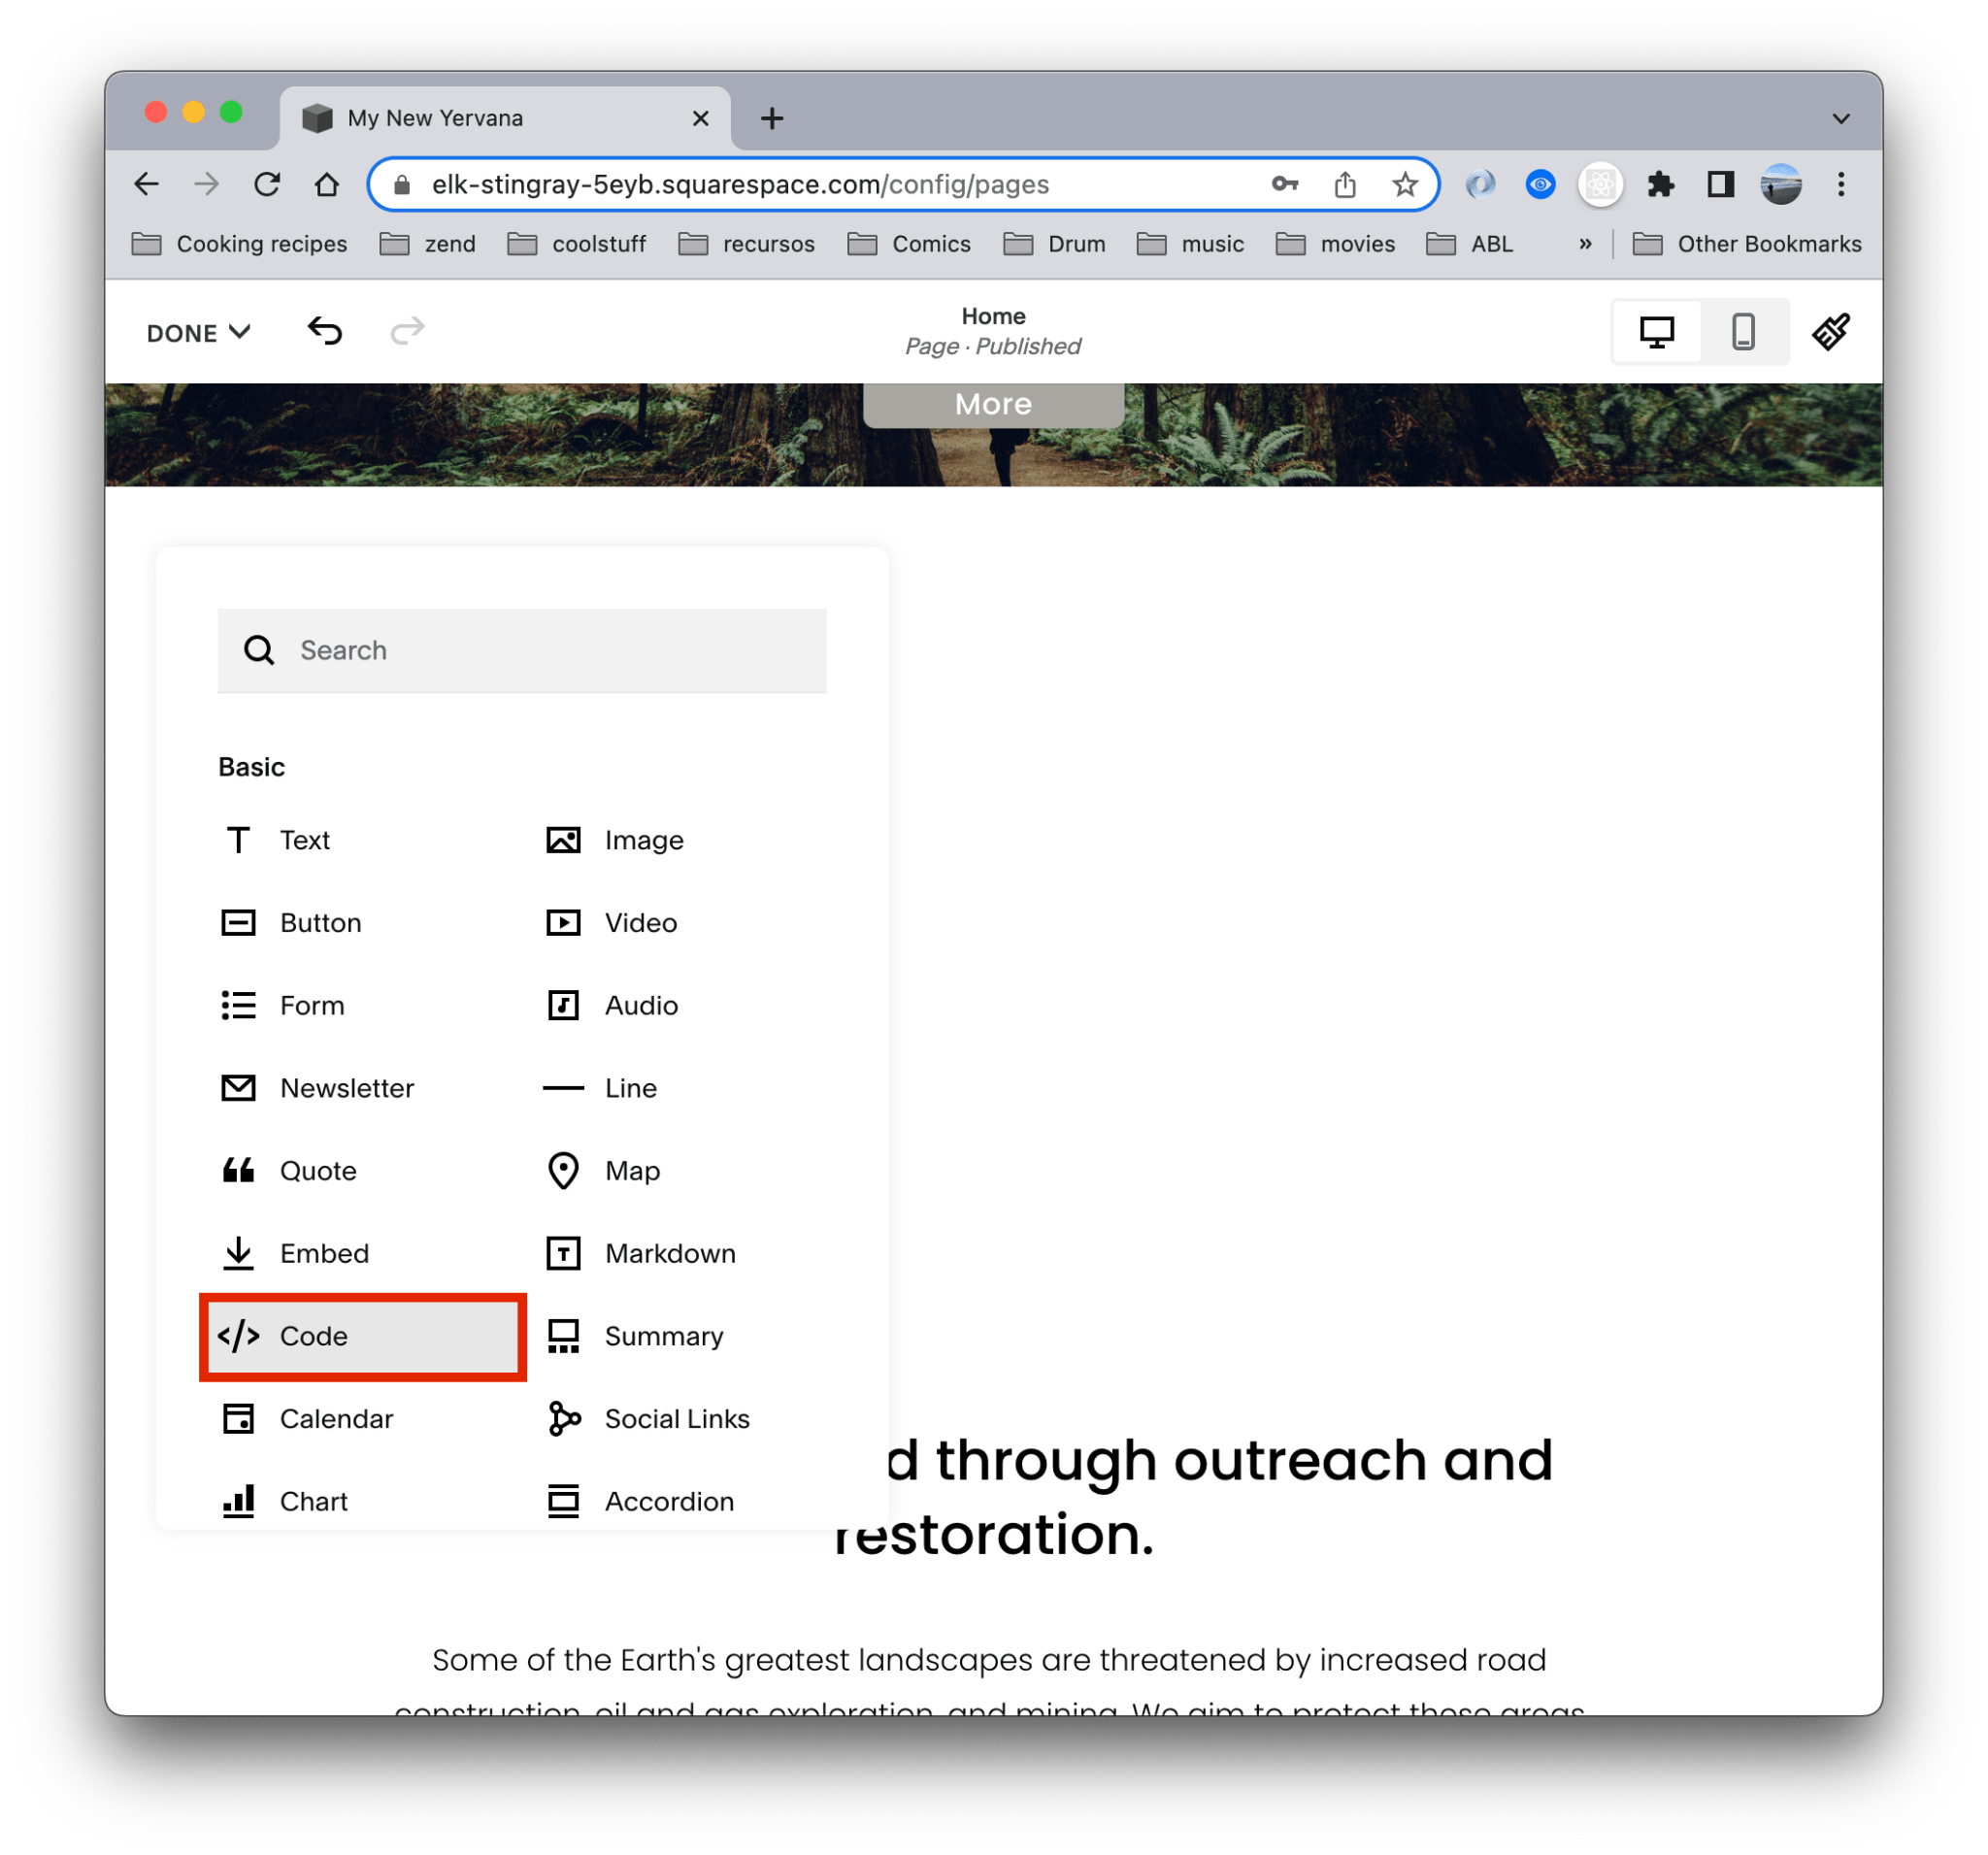
- From the list, select Code
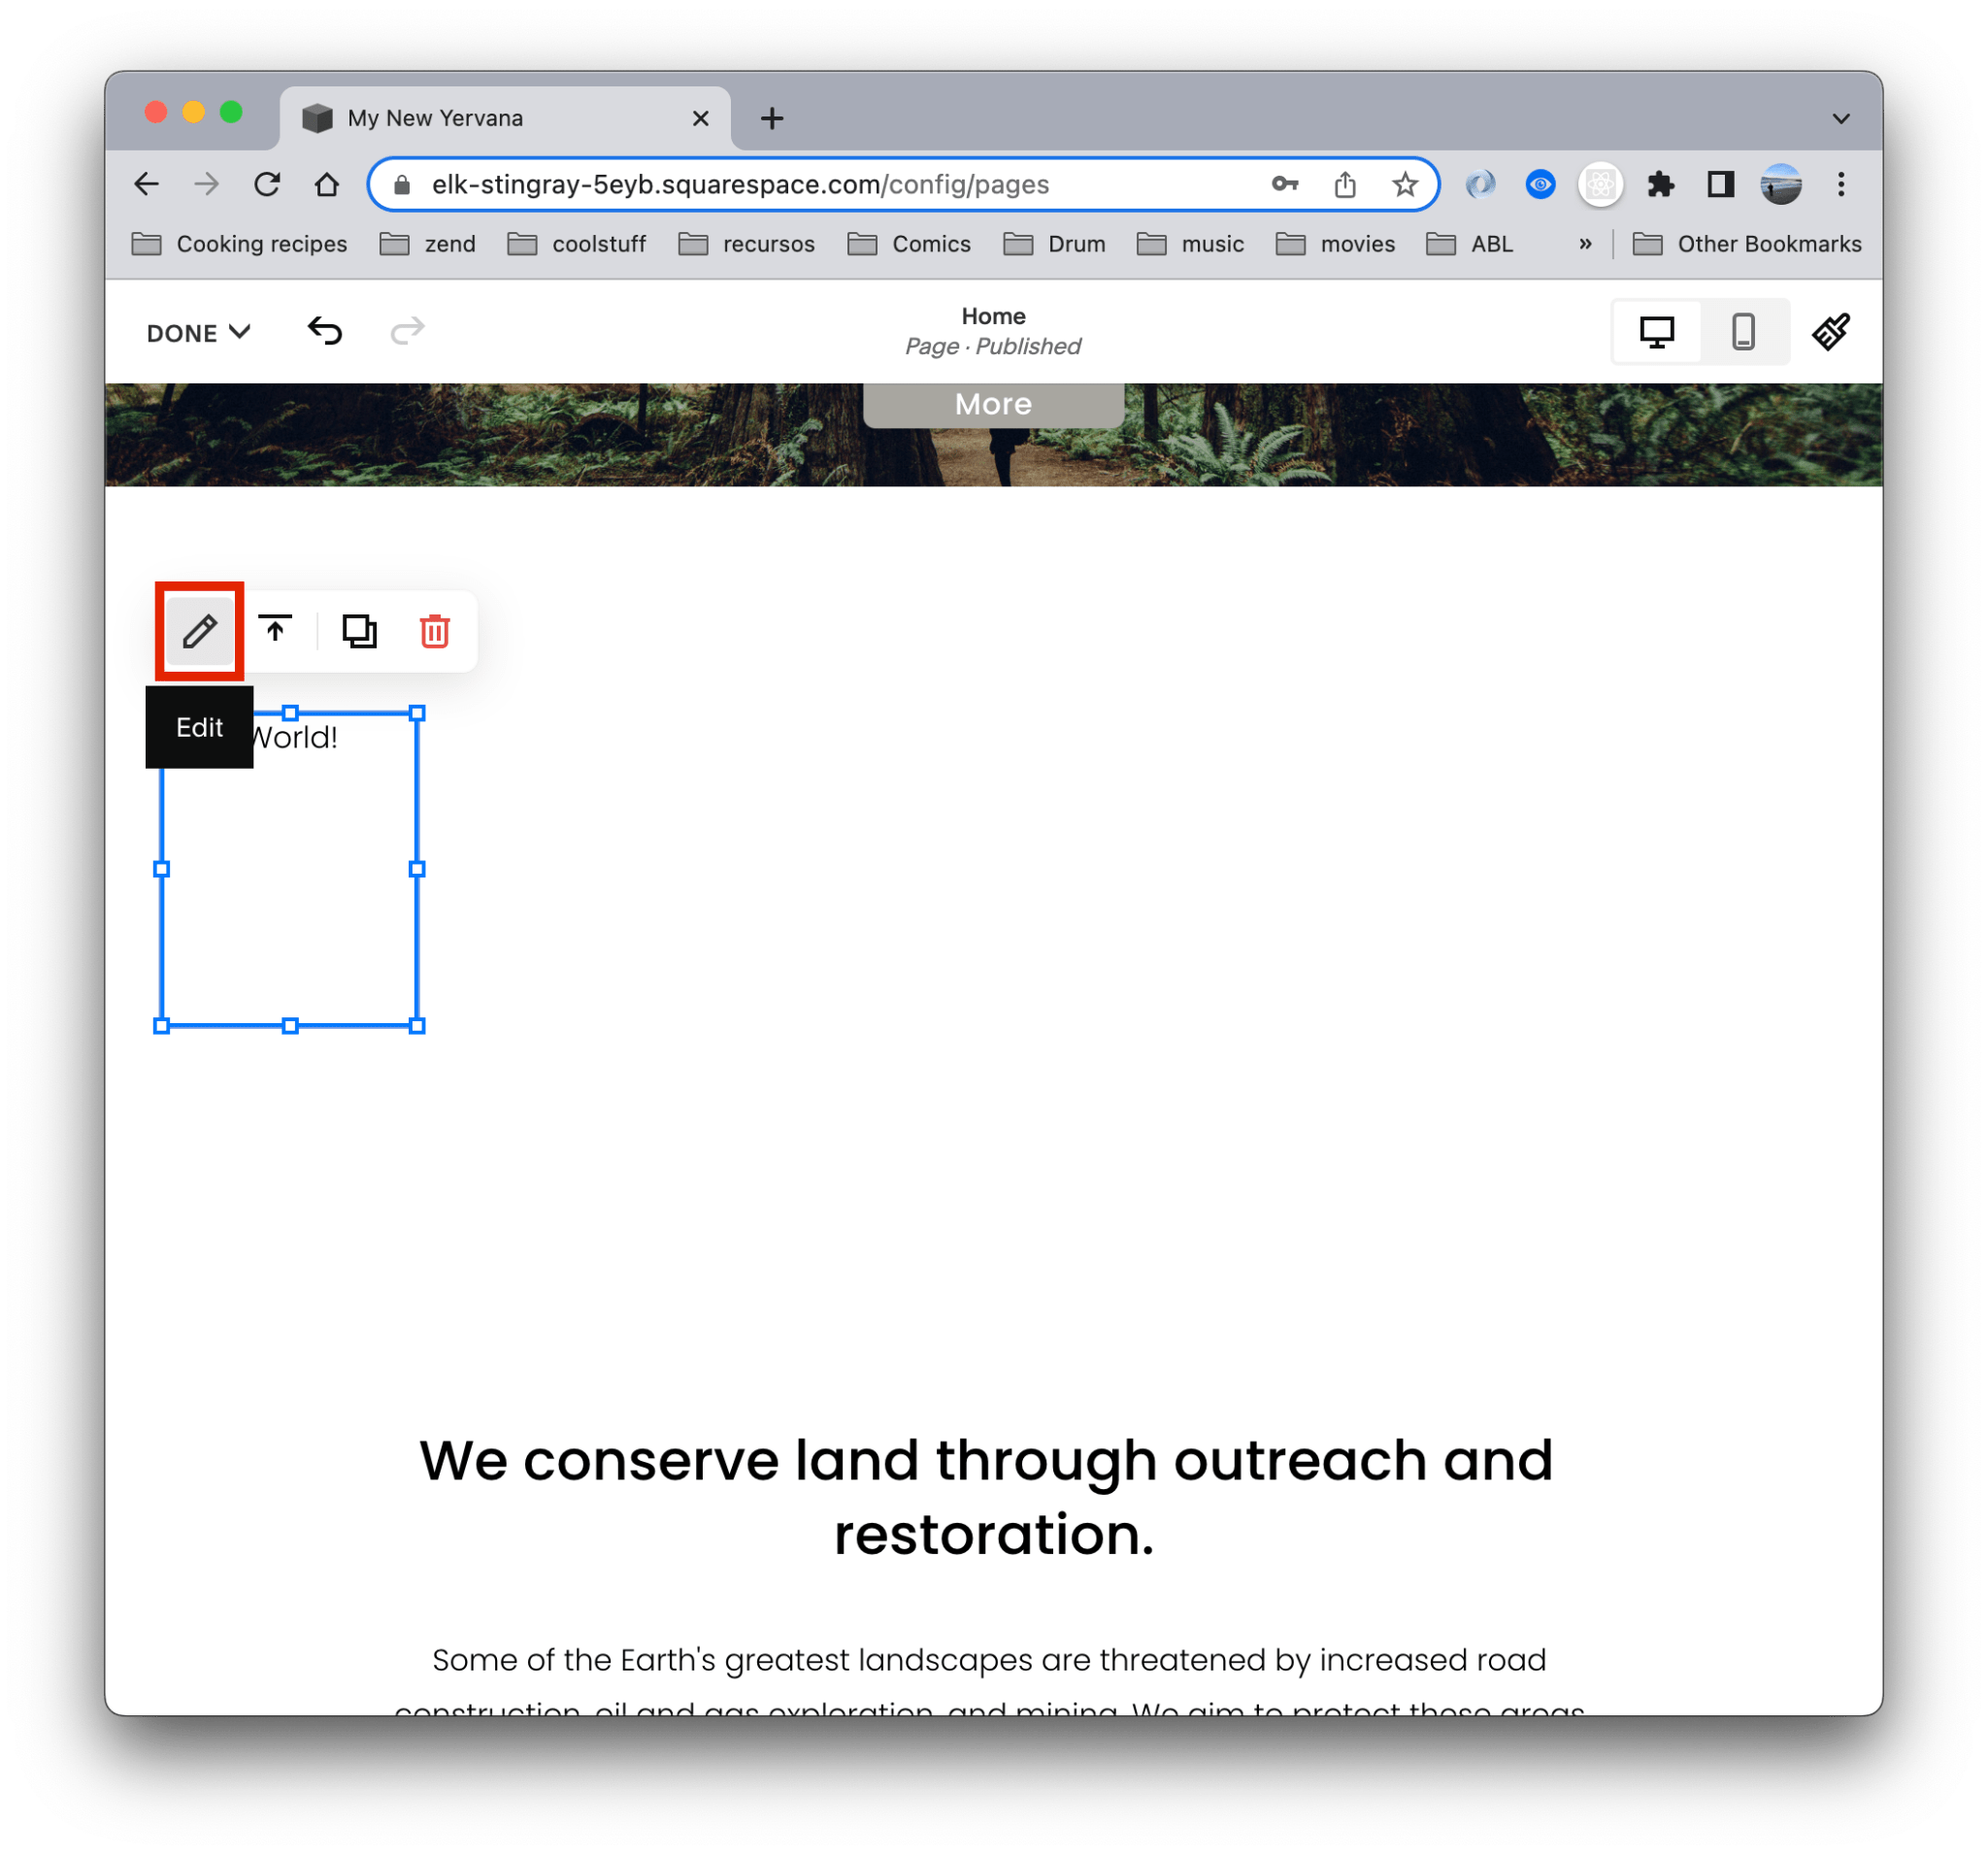
- The block will add a blue outlined square. Click pen icon
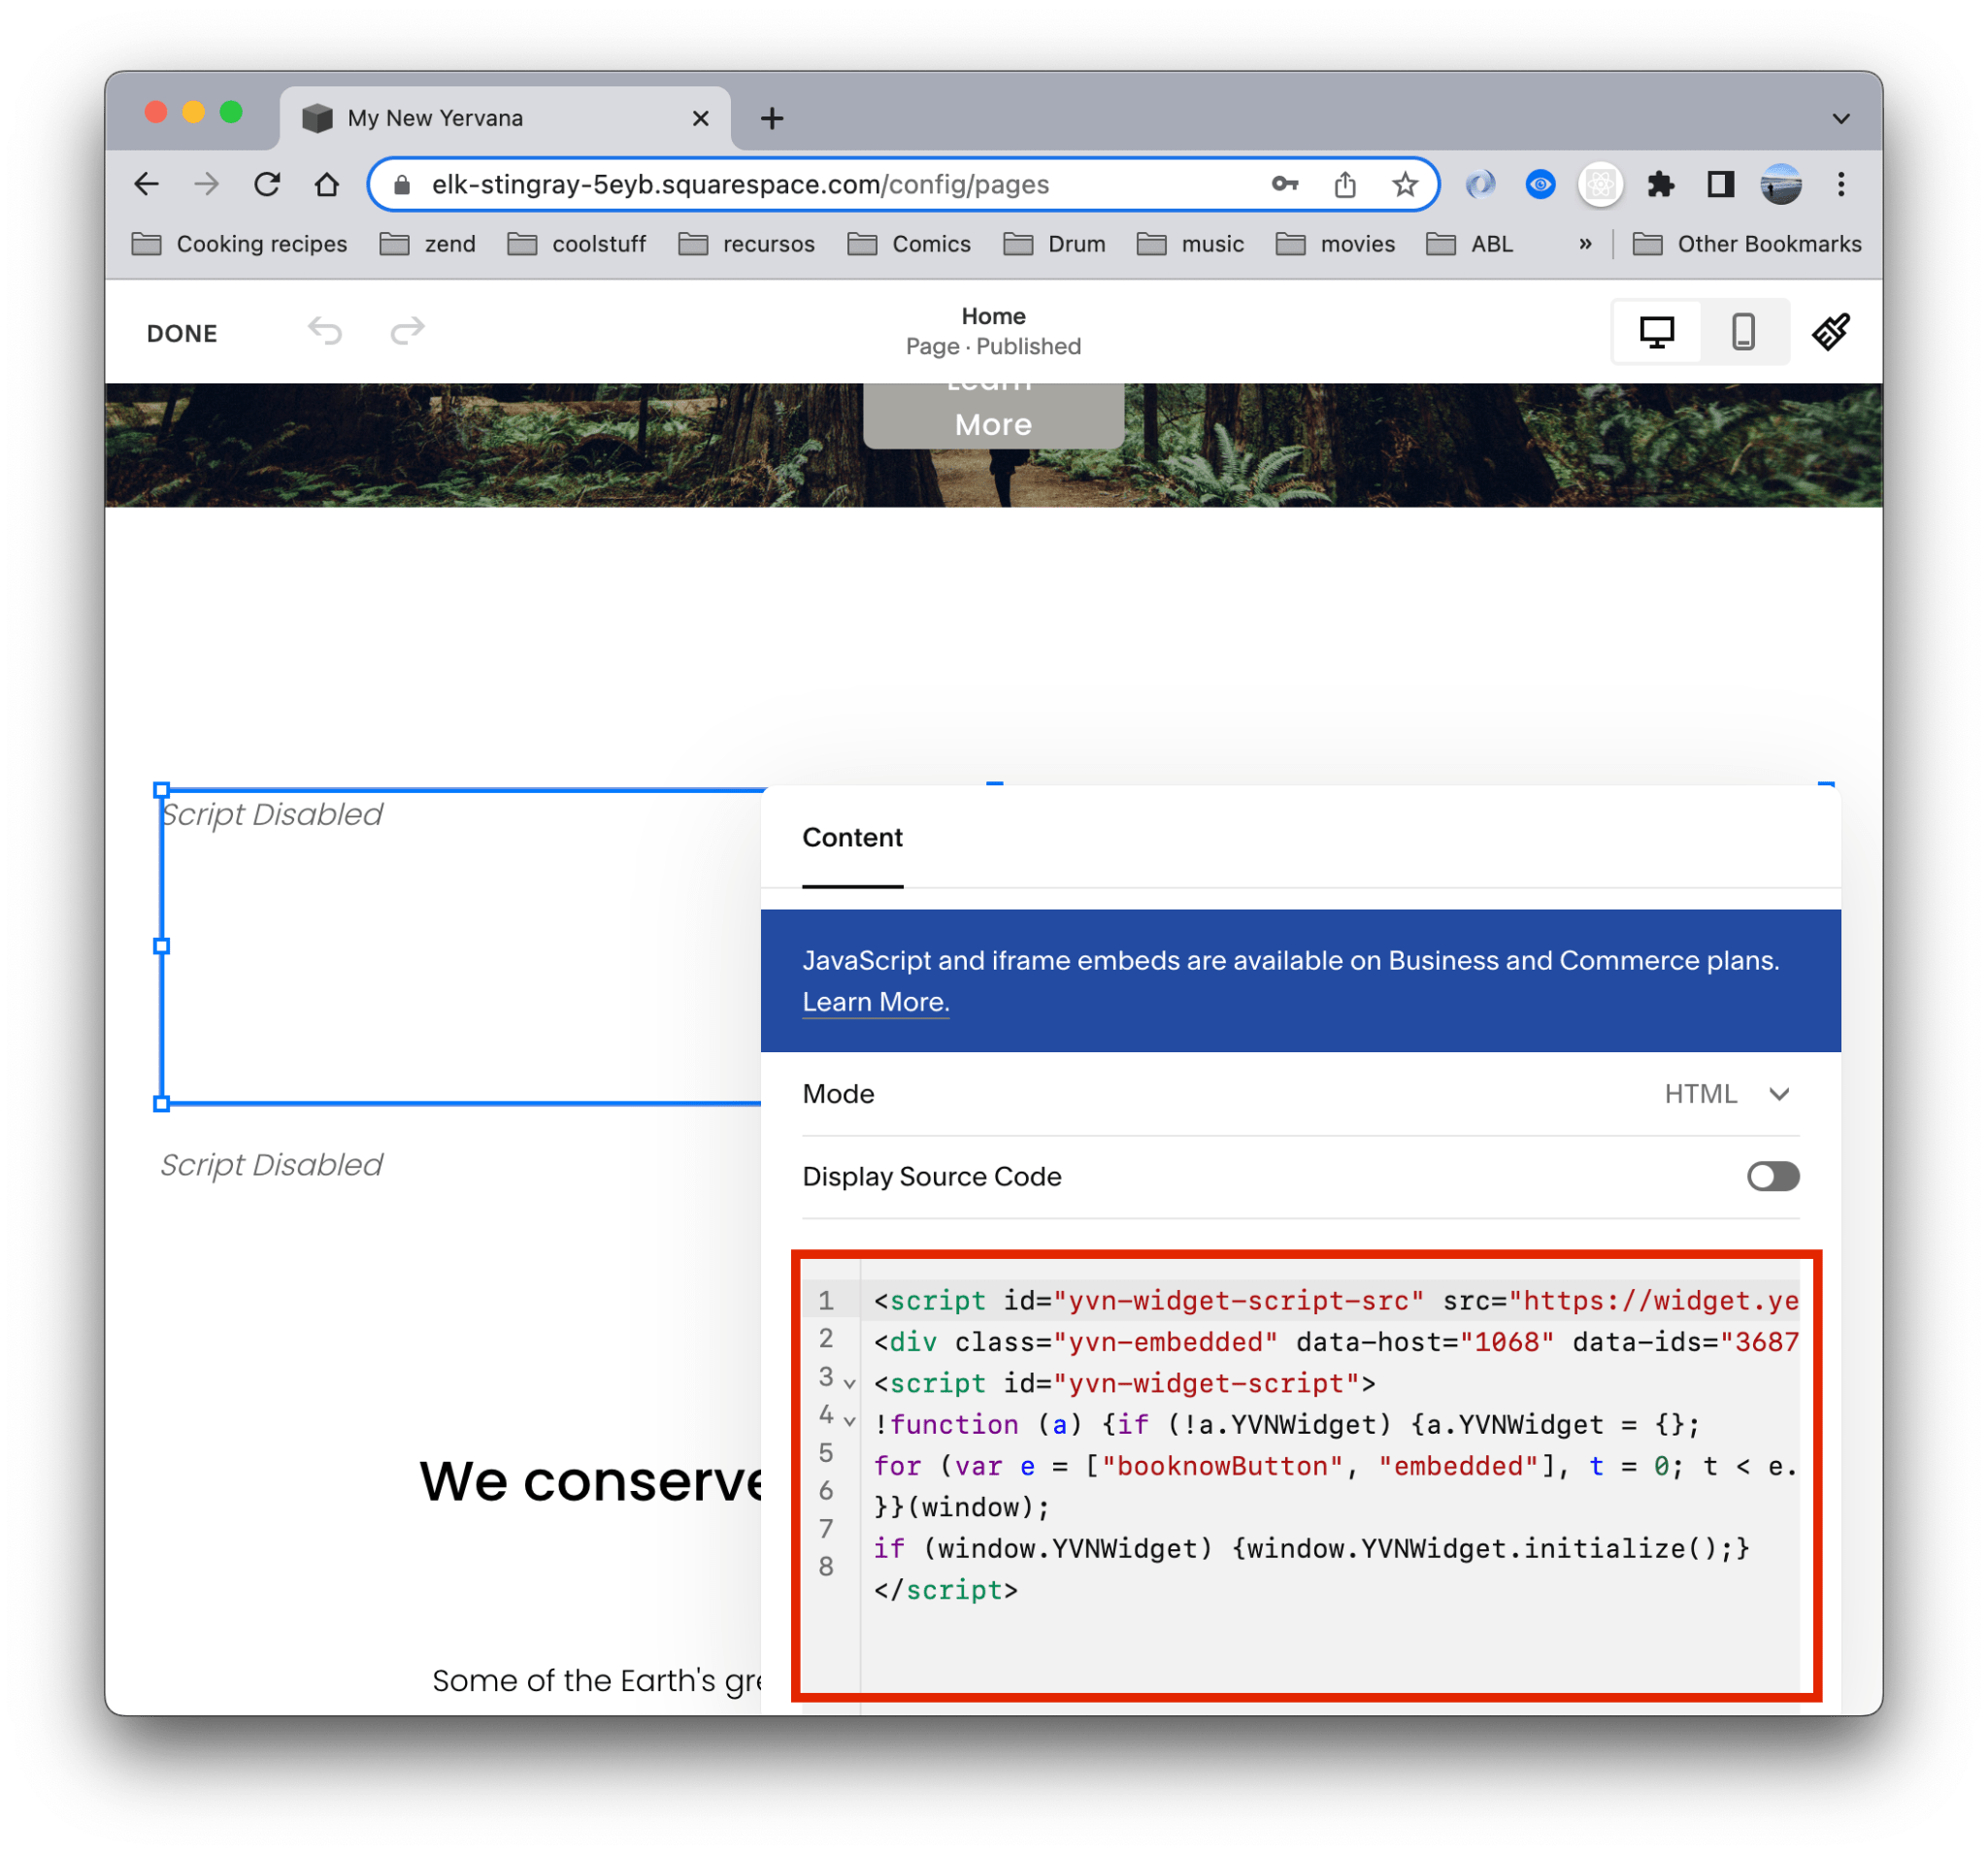
- A modal window will open up. In the text area paste the code generated in your dashboard at yervana.com. Read Yervana Widget Generator
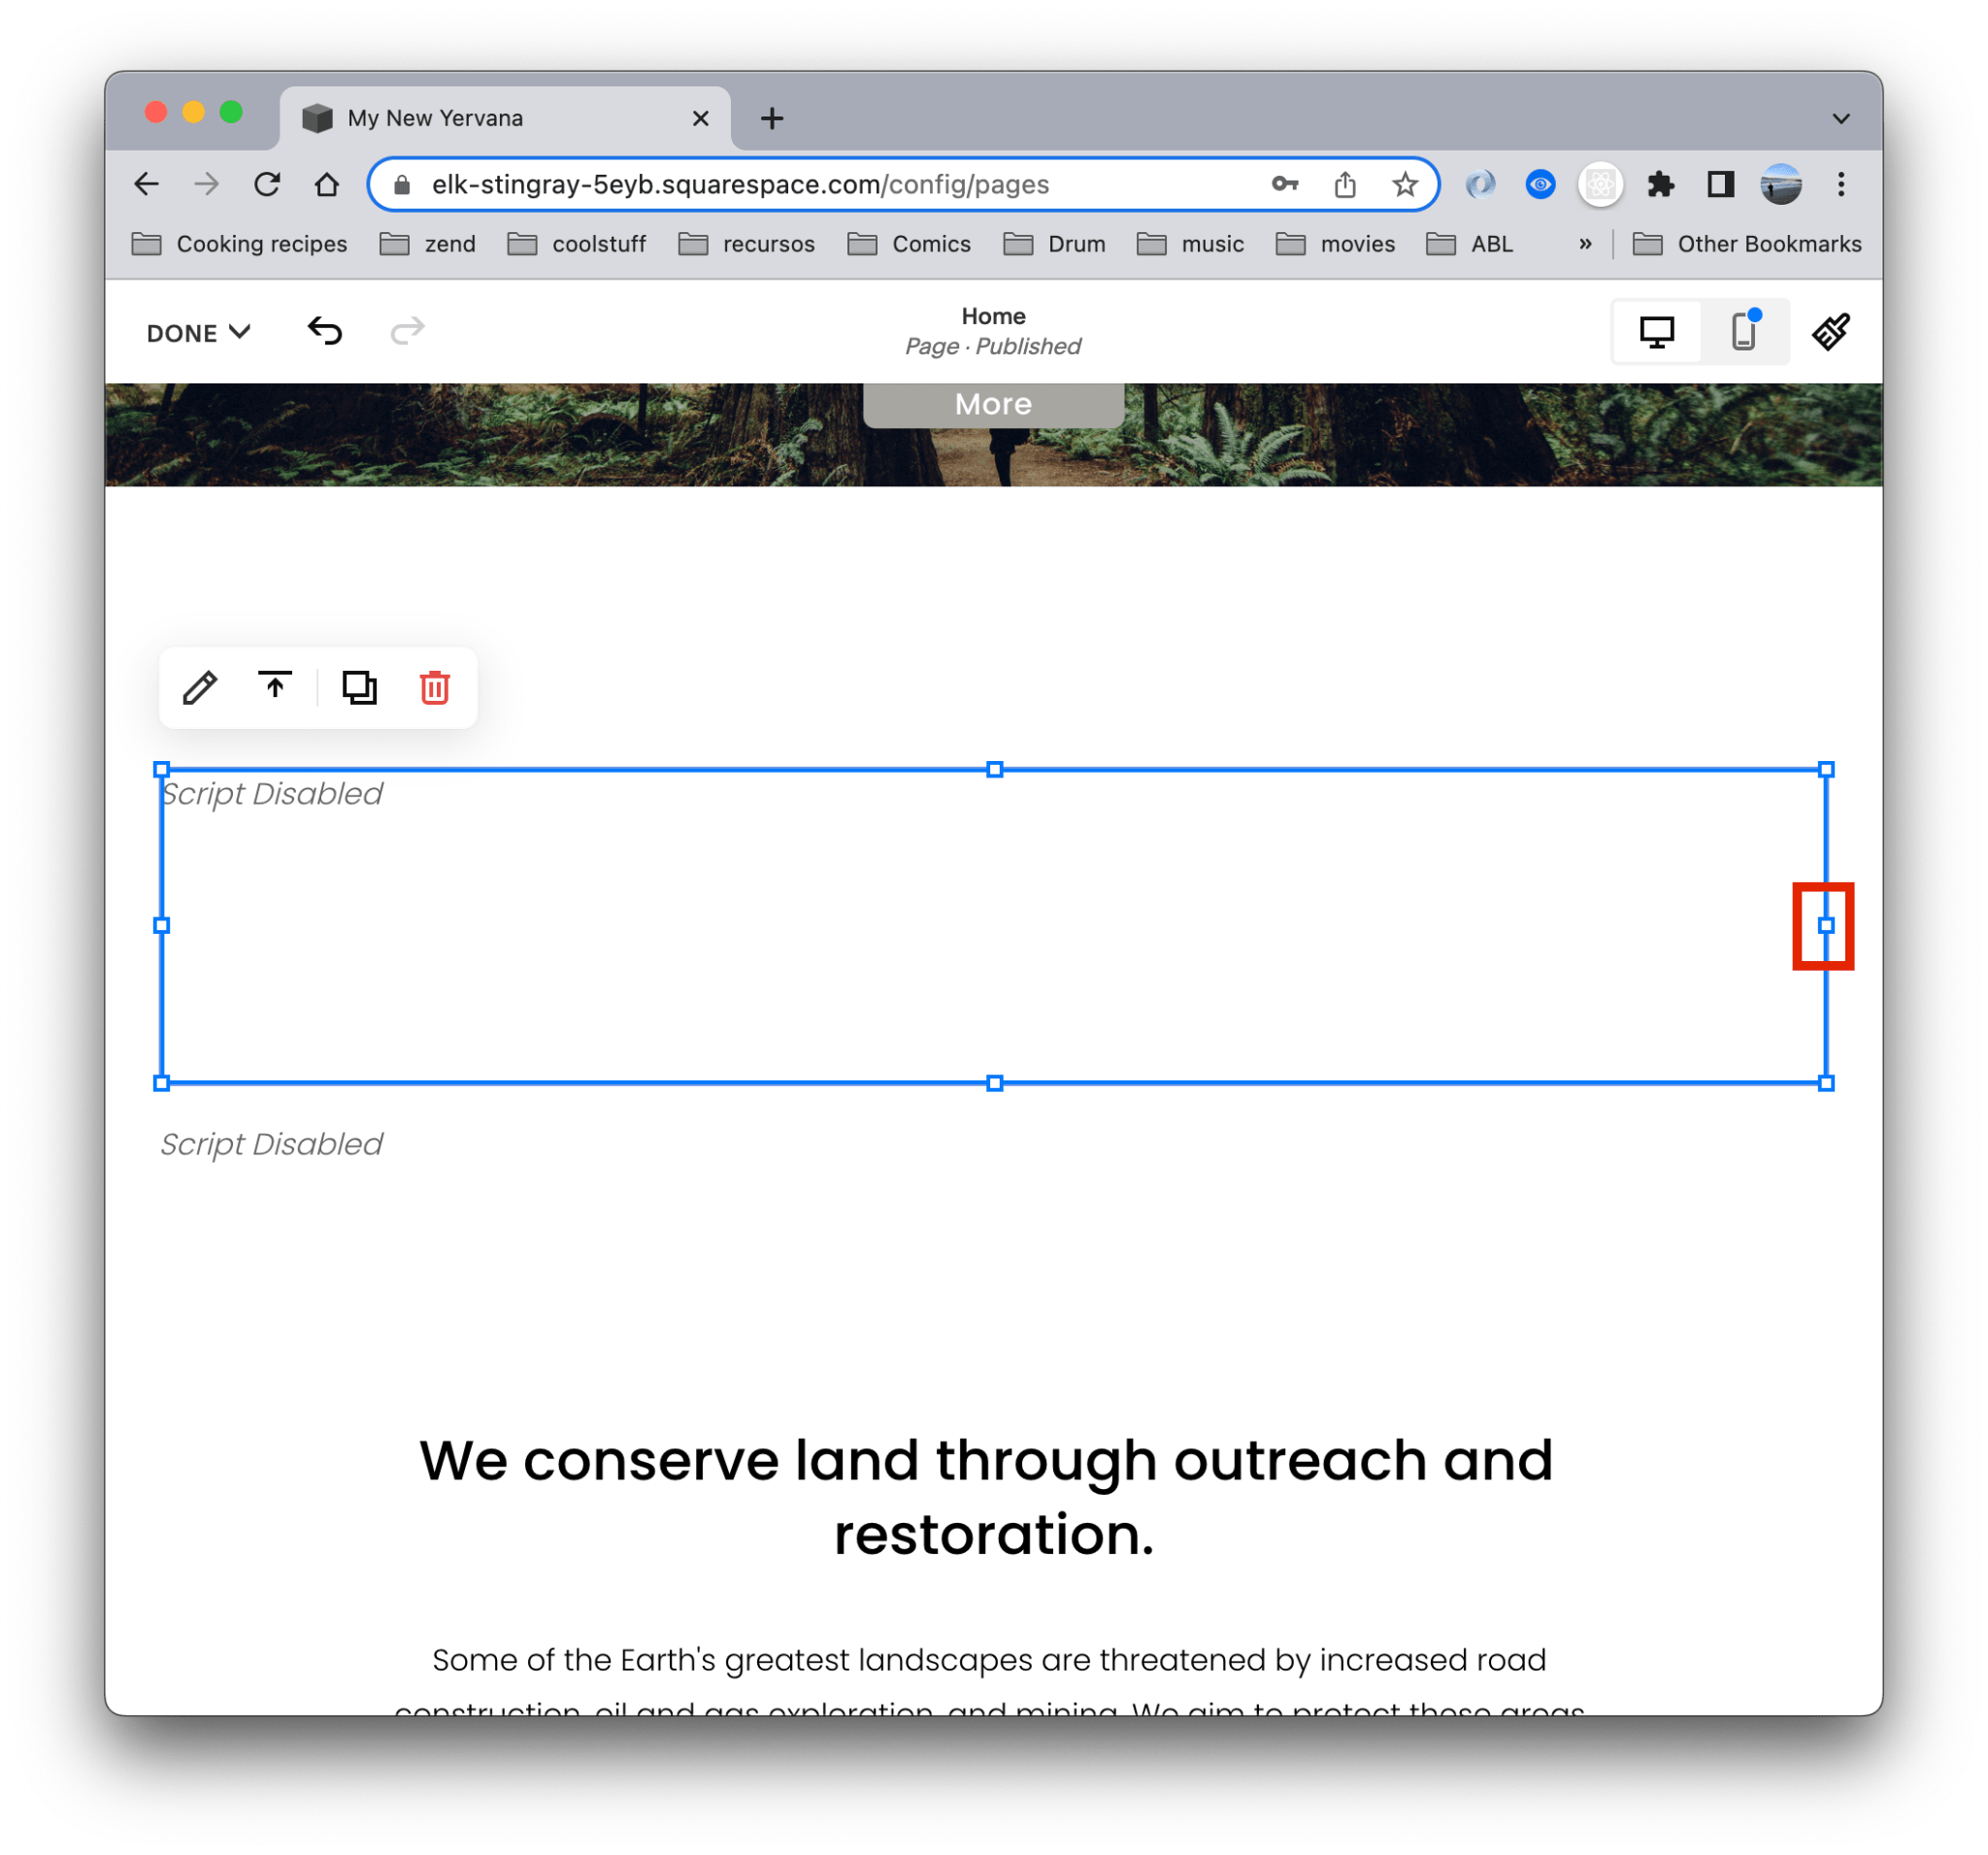
- To change the width of the widget, drag and drop the controller to adjust it like in the image below
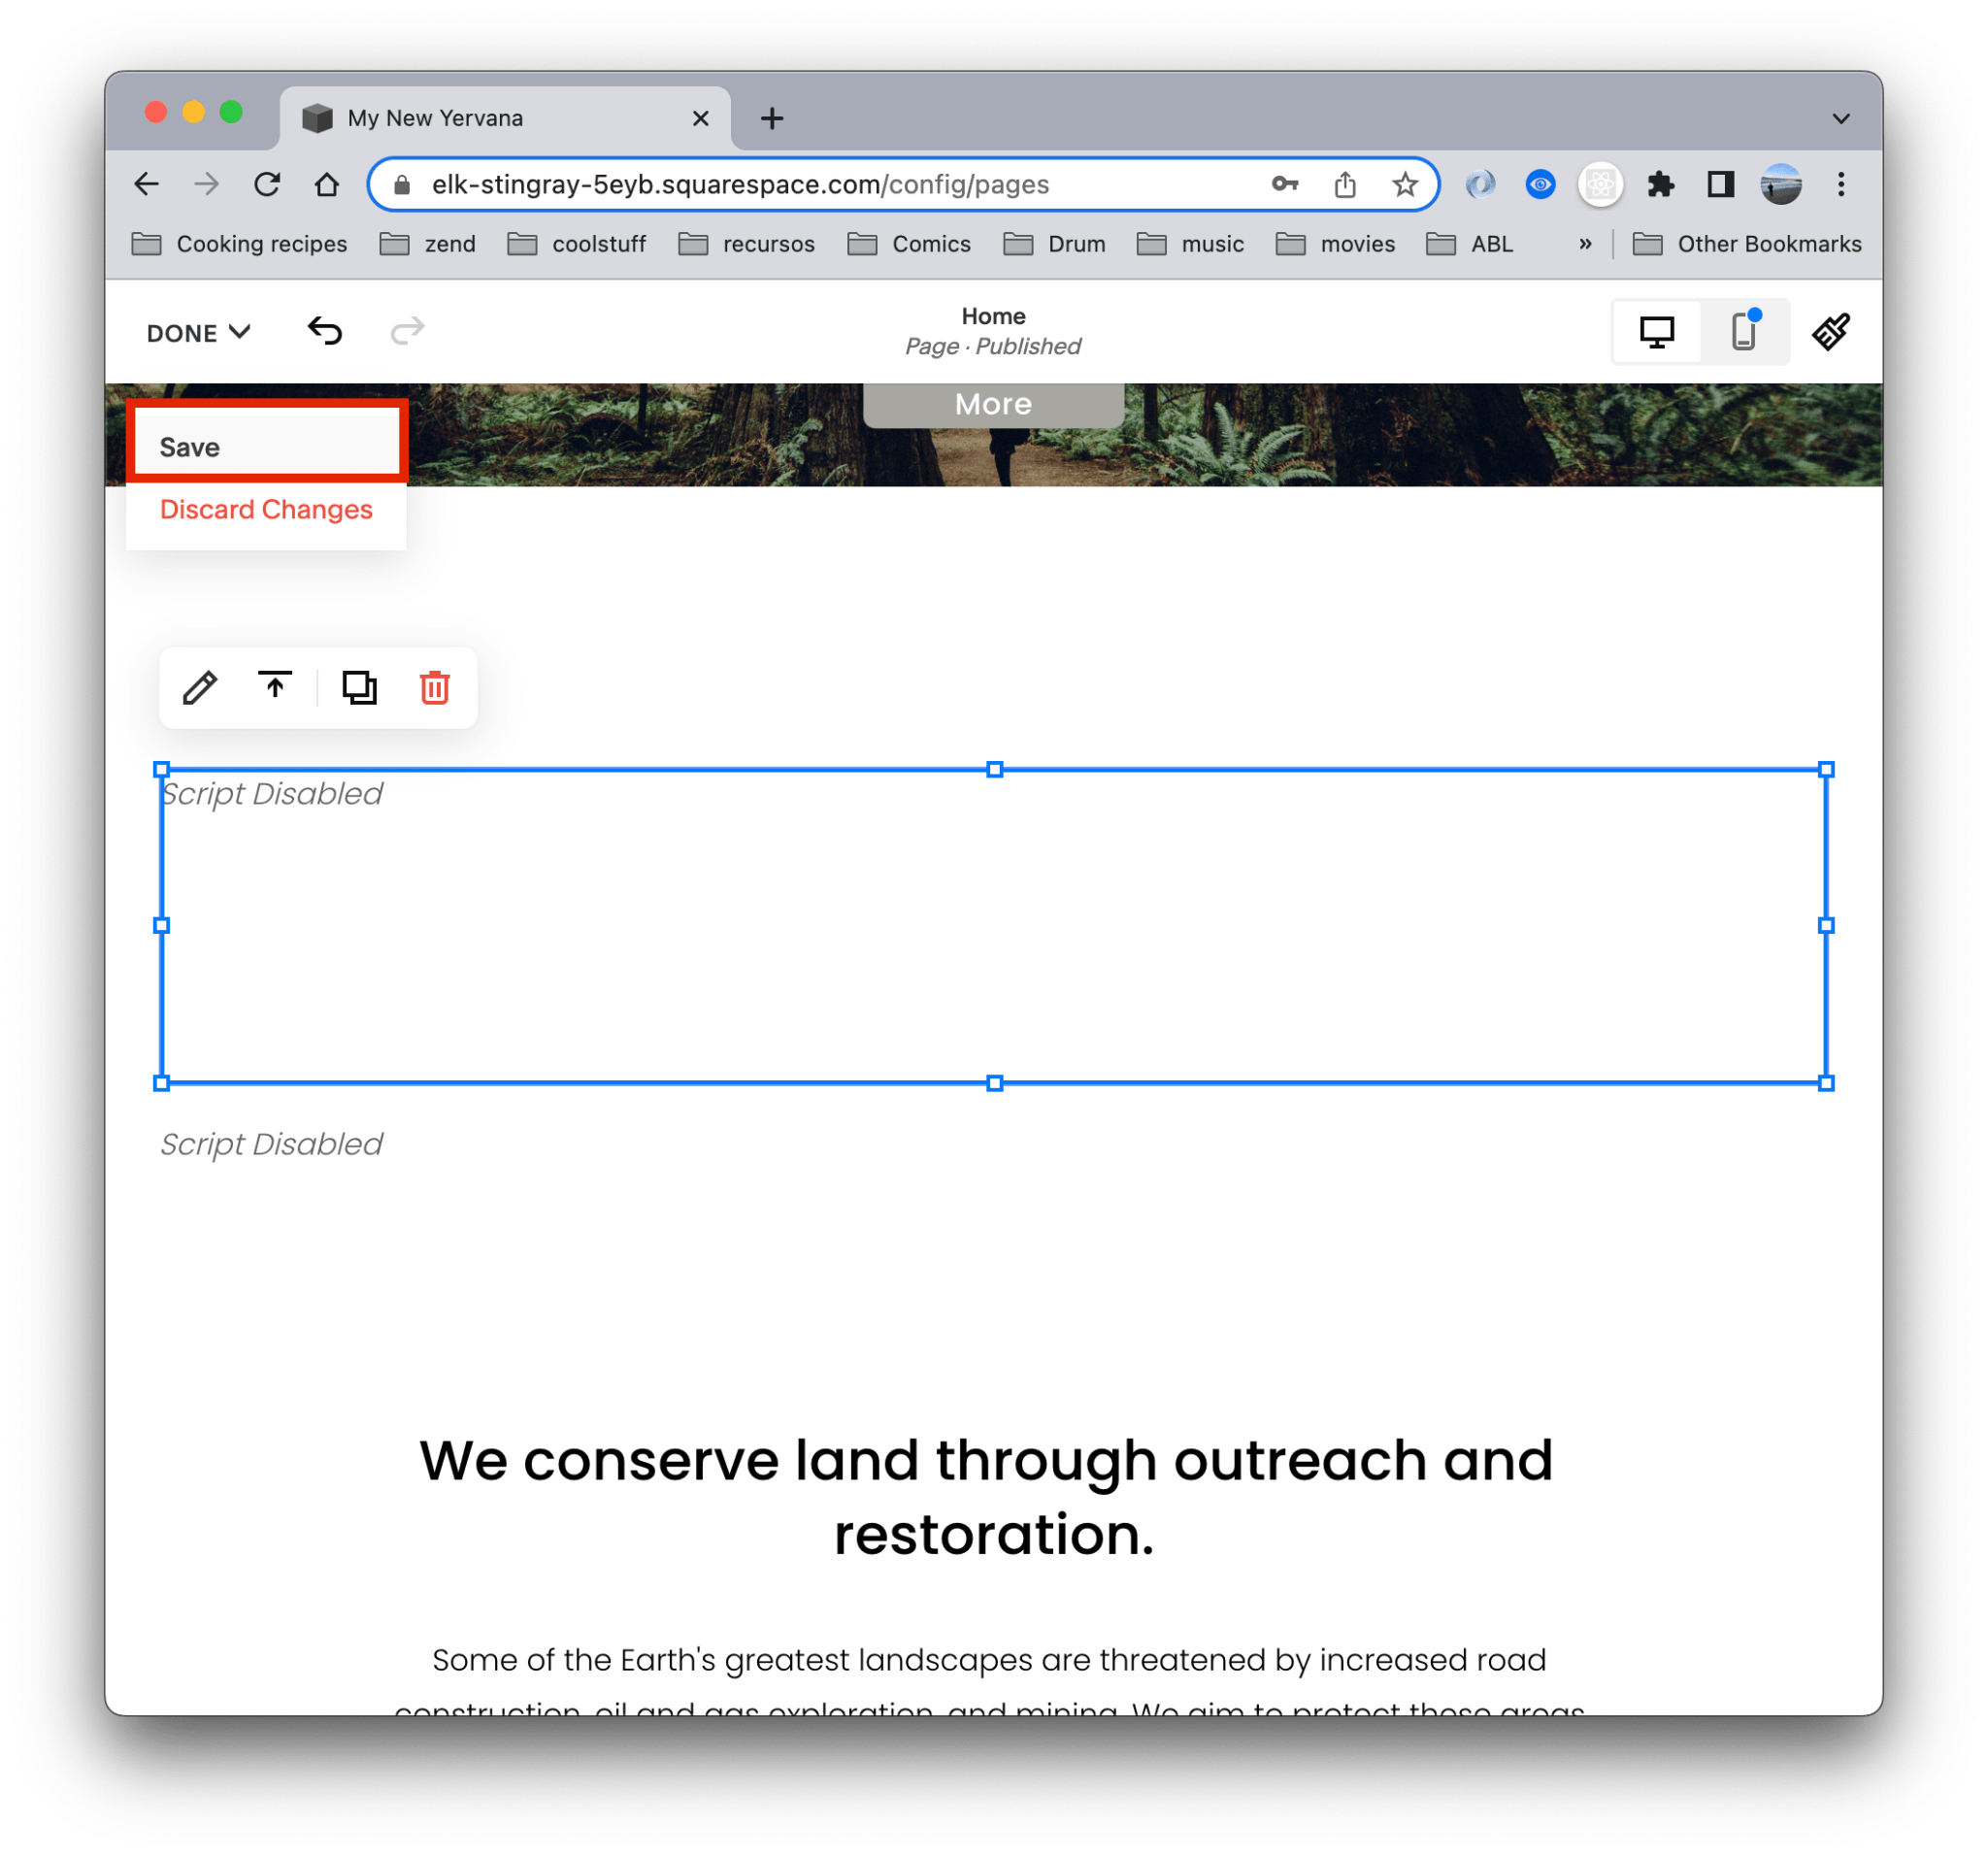
- To save your changes click Save button.
- To preview the widget, click the top right arrow
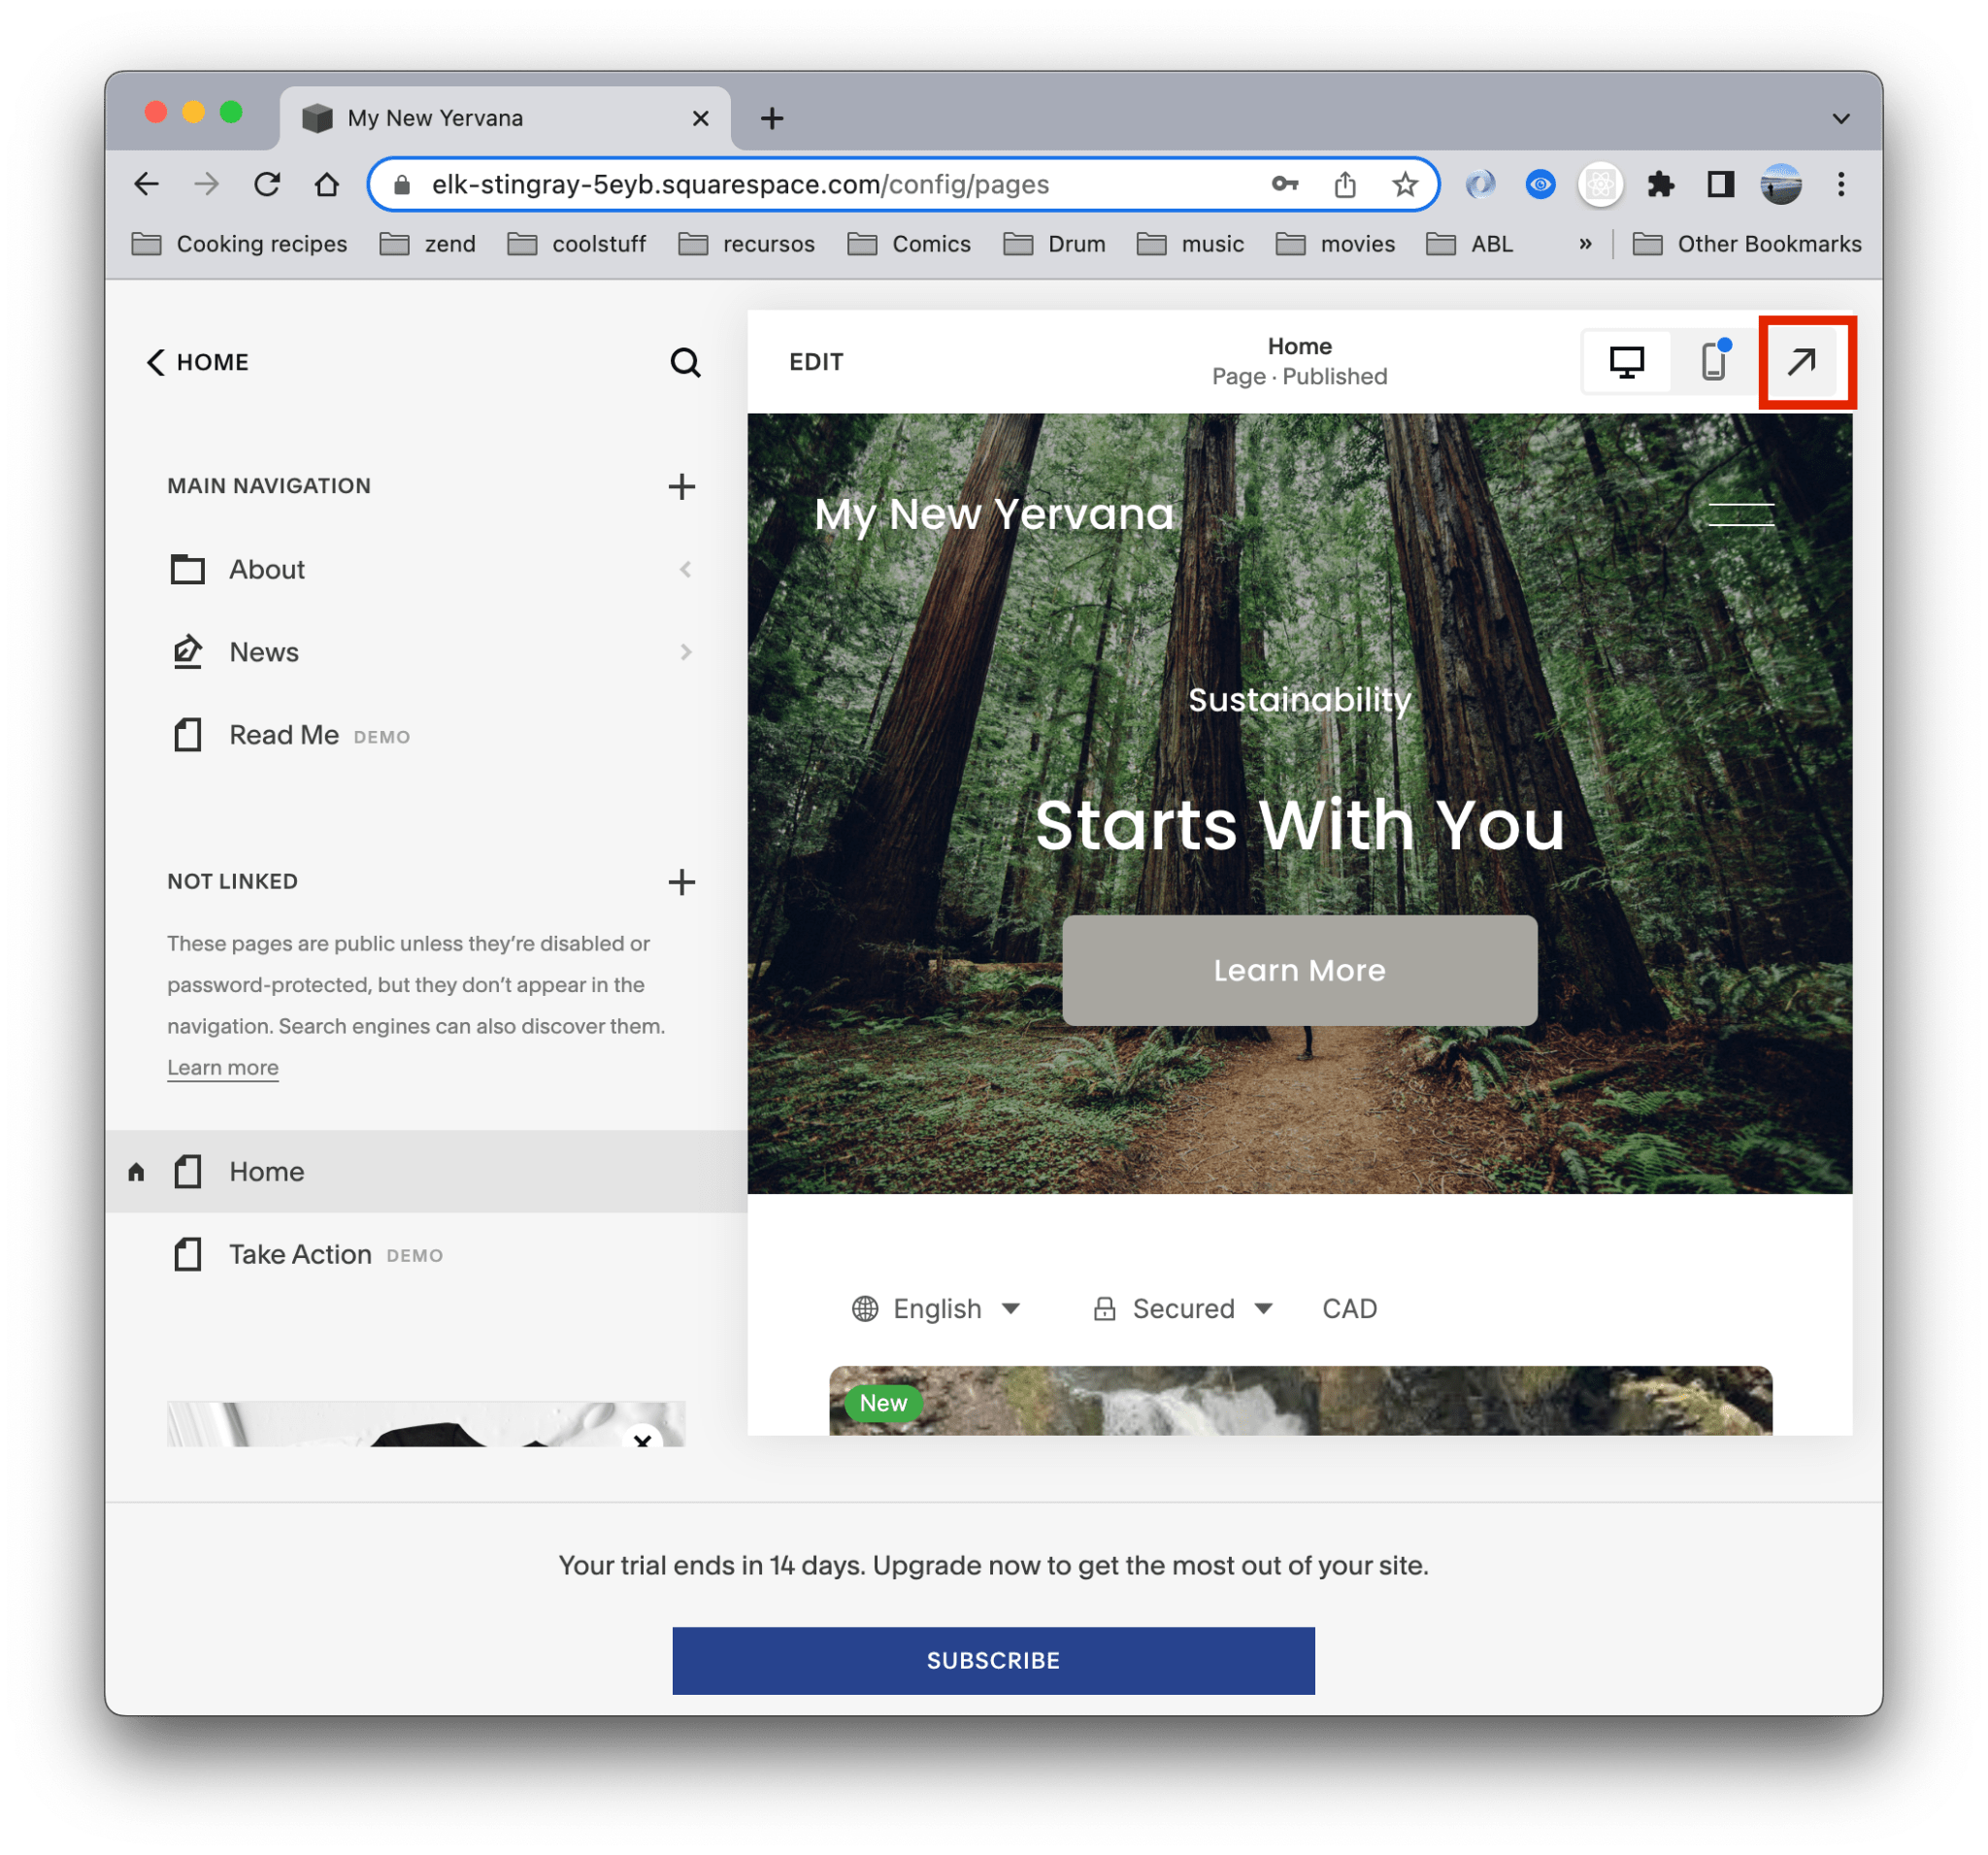
- If the installation worked, you should see Yervana’s Widget like in the image below (with your own adventures)
