Camp Cooking 101: Yervana Adventure Food Series
Camp Cooking 101: Yervana Adventure Food Series
Welcome to the Yervana Adventure Food Series, where we show you how to cook, eat, and enjoy the best foods in Canada this summer – from the backcountry, to the lake, to the forest, and beyond! To get started, we’re talking all about camp cooking. Read on to learn more!
Camp Cooking 101
Whether you’re newly falling in love with the backcountry, or you’re a seasoned pro looking for inspiration, you’ve come to the right place! That’s because we consulted Yervana Local, certified Field Leader, interpretive guide, and nutrition coach Lucinda to give you all the tips and tricks you need to learn about camp cooking and nutrition in the backcountry!
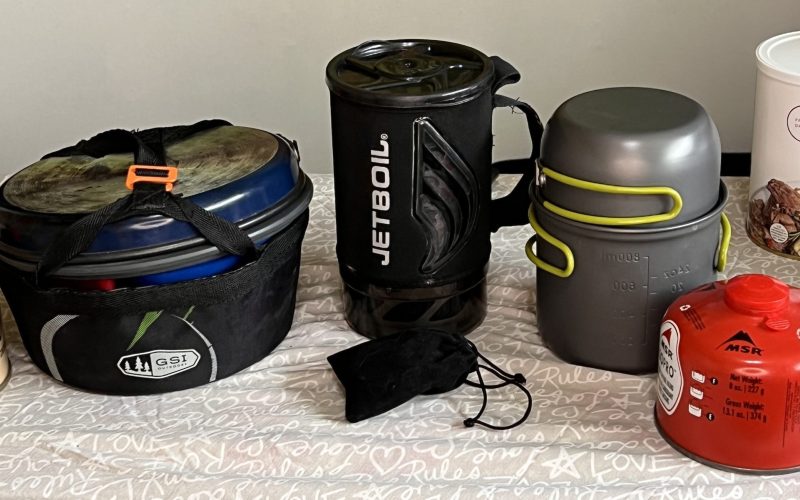
Image: Lucinda’s Gear Picks
The Gear:
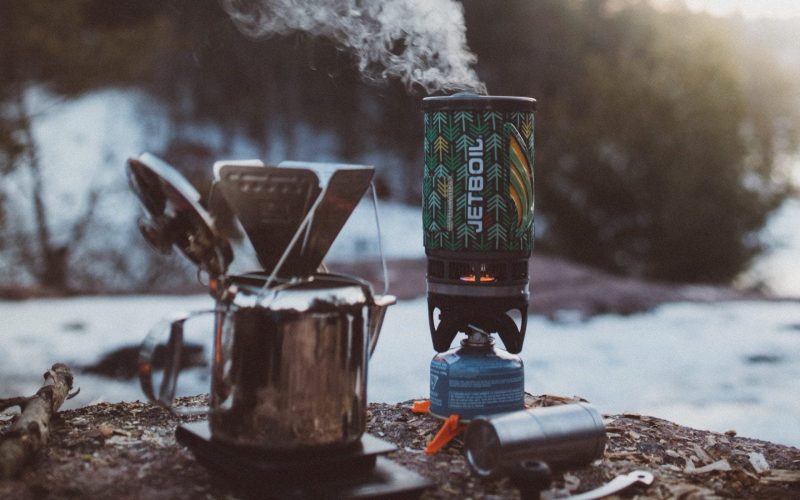
Lucinda suggests a simple cookstove and pot for most of the cooking you’ll need to do in the backcountry, and that you shouldn’t plan to just use a fire. This is because, according to Lucinda, “with fire bans and possible lack of firewood, you don’t want to be caught without a way to cook. Plan ahead!”
A camping specific stove, like a Jetboil, is also a good option to bring. These are super compact, and boil water very quickly making it perfect for cooking most dehydrated meals.
In order to pre-make food, Lucinda suggests using a dehydrator, though if you don’t have one, your regular oven will work as well.
The Food:
You can always buy pre-packaged meals, however Lucinda suggests creating your own meals to save costs, and know exactly what you’re consuming. This option is great for people who may have food allergies, or like certain foods and flavours.
Dehydrating foods is a great option to ensure that food is lightweight, doesn’t take up too much space, and is easy to carry.
Camp Breakfast Ideas
For an easy, make-ahead breakfast, Lucinda suggests two high-protein and filling options:
Oats
In a small plastic bag or container, pack as many portions as you need of quick oats. Add in freeze-dried strawberries, cinnamon and protein powder. Or, get creative with the fruit and spices you add to tailor your breakfast to you!
Eggs
Make dehydrated eggs. Start by scrambling eggs, laying them out on cookie sheets in a thin layer, dehydrating them in the oven on low, and once dehydrated, mashing them into tiny pieces. Pack as many portions of eggs as you need into a Ziploc bag, and add dehydrated veggies and spices.
Dinner Meals for Camping
For dinner, Lucinda has a simple formula to make sure you stay full, and satisfied. She mixes one starch (pasta, barley, or instant rice) with dehydrated veggies (any!). She adds a dehydrated protein source (ground beef, sausage, pulled pork, chicken, or tofu) and herbs and spices. Lucinda suggests salt, garlic, and Italian spices. Mix these elements together and you’ll have an amazing meal that satisfies your nutritional needs on the trail.
Lucinda’s top tip: Pack salt! It can be used to season your food to your liking, and can be added to water for quick and easy electrolytes on the trail.
Dehydrating Food for Camp Cooking
Though the easiest and most energy-efficient method to dehydrate meals is with a dehydrator, you can also make dehydrated meals using a regular oven. It can be time-consuming, but it’s simple and effective.
To dehydrate food, you’ll need baking sheets, parchment paper, any food preparation supplies you may need, in addition to a food storage option. Lucinda uses Ziploc bags for storage, and then re-uses them for garbage that she needs to pack out.
To get started, set your oven to the lowest temperature possible, usually 170 degrees Fahrenheit. The water content of food, your oven’s temperature, and other factors will determine how long you should dehydrate food for, but expect anywhere between 4 and 8 hours. Prepare your food as normal, spread it in a thin layer on the tray, and allow it to dehydrate! You can find great guides to dehydrating foods here and here!
Nutrition Advice:
When asked what she wished she knew when she first started backpacking, Lucinda said, “that you will need more food than usual. This is especially important in the winter, when you use more calories to regulate body temperature – be sure to pack extra!”
According to Lucinda, you can absolutely maintain a balanced, healthy diet in the backcountry. She says, “With some planning and the right tools, you can get all the nutrients you need. In preparation for day hikes, plan for all the food groups and healthy choices you need. For overnight hikes, you can dehydrate or freeze dry most foods that you will need.”
Wildlife Safety While Backcountry Cooking:
When you’re in the backcountry, safety considerations need to be made in order to prevent unwanted run-ins with local wildlife. Lucinda shares several tips below!
“When eating or preparing food, be sure to be in a different location to where you are sleeping. A good rule to follow when cooking is keeping it 200 metres from the tenting area. Never cook and eat in the clothing you are wearing to bed. Never keep cooking stoves, dishes, or any food in your tent.
“I like to use a bear hang to store food and cooking items. I have an Ursack that is made of Kevlar. I seal everything in a Ziplock and place all the food in the bear bag. We hang that in a tree, ideally over a branch seven feet minimum off the ground. Some backcountry campers have a bear locker that can be used. You really don’t want bears to get a taste of human food. Once they do, they will seek it out. This always means trouble for the humans and the bears.”
Learn More
Want to learn more about camp cooking and backcountry nutrition? Head to our Instagram to hear more from Lucinda!
Keen on exploring the backcountry? Check out some guided adventures!

ARTICLE WRITTEN BY

